Hello
Scrapping Cottage friends! Thanks for taking the time to stop and visit today. It's
Mary Marsh here bringing you the Saturday edition of the Blog.
Just as a reminder, CottageCutz has a new release of
Halloween & Christmas dies that are now available in the
online store for ordering. The DT has been showing lots of great samples and will continue to show them over the next couple of months to get your creativity flowing. There are plenty of beautiful new Christmas dies and we have something for everyone's tastes.
Today, I used a new Christmas die,
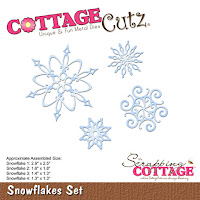
Snowflakes Set for my sample card. I chose the faux mother of pearl technique for my background because it's a very simple technique to do and it has a huge impact on your finished card. I also thought it would give the illusion of a snow squall. So perfect for my snowflake images.
Here is a video link to a tutorial on Splitcoaststampers.
And, I also wanted to show a card that would be easy to mass produce using this new die. So let's get started with some details on how I created my card.
Step 1: I used some Frost White Acrylic paint from Tsunineko. It has a bit of a shimmer to it. This paint acts as a resist and shows through the colors that I will sponge on in the next step.
I put a small amount of the frost paint on my craft mat. I used a piece of cling wrap and scrunched it up and then dipped it in my frost paint. I pounced it on my craft mat to work it into my cling wrap and also to insure that I didn't have any big globs of paint.
I then dabbed it lightly on my white cardstock. I left some open space so I could sponge the colors I was going to use. There is lots of shimmer on this panel that is hard to capture in a photo. I set it aside at this point to allow it to dry.
Step 3: Once the paint was dry, I decided on the shades of distress ink with tumbled glass and broken china.
Once I started to sponge the ink on I added a 3rd shade of ink using peacock feathers. I liked the color variation that I achieved. You can see on the photo below the white paint has resisted the distress ink. When I finished sponging I used a paper towel to rub off the ink that was sitting on top of the white frost paint. This allows more of the frost design underneath to come through.
Step 4: Since I was going with a turquoise card base, I decided to layer the pearl panel on white. Just for some variation between layers.
Turquoise Card Base: 5 1/2" x 4 1/4"
White Layering Panel: 5 1/4" x 4 1/8"
Background Panel Size: 3 7/8" x 5 1/8"
Step 5: I cut my snowflake images from white cardstock. They are such pretty shapes and I really like the size variation. I was able to use all 4 of the images on my background panel.
To adhere the snowflakes to the background panel, I cut small pieces of dimensional adhesive. I didn't want them laying flat against the background.
Step 6: The sentiment is from an older CottageCutz die -
Merry Christmas Santa. I cut it from one of my practice panels that I made. I sponged more ink on it for more of a contrast. I also cut another phrase in white and very slightly offset it.
To complete my card I attached it to the turquoise base. I wanted some depth between these two panels so I used some white fun foam behind the image panel. It gave it just the lift I was looking for I secured it with Tombow liquid multi glue.
I hope I have given you some inspiration for your Christmas cards. I am going to make a few more of this particular one. Well, that's it for me for this post. See you next Saturday.
Dies I used to create card:


