Sunday, September 24, 2023

Merry Moose in Wonderland


Welcome friends!  I hope you're having a blessed Sunday ☺

It's Kris sharing with you today and I've got a cute Christmas card using the Merry Moose die from the NEW 2023 CHRISTMAS RELEASE

I had this Winter Wonderland paper (6x6) from Doodlebug Designs that has some moose , polar bears, and other li'l critters on it and thought it'd be a great match for this new Merry Moose!  All the patterned papers came from this paper pad.  I followed this week's sketch challenge at SplitcoastStampers, SC976 


HERE'S HOW I MADE IT:

Cutting/Scoring:

White:
-- card base - cut at 4-1/4" x 11" and score at 5-1/2" 
--stamp sentiment, then die cut top and bottom with an edge of the Nested Wacky Stitched Rectangles
-- die cut Merry Moose

• Glittery White:
-- die cut Snowflakes (retired)

• Patterned Paper #1 (blue w/snowflakes) 
--cut at 4-1/4" x 5-1/2"
-- cut a small corner triangle as shown and die cut the top with the side edge of a Nested Scalloped Rectangle die
-- die cut just the hat from Merry Moose

• Patterned Paper #2 (blue with animals) 
--cut 4" x 5-1/4"

• Patterned Paper #3 (pink w/ pink snowflakes) 
--die cut with largest Nested Wacky Stitched Rectangles

• Patterned Paper #4 (white w/ colored snowflakes) 
--cut a corner as shown and die cut the top (diagonally) with the side edge of a Scalloped Rectangles die 
-- die cut just the scarf from Merry Moose

• cut 2 strips from the patterned paper that has rows/borders.


Design Steps:

1.  I added some DO ink to my moose parts and assembled.


2.  Adhere Pattern #1 to card base, then #2 to that, then #3 centered on top.  

3.  Attach snowflakes as shown, then pop up the moose with foam strips.

4.  Attach Pattern #4 to bottom right corner, and attach the 2 border strips at a diagonal in top left as shown.  Then turn over and trim away the strips that are hanging over.


5.  I thought I was done at this point.  But then I thought I wanted to anchor that corner with a darker color and sentiment, so I added the smaller blue corner (cut the same way as the white w/ snowflakes)


6.  And lastly, I stamped a sentiment on white cardstock and added some detail by die cutting the top and bottom with an edge of the Nested Wacky Stitched Rectangles, turned it over and trimmed away what was hanging over.  Now it's done!


Ink Something Crafty!

~Kristine


Saturday, September 23, 2023

Winter Snowman (New Die)

Hello CottageCutz friends! Thanks for taking the time to stop and visit with us today. It's Mary Marsh here bringing you the Saturday edition of the Blog.

It's new release time!!! We have our Christmas 2023 release in the online store that has 40 designs. It's an old-fashioned Christmas theme. You can pick up the bundle at 50% off or the individual dies at 30% off for a limited time. 

We also have a new Fall 2023 release in the online store with 15 designs. You can pick up the bundle at 50% off or the individual dies at 30% off for a limited time. 

Today for your viewing pleasure, I am featuring the new Holly Frame and the Winter Snowman dies. So, let's get started on some details of how I created my card. 

Design Steps:
I started by cutting the Holly frame die in a Christmas green cardstock. We haven't had a die like this before, and I thought the center opening would work to showcase the new snowman die. 
Next, I cut my snowman from cardstocks and gave him a red Christmas scarf. 
I wanted a sentiment on the card front and I decided to use the Merry Christmas phrase from an older CottageCutz die. It's the Merry Christmas w/Deer family from our 2018 release. 
I am using a white card base behind the frame and for the center cut-out portion I cut another piece of cardstock and stenciled some clouds. 
White Card Base: 4 1/4" x 5 1/2"
Stenciled panel 2" x 3 3/4"
Now that my elements are prepared, I am ready to start card assembly. I attached the stenciled panel to the holly frame. 
I attached the snowman using dimensional adhesive. On his little sign I added a sticker with the word "peace". 
To complete my card, I attached the Merry Christmas phrase and also decided to add some red berries to the Holly Frame.  
That's it for me for this post. See you next Saturday!

Reminder: We have videos on our YouTube Channel. Check out this one from Marla. 


Thursday, September 21, 2023

Happy Fall Y'all

Hello Friends,

It is Pam sharing with you this fabulous Thursday.

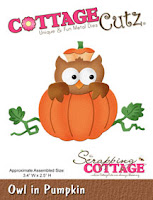
I have another fall card for you.  It can be used to welcome in autumn or for a Thanksgiving card.  I am using the Owl in a Pumpkin die. It is an oldie but a goodie and still available in our store today! 


Design steps:

1.  Using the Owl in a Pumpkin die cut out the following pieces of card stock: brown, green, yellow, white, black and a DP orange
2.  Using coordinating ink colors shade the pieces and then glue together
3.  For the base use an A2 blue card, cut a piece of brown 4 1/8 x 5 3/8, and a piece of leaf DP cut 4 x 5 1/4.  Using the largest Pierced Wide Circle Frame die cut out 2 circles in brown and glue together.  Using the second from the largest Pierced Circle die cut out blue and then run through an embossing folder of your choice.  I used a leaf embossing folder
4.  Glue the brown to the blue card base and then add the leaf DP.  Glue down the blue circle slight above center as shown above.  Place dimension dots on the back of the circle frame and pop of the blue circle
5.  Place dimension dots on the back of the Owl in the Pumpkin and pop it to the blue circle as shown.  Add your green leaves.  I cut a few extra leaves as you can see below
6.  Finish your card by adding the sentiment


We have more inspiration on our YouTube Channel check it out HERE

Thanks so much for stopping by!  And I will see you next Thursday.

Blessings and Take Care


Tuesday, September 19, 2023

Hello Cute Witchy Die Cut Card

Happy Tuesday crafty friends,
I hope you are having a wonderful day. Today I am sharing a super cute, quick and easy card I created featuring some fun Cottage Cutz dies! Here's what I created.


My cute and quick card is a standard 4.24 x 5.5 top folding card.


Here's a closer look at the fun hello card. Hello comes from the Spring die cut collection.


Here's a closer look at the cute little pumpkin. I used some glossy accents in the eye nose and mouth to give it a little extra sparkle and shine.

Here's a closer look at the darling little witchy. You can see after coloring her in, I used some Stickles glitter glue for some extra decorative touches.

Here are the pieces of the Witchy die cut. I started with white pieces and then used y markers to color her.


Cute Witchy


Hello Spring Bunny Cottage


Spooky Fence Mini


Wacky Stitced Rectangle Frame set


This was a quick and easy card that you can make very quickly. Here is one last look at it again.


Make sure you head over to the Cottage Cutz You Tube channel and see what they have been up to.

Well that about covers it for today. Be sure to head over to Cottage Cutz and check out all the cute dies. Until the next time, have a wonderfully crafty day!