Monday, August 22, 2022
Triple Twisted Easel
Saturday, August 20, 2022
Baseball Cap Triangle Easel Card
Or for the kiddos (boys and girls) who are baseball or softball players. Don't forget about the golfers either. If you are a scrapbooker and are putting together the summer season of your child's baseball season, we have you covered.
I used the largest of the Stitched Rectangle (4 1/4" x 3 1/4") die for the card front. I stamped my sentiments in the pink shade that matched the cardstock and designer papers.
I attached the baseball cap to this panel with dimensional adhesive. Then the panel was attached to the card base with double sided tape. I only taped the bottom right of this panel so when the easel is opened the top left of the panel will move freely.
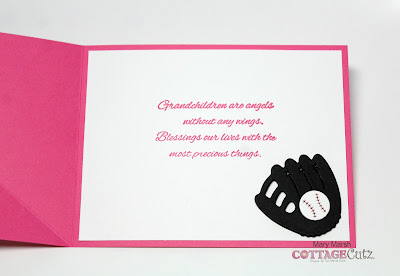
Now for the card inside, I cut a piece of white cardstock 4″ x 5-1/4″. I stamped another sentiment and added the glove and ball as the anchor to hold the easel card when opened.
Well, that finished my card for this week. I hope I have given you a fresh idea for another way to use these new dies as well as a fun fold idea. See you next Saturday.
Dies I used to create card:
Friday, August 19, 2022
Batter up!
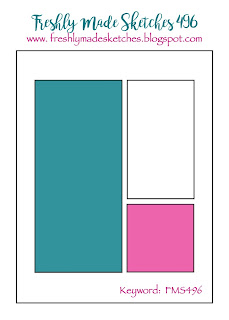
For this particular card, I followed a fun card sketch. it's nice a simple and perfect for using some of your pattern paper scraps! These papers are Lawn Fawn's Gotta Have Gingham and Plaid papers. I thought they'd be perfect for this baseball themed card.
The Retro Alphabet set from CottageCutz seemed like a perfect fit for this masculine card!
Thursday, August 18, 2022
Par-fect Day
Hello Scrapping Cottage Friends,
We have a NEW RELEASE which is perfect for all those sports fans in the family! It is called Baseball & Golf! It has 16 fantastic dies which will make your card making and scrapbooking pages look great! The release has special pricing right now so go and check it out HERE!
My husband is a golfer so I am really going to enjoy creating with the golf dies. I used the Putting Green and Golf Cart for this card. I mixed it with a few of the slimline dies for the background.
Design Steps:
1. I used the Golf Cart die and cut gray, silver, red, blue, rust and black card stock. I then assembled with a fast drying, fine tip glue2. I used the Putting Green die and cut brown, red and green card stock. I will assemble the putting green on the card. You will see on the card I added a little piece of white on the back side of the hole
3. For the background of the card I used an A2 white base, blue DP for the sky 2 1/4 x 5 1/4, dark green card stock cut with Mountain & Trees Slimline, a piece of green measuring 3 x 5 1/4 cut with the Hills Slimline and not pictured a piece of white 2 x 5 1/4 cut with the Clouds slimline4. Glue the sky down first to the white card base. Glue the tree line to the green hills and then glue to the card
5. Glue the putting green to the green hills as pictured above
6. Pop up the golf card, add the clouds to the top and your sentiment to the bottom. Your card is complete


