Monday, August 01, 2022
Berry-Bug Cupcakes
Saturday, July 30, 2022
I'm Just a Gnome Boy Looking at a Strawberry Girl...
Friday, July 29, 2022
Woodland Country Church
 |
| real red, silver, garden green |
To finish off my card, I attached the image panel to the card base. I kept the panels to just the base and image panel. That way the images would be the star of the show. To get the silver color in, I added these snowflake images from my stash and used a silver sequin in the middle.
Real red card base: 4 1/2 " x 5 3/4"
Thursday, July 28, 2022
Bee Happy
Hello Scrapping Cottage Friends,
We have a huge Christmas in July sale going on right now! The last day for the sale is tomorrow! So don’t miss a chance to save up to 65% off! Check it out HERE
We also have a new release and it is just plain adorable. It is called Strawberries and Bees perfect for those fun summertime cards. There are 16 designs in this new collection and you can get the individual dies for 30% off right now! This sale will not last so shop today to get the incredible savings.
Here is my card for today using two new release dies Honey Bee and Bee Phrases.
Design Steps:
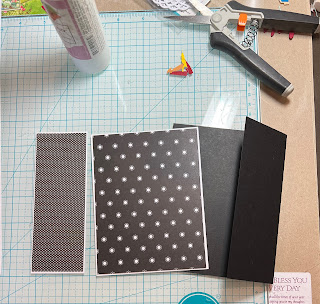
1. Start with a black A2 card base with the front flap cut in half. 2 pieces of white card stock cut at 4 1/8 x 5 3/8 and 5 3/8 x 2. 2 pieces of DP cut at 4 x 5 1/4 and 1 3/4 x 5 1/4
2. Glue the DP pieces to there matching white layer and then glue them to the black card base
3. Use the Scalloped Circle die second from the largest and cut two pieces of yellow card stock. Use the Cross Stitched Circle die third from the largest and cut two pieces of white card stock. Glue the pieces together (One will go on the inside of the card)
4. Use the Honey Bee die and cut out pieces using: yellow, mustard yellow, black, red, vellum and brown
5. Shade the pieces with ink and a small applicator. Assemble the pieces with fine tip glue and then arrange onto the white circle as shown above. Use a white gel pen to dot the eyes
6. Using the Bee Phrase die cut out the mustard yellow and red card stock. Shade with ink and a small applicator
7. Glue the scalloped circle to the edge of the front flap as shown above. Glue down the sentiment
8. I decided the card need just one more little bee so I cut out the second bee and glued it to the bottom right of the card as shown


