Saturday, March 20, 2021

Some Bunny Loves You

Hello Scrapping Cottage friends! Thanks for taking the time to stop and visit with us today. It's Mary Marsh here bringing you the Saturday edition of the Blog.

We have a brand new release of dies in the online store. It's our Spring Release with 22 new designs. Everything you need to create Spring, Easter, Birthday, Mother's Day, Father's Day, Thinking of you cards and so much more.

The Design Team has been showing samples using these new dies. So if you haven't seen them check back on the blog for lots of great ideas. The dies are currently on sale at 25% off so check all the new designs in the online store for some great selections. The Safari & Circus releases are still available at 25% off as well.

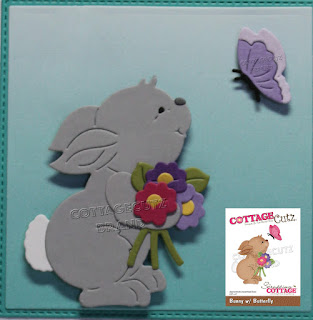
Now onto my card for today. I am featuring the new Bunny w/Butterfly die and created an Easter card for the two little ones that live next door to me. So let's get started with some details on how I created my card. 

Design Steps:
 I started my card this week with my layout. I found this sketch #845 over on Splitcoaststampers and decided to use it. The layers would allow me to use designer paper to create a festive Spring card. 
I looked through my designer papers and decided on these two coordinating patterns. I used the largest Stitched Square die for layer #2 and the largest Square die for layer # 3. For the background layer #1 I found this piece of light card patterned paper. I cut it to 4 1/4" x 5 1/2" and secured it to a white card base. 
For layer # 4, I used the 3rd largest stitched rectangle die. The width was fine but the height needed to be re-sized to 1 3/4".  I forgot to take a photo during the cutting process of the designer paper. So I repeated the process for you to see with cardstock. I cut the shape first 
and then measured at the 1 3/4" mark 
and placed it back in the die and ran it through my BigShot.
Here is the finished size. 
For layer #5 I used this piece of light purple cardstock and resized it to 3/4" x 3 1/2"using the same method.  I stamped my sentiment in a grape ink on this panel using my Stamp-a-ma-jig to get the placement.  
Next, I cut the bunny and butterfly images. I used colors that complimented my designer paper.
Now that all the card elements are prepared I am ready to start assembly. I secured the gray patterned paper to the card base first with double sided tape. Next, I attached layers 2, 3 and 4 secured to the card base. 
Added the sentiment strip with double sided tape.
I attached the bunny image using dimensional adhesive. I scattered a few enamel dots to finish off this card. 
I hope I have given you an idea with the image + the sketch for this new die.  See you next Saturday!

dies I used to create card: 


Friday, March 19, 2021

Hello Spring Kitty

Happy Friday!  It's Jeanne today and I have a cheerful spring card featuring the Cat w/ Spring Bird die from the new Spring release.  These dies are fun, happy and perfect for the new season.  And they are on sale right now for a limited time!

To start this card I die cut everything from white cardstock except for the sentiment and the bandana on the kitty.  For these I used paper that coordinated with my background papers.  The sentiment is from an older die - Hello Spring Bloom.

I colored most everything with Distress Oxides. The small pieces (beak, bird legs, kitty nose and inner ears), I colored with Copic Markers.  I find this easier since there usually is no shading on these pieces.
These are the colors I used.

Then I cut my panels.  The card is A2 size so I cut a base panel 4 1/4 x 5 1/2 inches, a patterned panel using the 3rd largest Stitched Rectangle and a white panel using the 4th largest Stitched Rectangle.  I also cut  a strip 3/4 inches high from striped paper.  It was a bit longer than 4 1/4 inches.
Because I used a checked pattern for my base it was super simple to get things lined up and straight. Since the striped banner across the middle was longer than the card, I simply snipped off the excess after gluing it down.

Once my panels were glued down, I added the kitty, bird, sentiment and fun 3-D flower!  Very easy, very cheerful. Perfect for the cat lover in your life and great for any occasion!

Dies used:


Thanks for visiting today.  I hope you have a fun and creative weekend!


Thursday, March 18, 2021

Spring Blossoms Thank You

Hello Friends,

It is Pam on the blog today!

Before we get started on today's card I wanted to let you know we are having a St. Patrick's Day day sale with savings up to 60% off selected stamps and dies.  The sale ends today at 9PM Pacific Time.  So hurry on over to the online store just click HERE.

For the card today I made a big beautiful flower arrangement for a special thank you card!


Design Steps:
1.  Start with an A2 white card base, cut a piece of white card stock 4 1/8 x 5 3/8 (run it through an embossing folder that looks like linen) and a piece of dark brown 3 1/2 x 4 1/2.  Glue the white to the white card base and then the brown to the embossed white slightly toward the top of the card as shown above
2.  For the blue panel I used a piece of light blue mulberry paper 8 1/2 x 11 cut into 4 equal pieces.  I then stacked them together and lightly sprayed both sides with water just so the paper is damp not soaked.  Place them in your embossing folder and then run through the machine 

3.  After you run the mulberry paper through the machine let it dry.  After it is dry use the largest Pierced Rectangle die and cut it with that die.  This makes a really cool effect and textured feel

4.  Cut all the pieces in white using the Spring Flowers in a Pot die.  After you cut them out color with copic makers.  This takes a little time but I love the shading you achieve
5.  Begin building you flower pot on the embossed blue mulberry paper.  I put a large dimension dot under the pot to give it a rounded shape
6.  Start to arrange you flowers using some dimension dots under some of the flower and glueing others flat
7.  After your flower pot is complete put some glue on the back of the mulberry paper and adhere it to the dark brown card stock on the front of the card
8.  Using the Expressions Thank You die cut out 3 on whtie card stock.  Glue the 3 together for added strength and dimension.  Glue them to the bottom of the pot and your card is complete 

CottageCutz Products


Please don't forget to head on over to the store so you don't miss out on the wonderful St. Patrick's Day Sale which is ending soon.  Thanks for stopping by today!

Blessings and Take Care
Pam


Wednesday, March 17, 2021

It's your Day to Bask in the Sun!

Hello!  This is Sukie and today I have a quick card to share for my design team post.  I'm using one of the die sets from the new Springtime die release.  This die release offers so many wonderful dies which are currently on sale.  Also, check out the St. Patrick's Day sale going on through tomorrow!

For today's post, I used the Gnome Sleeping in Hammock die set.  Using basic card stock for the die cut pieces, I followed the package design for my colors.  I changed the gnome's hat to a patterned design.
The ink blended card base is a background that I had created some time ago and ended up not using it for my project.  It seemed to be the perfect background for the sleepy little gnome.
The die cut scene was placed in the center of my card against the yellow portion of the ink blended background.  The yellow is a nice contrast against the die cut pieces.
I found a whimsical sentiment in my stash of stamps and added it to a coordinating strip of paper and adhered it at an angle in the corner of my card.
The edges of the sentiment tag were snipped off with some scissors using the card base as a guide.
This card came together very quickly and  will be a fun celebratory card for a birthday, Father's Day or other special occasion.
Here is the die set used on my card, available in the store:

Tuesday, March 16, 2021

Bunny Tree Cottage

Hello Scrapping Cottage friends! Thanks for taking the time to stop and visit with us today. It's Mary Marsh here bringing you the Tuesday edition of the Blog.

We have a brand new release of dies in the online store. It's our Spring Release with 22 new designs. Everything you need to create Spring, Easter, Birthday, Mother's Day, Father's Day, Thinking of you cards and so much more.

The Design Team has been showing samples using these new dies. So if you haven't seen them check back on the blog for lots of great ideas. The dies are currently on sale at 25% off so check all the new designs in the online store for some great selections. 

The Safari & Circus releases are still available at 25% off as well. There is also a St Patrick's Day sale going on until March 18th. You can save up to 60% off on selected designs.

Now onto my card for today. I am featuring the new Bunny Tree Cottage die and I created an Easter card. No tutorial today but I do have some card details for you. 

My card colors are from the Splitcoaststampers color challenge #835. I am the hostess and I chose purple posy, night of navy and coastal cabana for the challenge colors. Optional is to use designer paper. 
For my card I started off stenciling a brick background - soft suede ink (neutral) on kraft paper (neutral).  The bunny window scene is cut in the challenge colors . I used designer paper on the bunny outfits and the wallpaper (it's a bit light in this photo).

I used the Spring Grass die and cut in a dark green cardstock (another neutral). I added some Easter eggs (2018 Mr Peter Rabbit die) and tulips (2017 Hello Spring die). My bunny kisses phrase is from the 2019 Bunny Kisses and Easter Wishes die. I cut in coastal cabana cardstock and shaded with the same color ink.

The card base is 4 1/2" x 5 3/4". I didn't have cardstock that size so I used a hinge technique to make it larger. Instructions for the technique are here.

Well, that's it for me for this post. I hope I have given you a fresh idea for a way to use this new die. See you on Saturday!

dies I used to create card: