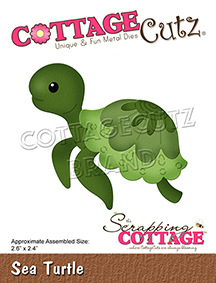
We have a brand new release of Beach & Tropical dies in the online store. We have 14 new designs in this release and they are currently on sale for a limited time at 25% off. They are so perfect for creating beach themed birthday cards, thanks you, thinking of you etc. Let your imagination soar! The Design Team has begun showing cards with these fun dies so take a look back on the blog for some creative ideas.
Thursday, August 13, 2020
Day at the Beach
We have a brand new release of Beach & Tropical dies in the online store. We have 14 new designs in this release and they are currently on sale for a limited time at 25% off. They are so perfect for creating beach themed birthday cards, thanks you, thinking of you etc. Let your imagination soar! The Design Team has begun showing cards with these fun dies so take a look back on the blog for some creative ideas.
Wednesday, August 12, 2020
Pink Isn't Just a Color, It's an Attitude!
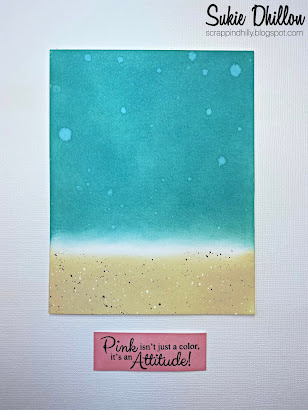
I created a simple background by blending a couple of different colors of Oxide Inks and bit of water. The bottom portion of my card was also splattered with some paint to replicate a sandy beach.
The adorable flamingo was placed on my card striking a contrast against the pop of color on the background.
The bold and fabulous surfboards were tucked into the sand and accented with the tropical palm die cuts.
The sweet sentiment was stamped on some inked up card stock and was the perfect addition to this card. I embellished the sentiment tag with a few more tropical palms and a tiny flower.
Monday, August 10, 2020
Tropical Birthday Bouquet
Hello Scrapping Cottage friends! Thanks for taking the time to stop and visit with us today. It's Mary Marsh here bringing you the Monday edition of the Blog.
whisper white, real red, crumb cake |
Sunday, August 09, 2020
Seahorse & Sea Turtle
Hi!
It's Anja here. I have two cards for you today. I made a cute set with a Seahorse and a Turtle.
For this project I used:
- Cottage Cutz dies (Seahorse, Sea Turtle, Circle Set),
- Dye Inks,
- 2 white card bases (15x15 cm),
- white card stock for die cuts,
- water color paper (2 14,2x14,2 cm),
- acrylic paint sprays (blue shades),
- sentiment stamps,
- acrylic block,
- black pigment ink,
- white pigment ink,
- black pen,
- white pen,
- Wink of Stella glitter pen,
- heat gun,
- adhesive foam pads,
- paper glue.
First I cut and colored the turtle. I used white pigment ink and a brush to emphasize some parts of the turtle. I also added a bit of glitter to it.
Next I cut and colored the seahorse.
Then I cut two paper stencils.
I put the stencil over the watercolor paper and sprayed it with acrylic spray paints. I used three shades of blue.
Next I removed the stencils and added a few drops of the lightest blue shade to add over the paper. I dried the paper with the heat gun.
After that I added some color to the edges of the background paper. I also stamped the sentiment.
When I had all the pieces ready I assembled the cards together. I added the turtle and the seahorse using adhesive foam pads for dimension. And my cards were done.
This is all from me for today. Have a nice Sunday and see you again next week.
Anja Z.
Cottage Cutz dies I used for this project:
Friday, August 07, 2020
Aloha Friday
The card is actually quite easy to make but does involve some ink blending. I wanted to make sure that there was a good variety in my browns and I tend to use the same colors all the time. So before I undertook the coloring, I organized my Distress Oxide inks to see exactly what I had. Previously they were all thrown in a drawer!
So....I cut all the pieces in white from the Aloha & Ukulele and the Tropical Fruit dies. Then I used blending brushes and colored them using these Distress Oxide inks:
It may seem like a lot but you'll notice there is overlap in the colors I used on the objects. It really didn't take long and I love the color depth I got!
Next I cut a slim line card (folded size is 3 1/2 x8 1/2 inches) and a panel from wood look paper 3 1/2 x 8 1/2 inches.
I took a scrap piece of white cardstock and stenciled a sky background.
Using the middle size of the Stitched Wide Circle Frames, I cut three from the sky and three from green cardstock.
I inserted the middle part of the sky into the center of the frames. I now have some "sky" patterned frames which I am storing with my dies for future use!
I cut the word Aloha from dark brown cardstock. I toyed with the idea of using a bright color but I really didn't want the greeting to compete with the colors of my objects.
I arranged the word and the frames on my panel....
and then cut off the overhang.
I then added all my objects. I used the watermelon slice and turned it into a pineapple slice simply by changing the colors! This card was fun to create and went quickly once I knew what colors I wanted to use.
Dies:
Mahalo for stopping by! I hope you have a fun and creative weekend!