Sunday, March 29, 2020

Come And Play With Us

Hi!

It's Anja here. I have a simple card for you today, combining two cute animal dies from the latest release.


For this card I used:
- Cottage Cutz dies (Spring Lamb & Chick, Duckling with Kite),
- Distress Inks,
- craft cardstock for die cuts,
- craft card base (12,5x17,5 cm),
- bristol paper for background (11,8x16,8 cm, 11x16 cm),
- pink card stock for background (11,5x16,5 cm),
- black pen,
- white pen,
- brush,
- paper glue.

First I cut and colored both ducklings and the sheep.


Next I trimmed the background paper.


I used the smallest white paper to color. I did a bit of green in the bottom for the grass. And I used a brush to make it look like the sky.


And then I put all the pieces together and this is my finished card.


Before I go I just want to remind you there's a Home Crafting Days Sale going on on The Scrapping Cottage online store. Great chance to get some new goodies to craft with.

Stay safe and have a nice Sunday.

Anja Z.


Cottage Cutz dies I used for this card:


Saturday, March 28, 2020

Bunnies with a Balloon

Hello Scrapping Cottage friends! Thanks for taking the time to stop and visit with us today. It's Mary Marsh here bringing you the Saturday day edition of the Blog. Hope you are doing ok in the midst of the pandemic. It's a great time to make some cards. I find it so relaxing being able to create. 

The new release of Spring dies are available in the online store and 25% off for a limited time. There are 27 new dies in the release and each one is cuter than the next. They are perfect for your Easter and Spring card making. 

Today, I am featuring the new Bunny Backsides die for another Easter card. I chose this die because I happened to see a challenge over on Splitcoaststampers that they titled "look up". It was open for interpretation and I thought these bunnies with their bunny balloon were looking up at the sky. So let's get started with some details on how I created my card. 

Design Steps:

This week I am using the MojoMonday sketch for my card layout.  As I have said so many times before, having a layout in mind at the start of my card is always a big boost for me. It jump starts my creative thought process. I love working with the sketches that are out there in the online world. That way I just choose the colors and designer paper and I am good to go.

This sketch was perfect with the middle horizontal panel for displaying my bunny images. 
I looked for some spring like designer paper in my collection and found this sheet. So I coordinated it with similar purple and green cardstocks. I used the dimensions given for the panels except for my card base and designer paper layer. I made that slightly larger. For the center rectangle panel I decided to use ribbon.

purple card base: 4 1/4" x 5 1/2"
designer paper layer: 4 1/8" x 5 3/8"
white rectangle panel: I used the 3rd largest pierced rectangle die.
The vertical rectangle panel is embossed with a dots embossing folder, just for added interest. 
Next, I die cut the bunnies using the color scheme from the packaging. On the balloon bunny, I used the same color marker and darkened his eyes and nose. These little guys ae just too cute. 
Since the bunnies are outside watching their floating bunny balloon, I decided to sponge in some clouds and grass using distress inks. 
Now that my card elements are cut and prepped I am ready to start card assembly. I attached the ribbon to the designer paper. And, then attached that to the card base using double sided tape. 
I attached the embossed panel also using double sided tape. 
I attached the bunnies to the sponged panel with double sided tape and stamped my Easter sentiment. I used my stamp-a-ma-jig for placement since this stamp is red rubber. 
To finish off my card, I added some white enamel dots. It's one of my fave embellishements and I like the look they add to a card.
Well, that's it for me for this post. Before I go I wanted to mention that there is a Home Crafting sale going on in the online store. Since most of us are under a "stay at home" order, this sale is a way to get some dies at really great prices. And, then you can "craft at home". See you next Saturday!

dies I used to create card:


Friday, March 27, 2020

Blue Skies Ahead!

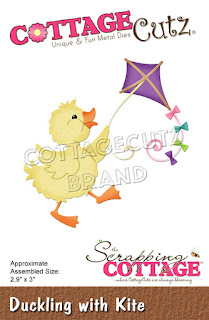
Happy Friday!  I hope everyone is staying well.  It's Jeanne today with a simple card using one of the adorable new duckling dies from the Spring release.
I used a card sketch from Freshly Made Sketches as the basis for my card.  Card sketches make designing a card quick and easy!
To start, I cut the pieces from white cardstock and colored using Poppy Parade, Daffodil Delight, Pumpkin Pie and Seaside Spray inks along with Smoky Slate to shade the duckling and Crumb Cake for the kite supports.  I decided to make my duck white instead of yellow.  I guess I wanted him to look more like a full grown duck rather than a duckling.
I used an A2 white card base and cut a 2 3/8" x 4 1/4" panel from Daffodil Delight and a 2 1/4" x 4 1/4" panel from a blue watercolor patterned paper.
I stamped my sentiment on the blue panel and then glued that to the yellow panel and card base.
This card sketch is great and works for SO many of the spring dies.  It is very quick and really makes your die cut the focal point!

Dies:


http://www.scrappingcottage.com/cottagecutzducklingwithkite.aspx


Thanks for stopping by today!  Be sure to visit the online store where the new Spring dies are on sale for a limited time!

I hope you have a fun and creative weekend!

Thursday, March 26, 2020

Happy Hello

Hello Scrapping Cottage Friends,

It is Pam on the blog today!

I love surprising friends with happy mail.  So I like to make cards with just a simple greeting so I can write them a short note on the inside.  I want them to know I have been thinking of them.  I thought this great rooster and sweet chick was perfect for a hello card!


Design Steps:

 1.  Using the Rooster and Chick die cut out the pieces using various colors of card stock
 2.  Shade the pieces using different colors of inks and a small applicator.  Assemble the pieces
 3.  Use a white A2 card base a piece of red just slight smaller then the card front and a piece of Farm DP 4 x 5 1/4.  Using the Pierced Rectangle die cut out a white rectangle (I used the 3rd from the largest)
4.  Glue the Farm DP to the red card stock and then add the white rectangle.  Cut a strip of green for the grass.  Next pop up the rooster, chick and sun.  Then stamp the little hello in black ink and your card is complete

CottageCutz Products


I am so looking forward to surprising my friends with this little happy hello card.  Thanks so much for stopping and taking a peek at my card today!
Blessings
Pam


Wednesday, March 25, 2020

Make a Splash

Hello!  This is Sukie and today I'm sharing this adorable card for my design team post. I have another sweet die set to showcase on this card from the new Spring die release.
The Splish Splash Duckling was shaded with my Oxide Inks and tucked inside the oversized tub.  I also cut out a sign from the Route 66 Road Signs die set for the sentiment.  The circle is from the Nested Stitched Scallop Circle Set.
I selected a cheery background for featuring the duck at the focal point of my card.  I trimmed down the road sign, stamped it with a fun sentiment and layered the 2 pieces.
To build my card, I placed the scallop circle die cut in the center of my card.  The sweet duck was centered inside the circle.
Next, the water splashes and bubbles were clustered around the duck for a whimsical look on my card.
The layered sentiment sign was adhered on the bottom of the card for a final finishing touch.
Here are the die sets used on my card, available in the store: