Friday, August 10, 2018

Christmas Cardinal

The new Christmas Dies Part 1 are in and they are FANTASTIC!  For a limited time they are 25% off as well.  Head on over the the website and check them out (after reading this post of course - LOL).  My card today features two of the new dies.
I started this card by die cutting the pieces in red, green, black and a metallic gold card stock.
I cut a panel for the front 5 1/2 x 4 1/4 inches (A2) and heat embossed my sentiment in gold.  I felt this sentiment was perfect for the cardinal.
Next I sponged the edges of the bird body and wing with the matching red ink.  This added just a little shading to him.
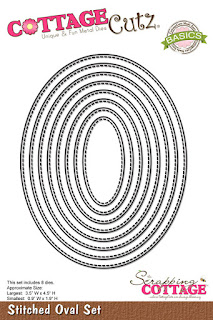
I assembled him and glued him to the fourth smallest oval in the Stitched Oval set.
For the flourishes in the background I cut them so that I could separate them under the oval.  Originally I was going to use all of the gold sprigs but decided that was a bit too much gold so I just snipped off the portions I wanted to use.
I glued those to the card and then die cut three more ovals from red card stock.
The ovals are stacked and glued together.
This gives just a little peek of red underneath the cardinal.  I then glued the panel to an A2 card base.

These new dies are so much fun - I'm looking forward to seeing what the design team creates!

 Dies used:

http://www.scrappingcottage.com/cottagecutzcardinalwflourish.aspx

http://www.scrappingcottage.com/cottagecutzchristmasfloral2.aspx

http://www.scrappingcottage.com/cottagecutzstitchedovalsetbasics.aspx

 Thanks for stopping by.  I hope you have a fun and creative weekend!


Thursday, August 09, 2018

Merci

Good Morning Scrapping Cottage Fans!

It is Pam from Stamper At Heart Blog sharing with you today!

We are getting very close to our new release for Christmas!  And it will soon be time for us to share the new dies but until then we are showing you some new ideas for those favorite dies from the past!
I was blessed to be able to go to Paris on vacation one year and it is truly a beautiful city.  The Z - fold card I made for you today was inspired by that amazing visit!  And the best thing about this fun card is it took just one fantastic die!!


I would like to share the steps for this fun and feminine card!


1.  Start by using a 4 1/4 x 11 piece of white card stock score at 2 3/4 inches and 5 1/2 inches


2.  Cut Pink card stock 1 piece 4 x 5 1/4 and 2 pieces 4 x 2 1/2 set aside
3.  Cut Pink DP  1 piece 3 3/4 x 5 and 2 pieces 3 3/4 x 2 1/4.  Glue the Pink DP to the pink card stock  and then attach to the card


4.  Cut an 11 x 1 1/2 inch piece of white card stock and score at 5 1/2 and 8 1/4
5.  Cut pink card stock 1 piece 1 1/4 x 5 1/4 and 2 pieces 2 1/2 x 1 1/4.  Glue the pink card stock to the white


6.  Attach the strip to the card making sure you only place glue on the first 4th of the strip and the last 4th of the strip.  The middle fold will pop out toward you as you fold the card

7.  Cut out all of the pieces using the Eiffel Tower, Lamp & Poodle die.  I used black and white card stock plus a small piece of yellow for the lamp glow

8.  Tape the piece of yellow for the lamp on the backside of the post and stamp merci! on the white part of the sign
9.  Glue the sign post to the front of the card and add the sentiment to the lamp post
 10.  Glue the Eiffel Tower to the inside back
 11.  Add darning thread to the dogs for their collars and small pearls for the eyes and them glue the black poodle down first and pop up the white poodle next to it


CottageCutz Products

Thanks so much for stopping by and stay posted for our new release coming soon!

Blessings
Pam

Monday, August 06, 2018

White Llama

Hi, Lois here with a really quick and easy card today.  While the CottageCutz design team is waiting for the next release, we have been using previously released dies during our "throwback month."  I used Traveling Llama and Spring Grass today.  The other day while I was in Hobby Lobby, I saw some cool llama patterned paper and decided to build my card around it. 


I started by cutting the llama from a scrap piece of white cardstock.  I decided that my llama was not "traveling" today, so I didn't use any of the suitcases.


I colored him with Copic markers and glued him together.  One of the things I really like about CottageCutz dies is the details -- like the tassels on the strap 


I then cut my cardstock.

Red - 4 1/4" x 11" scored at 5 1/2"; 2 1/2" x 4"
Brown - 1 1/2" x 4"
Llama patterned paper - 3" x 4"
Sky patterned paper - 2 3/8" x 3 7/8"

I also cut a strip of grass using the Spring Grass die.


I then constructed my card base, adding a strip of ribbon over the seam of brown/llama paper pieces.


I adhered the llama with foam pop dots onto the smaller panel and added the strip of grass, trimming on each side to fit.  I then stamped some birds in the sky.


I glued the llama panel to the card, and I was finished.


CottageCutz dies used on this card are:

http://www.scrappingcottage.com/cottagecutztravelingllama.aspx

http://www.scrappingcottage.com/cottagecutzspringgrasselites.aspx


Sunday, August 05, 2018

Let's Play

Hi!

It's Anja here on the first Sunday of August. Can't believe how time flies during summer. One more week and I'm back to work.

But in the meanwhile I still have some time to have fun, go to the seaside and craft a bit. For today's post I made a card with this cute monkey as an invitation to play.


For this card I used:
- Cottage Cutz dies (Hanging Monkey, Jamboree Bear),
- Distress Inks (Vintage Photo, Walnut Stain),
- Distress Oxides (Peeled Paint, Vintage Photo, Antique Linen, Black Soot, Forest Moss, Squeezed Lemonade, Fossilized Amber, Bundled Sage),
- white card base (10 x 21 cm),
- watercolor paper for the background (9,6 x 20,6 cm),
- craft paper for die cuts,
- heat gun,
- Versafine Black Onyx Ink,
- alphabet stamps,
- white acrylic paint,
- brush,
- water spritzer,
- black pen,
- adhesive foam pad,
- paper glue.

First I made the background. I cut the paper and colored it with Distress Oxides.


I used Vintage Photo Distress Oxide for the edges.


Then I used water spritzer and dried the water drops with the heat gun.


I added drops of white acrylic paint for the finish and let it dry.


Then I made the monkey. I used craft card stock for die cuts and mixes of Distress Inks and Oxides to color. I used adhesive foam pad to glue the head.


I did the same with the guitar.


Then I made the sign. I used the same materials and colors as for the monkey and guitar. I added the sentiment with the alphabet stamps.


And then I just glued everything together.


This is all from me for this week. See you again next Sunday.

Anja Z.


Cottage Cutz dies I used: