Showing posts with label mail tag set. Show all posts

Friday, March 22, 2019

Lamb Easter Basket Tags

Happy Friday!  It's Jeanne today with some fun Easter basket tags.  This little lamb cupcake is too cute.  I thought it would be perfect to decorate the front of a tag to hang on Easter baskets.
To start, I cut the lambs from vanilla cardstock and the cupcake, flower and tag reinforcement from three different colors of cardstock.  I used white cardstock and the largest of the tag dies for the tags.
Using Distress Oxide ink in Antique Linen, I tipped the lamb pieces to add dimension to the fleece and colored the face.  Then I used a black fine tip marker and white gel pen to color the lambs' eyes.
I played around with how I wanted the colors to line up.  Originally I thought I'd use all one color per tag, but ultimately decided to use all the colors on each tag.
I assembled the tags by gluing all the cupcake pieces together and then putting them on the tags.
Finally, I used coordinating ribbon as the ties.

Dies used:
http://www.scrappingcottage.com/cottagecutzspringlambcupcake.aspx
http://www.scrappingcottage.com/cottagecutzmailtagset.aspx

Thanks for stopping by today.  I hope you have a fun and creative weekend!

Wednesday, October 31, 2018

Introducing A New Guest Designer

Hello Scrapping Cottage friends! Thanks for taking the time to stop and visit with us today. We have a new guest designer with us for November and December. Let me introduce to you Sukie Dhillon. Here is a brief bio that will give you some information about Sukie.

"My name is Sukie Dhillon and I was born and raised in Northern California.  The most important thing in my life is my family.  I'm a proud Mom to 2 wonderful children who are both away in college. I've been married to my biggest fan and supporter for 27 years.  When I'm not working, I take cover in my craft room.  Creativity is an escape from my busy life.  I love being crafty and am passionate about creating cards, tags and scrapbook pages.  Creating with vibrant and bright colors brings me so much happiness.  I love to embellish my creations.  It's the simple things in life that bring me joy and playing with dies and paper is one of those things"!

Today we thought we would give you a sneak peek of what's to come from our guest designer. Sukie is a talented scrapbooker. She has created a great layout today using some of the newest Autumn dies. CottageCutz dies are so perfect to use as embellishments and added accents to your layouts.  Her layout is featuring the Pumpkin Pie & Latte, Fall Phrases, Stitched Circle and Mail Tag dies.

Here are some other views of her layout.


Sukie will be posting her work each Wednesday in November and December. And, there will be details showing the steps of her work. Welcome Sukie. It's nice to have you as part of the CottageCutz team.
 
dies used to create layout:
http://www.scrappingcottage.com/cottagecutzfallphrases.aspx
 
http://www.scrappingcottage.com/cottagecutzpumpkinpieandlatte.aspx
 
 
http://www.scrappingcottage.com/cottagecutzmailtagset.aspx

http://www.scrappingcottage.com/cottagecutzstitchedcirclesetbasics.aspx


Friday, October 12, 2018

Carmel Apple Treat Bags

Happy Friday!  It's Jeanne today with a super quick and easy tag  for treat bags.  Even though I don't have little ones, I get Trick-or-Treaters; mostly neighbors' kids and I love to do something extra for them. This project is perfect for the little ones that you want to do a little extra for, or if you're a mom and have a classroom of kids that needs treats, this is also for you!
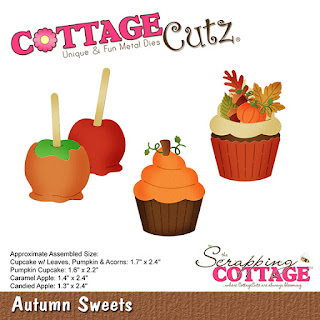
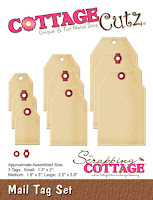
This project uses the new Happy Halloween and Autumn Sweets dies along with the Mail Tag Set (a super versatile set and one of my favorites!).
I cut the apples from the appropriate colors of card stock and two sentiments and tags/reinforcements. This makes two double sided tags.
I used a sponge dauber and the matching ink colors to add some depth to the edge.  If I were making multiples (let's say 30 for a classroom) I would not do this and they would still be very cute.
For each tag, I assembled an apple and glued it to the front of the tag.  I added the reinforcement at the top.
Then I glued the Happy Halloween to the back of the tag along with another reinforcement.
These are tied to the bags with ribbon - so cute and so easy.  A fun treat for those little ones! (Although my husband and adult daughter have been eyeing the candy corn!  LOL!)

Be sure to visit the online store where the new Autumn, Halloween and Christmas Part 3 dies are on sale for a limited time.  There are so many cute designs to choose from!

Dies:
http://www.scrappingcottage.com/cottagecutzautumnsweets.aspx
http://www.scrappingcottage.com/cottagecutzhappyhalloweenelites.aspx
http://www.scrappingcottage.com/cottagecutzmailtagset.aspx

Thanks for stopping by today!  I hope you have a relaxing and creative weekend!


Saturday, June 09, 2018

For Dad (new dies)

Hello Scrapping Cottage friends! Thanks for taking the time to stop and visit with us today. It's Mary Marsh here bringing you the Saturday edition of the Blog.

We have a brand new release of Just For Guys dies in the online store, and they are currently 25% off.  There are 14 new designs and they are ideal for Father's Day cards, guy stuff or car buffs. They all have a retro and classic look. The design team has begun to show samples using the new dies. You can check them out here and here.

For my card today, I am featuring the new Hats, Glasses & Moustaches + the Retro Alphabet dies. Let's get started with some details on how I created my project.

Step 1: I started my card this week with the layout. I saw this interesting sketch on Splitcoaststampers on Wednesday and an immediate idea came into my head on how to use it with these new dies. Love it when that happens.  
Step 2: I selected my card colors. Looked through my papers for some patterned paper with masculine appeal. I found this paper that had this tweed pattern -  very masculine so I decided to use it. Paired that up with some matching cardstock in soft suede (light brown). For the panel across the middle I used a yellow cardstock.
Soft Suede Card Base: 5 1/2" x 4 1/4"
Patterned Paper Layer: 5 3/8" x 4 1/8"
Yellow rectangle Panel: 5 3/8" x 1"

Step 3: I cut my Dad phrase and used the same cardstocks as the card base colors. I added a 3rd color of Cajun craze. It's a cinnamon color cardstock.
The hat, glasses, moustache and pipe are all cut in soft suede cardstock. I sponged the glasses & pipe with soft suede ink to make them a little darker.
For the tags on the sketch, I used an older CottageCutz die- it's the mail tag set. It's the smallest of the tags and I cut in a kraft card stock.
Step 4: Started card assembly.  I assembled the card base, patterned paper and middle rectangle panel using double sided tape.
Next, I attached the tags, the Dad Letters and the hat, glasses moustache and pipe. On the tags I used double sided tape and for the letters I used Ranger Multi medium matte. Its a liquid adhesive that dries clear. For the other images I wanted them lifted from the background panel so I used dimensional adhesive.
Well, that's my card for this week. I hope I have given you another idea for a way to use these new masculine dies. Remember, they are on sale right now for 25% off. See you next Saturday!

dies I used to create card:
http://www.scrappingcottage.com/cottagecutzhatsglassesandmustaches.aspx

http://www.scrappingcottage.com/cottagecutzretroalphabet.aspx
http://www.scrappingcottage.com/cottagecutzmailtagset.aspx