Showing posts with label bottoms up bunny baker. Show all posts

Thursday, March 21, 2024

Do You Smell Carrots?

Hi Crafty Friends,

It is Pam sharing with you today.

I am still finishing up my Easter/Spring cards.   I learned a fun fold from Stacey.  She is a wonderfully creative fellow paper crafter.  So I decided to use it on this card today.  I am also featuring two different dies Bottoms Up Bunny Baker and Spring Bunny w/Giant Carrot.

Background photo by Freepiks

Design Steps:


1.  Cut 2 pieces of white card stock 8 1/4 x 4 1/4 (Score both pieces at 2 1/4, 4, 6 1/4) Cut one piece of white card stock 4 1/4 x 4 1/4

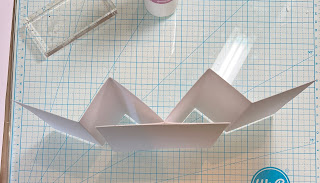
2.  Starting with the widest panel make a mountain fold and then the next 2 valley.  Set the two pieces next to each other as shown above in opposite directions.  Tuck the mountain fold into the valley fold and place close together as shown below

3.  I used a piece of tape to anchor them together then applied glue to the two panels as shown below
4.  After spreading the glue I lined up the 4 1/4 x 4 1/4 square on top of the flaps

5.  This is what it looks like after the panel is glued in place
6.  To open the panel pull on the two side flaps and it will look like this from the top view
7.  This is what the card looks like from the front view 
8.  Cut 2 pieces of plaid DP 2 1/8 x 4 1/8 and 2 piece of Easter Egg DP 1 5/8 x 4 1/8 (I decided to make a spring card rather then an Easter card so I switched out the pattern)
9.  Glue the DP in place as shown above


10.  Use the following dies and card stock colors:  Picket Fence Slimline White - Bottoms Up Bunny Baker pink, white, gray - Spring Bunny w/Giant Carrot orange, green (cut off the little curl at the bottom of the carrots).  Cut a piece of polka dot DP 4 1/8 x 4 1/8
11.  Working on the polka dot square DP glue down the fence (do not put glue on the top of the fence so you can tuck in the carrots), dirt and then the bunny as shown above
12.  Tuck in the 3 carrots behind the fence.  Glue the polka dot panel to the white panel on the card base.  Add your sentiment

13.  This card will fold down to fit inside an A2 envelope 


We have more inspiration on our YouTube Channel check it out HERE

Thanks so much for stopping by!  And I will see you next Thursday.

Blessings and Take Care


Head over to Cottage Cutz and do a little shopping today!

Get Social With Cottage Cutz

Tuesday, March 07, 2023

Happy Easter


Hello CottageCutz friends! Thanks for taking the time to stop and visit with us today. It's Mary Marsh here bringing you the Tuesday edition of the Blog.

We have a brand-new release of dies in the online store. It's our Flowers & More release. The individual dies are currently on sale for 30% off. This release has what we are calling "simple cuts". Meaning not as many pieces to put together so they assemble quickly.

They are so perfect for the many card making occasions that we all have. Birthdays, Thank You, Sympathy, Mother's Day or even a scrapbook layout just to name a few. Today for your viewing pleasure, I am featuring some of our older Spring release dies and I created an easy Easter card. 

I started my card with the colors from this week's color challenge on Splitcoaststampers #938. We were to use flirty flamingo, pear pizzazz and crushed curry for our color trio. Optional was to add any 4th color. I used gorgeous grape for my additional color. 

flirty flamingo, pear pizzazz, crushed curry
My card was inspired by an ad for an off-brand stamp company I saw on Facebook. I decided to recreate it with the challenge colors and CottageCutz dies to make it my own.

I thought the colors had a definite Spring vibe so I went with the Easter card idea. This one is a mini-slimline.
Grape Card Base: 6 1/4 "x 3 3/4"
White layer Panel: 6 1/8" x 3 5/8"
Grape Ombre Designer Paper: 6" x 3 1/2"

I used the Stitched Alphabet die for my Easter phrase. I cut the letters in the challenge colors using different dotted designer paper. 

I layered the letters on gorgeous grape ombre specialty paper. I loved all the sparkle this paper has. The Happy phrase is part of the Happy Easter Greeting die. This die also includes the bunny ears. I cut the ears in flirty flamingo and placed them above the letter A.  The happy word is cut from pear pizzazz cardstock.

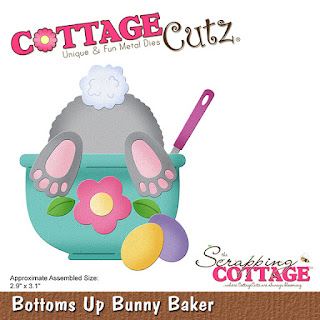
The bunny feet are part of the Bottoms Up Bunny Baker die. That's it for today's sample. See you again on Saturday.

Reminder: Our YouTube Channel has a new video from Jen Hartsgrove. There is a giveaway for being a subscriber, liking the video and leaving a comment. Click here.

Dies I used to create card:


Friday, January 28, 2022

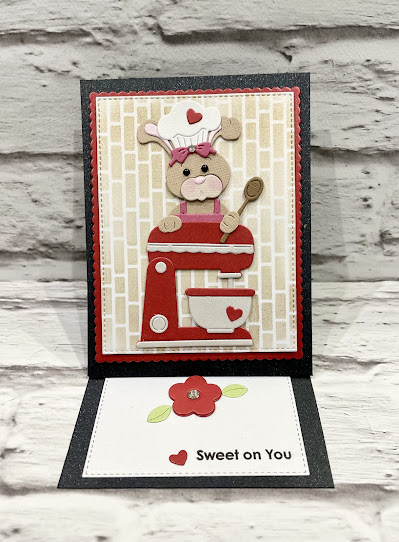
Sweet on you easel card


Happy Friday, It’s Wendy bringing you the blog today. I hope you’ve all had a wonderful week and have plenty of time planned for crafting this weekend.

Today, yes I’m bringing you another easel but I really think they have a super impact for the recipient.

This is a Valentines card and I was really inspired by Pam’s colour on her card yesterday. What an impact red, black and white can have

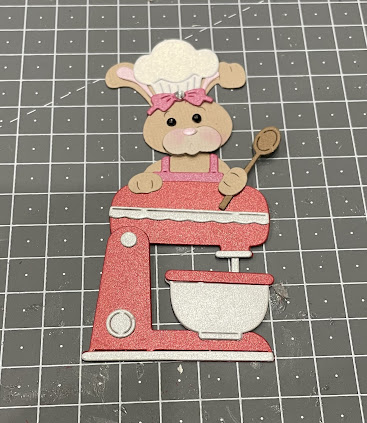
Anyway, right to the card. I’m not going to show you every item I’ve die cut as I think that technique is more important. I die cut all the elements from the ‘Sprint Bunny Baker’ die and assembled. Here she is in her crowning glory. I thought the mixer looked very much like my cake mixer so used the colours from mine. Don’t you just love the little bow. I couldn’t help but pop a gem on the top. I also gave her pink cheeks with some chalk


Next I took the largest ‘Stitched Rectangle’ in white card. Once cut I wanted to add some brickwork to the background, to I took a stencil and added some ink with a brush. I have a tool that allows me to pop the stencil on the card with magnets so the card doesn’t move. I wasn’t fussed whether the ink was darker in some places so just take your time and find your happy design


Once inked, here is the finished piece of card 


Next I took the largest of the ‘Stitched Scalloped Rectangles’ in red card and attached my piece of inked card to it with 1mm foam pads. I also attached my assembled bunny to the card with 1mm foam pads


Next I took a piece of black card measuring 10” x 4” and scored in hall. I also cut another piece of black card measuring 5” x 4” for the front of the card. You’ll notice that I scored the front of the main card in half and then attached my other piece if card to the bottom part only to get my easel


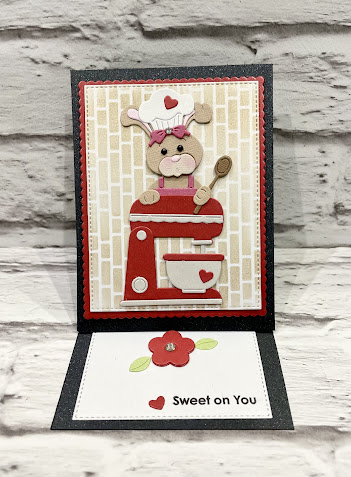
To finish I attached my other piece of completed card with the bunny to the front. To keep my easel standing up I used the flower from the ‘Bottoms up Bunny Baker’. I cut it 3 times and layered it up to keep the card standing up.

I added some extra embellishments like a pice of white card on the bottom card with a stamped sentiment. I also went through my stash of Cottagecutz dies and found a suitable heart and popped this on the bunny’s hat, the mixer and then next to the sentiment and we are all done!


I really enjoyed making this card and I hope that you like it and it’s given you some inspiration to make your Valentine’s cards.

So I wish you  a wonderful weekend of crafting happiness and I will see you on Tuesday for another project.
Hugs, Wendy


Dies I used:


Please don’t forget to check out our YouTube page as there are designs being added frequently