Showing posts with label Ugly But Cute Sweater. Show all posts

Sunday, December 29, 2019

Happy 2020!

Hi!

It's Anja here for my last post in 2019. Today I have no coloring project for you. I made little tags you could use for decoration for your New Year's dinner.


For this project I used:
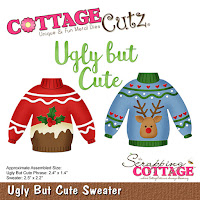
- Cottage Cutz dies (Ugly But Cute Sweater, Sweetheart Doilies, Circle Set, Sugar & Cream Alphabet, Expressions Happy),
- craft, white and dark red card stock,
- adhesive foam pads,
- paper glue.

First I cut two sweaters and some decorative elements, one set from white and the other from craft cardstock. I adhered all the pieces with glue.


Next I cut two sets of larger circles, two sets of smaller circles and two doilies.


Then I cut the sentiment and numbers from dark red cardstock.


I adhered the circles together. I used adhesive foam pads to add the sweaters.


And my project was done.


This is all from me for this year. You can also check the online store for some After Christmas sales

I wish you all pleasant New Year's celebrations and all the best in 2020.

Have a nice day and see you again in a week.

Anja Z.


Cottage Cutz dies I used for this project:


Saturday, January 05, 2019

Birthday Sweater

Hello Scrapping Cottage friends! Thanks for taking the time to stop and visit with us today. It's Mary Marsh here bringing you the Saturday edition of the Blog. Happy New Year and welcome to my first Saturday blog post of 2019.

I am in need of some masculine birthday cards this month so that's my theme for this post. Since it's January and sweater weather I thought I would use the Ugly but Cute die for my card. It's part of our Christmas 3 collection but my card shows you a way to use it for other occasions. Helps you get more mileage out of your dies.

Let's get started with some details on how I created my card.
Step 1: The sketch #720 from Splitcoaststampers was a perfect layout for a masculine card. It's simple and I think that always makes for a great  male themed card.
I chose this designer paper from my stash. It has a variety of colors that will help me build my card. For the angled panel, I cut a piece of turquoise cardstock 4" x 5 1/8" and cut it at an angle. I did the same with my designer paper.
I wanted some texture on the turquoise panel so I embossed with an argyle embossing folder. 
I cut my sweater from cardstock to match the colors on the designer paper. Used a purple (rich razzleberry) and pumpkin cardstocks.
Step 2: Now that the card elements are cut, I can start my card assembly. I attached the angled panels to the white card base with double sided tape. 
I wanted a cover up where the 2 panels meet. I thought of ribbon or twine but eventually decided on just a strip of rich razzleberry cardstock. It's 1/2" wide and 4 1/4" long. It kept the masculine appeal of my layout.
White card Base: 4 1/4" x 5 1/2"

The sweater was attached with dimensional adhesive. I always like the look of the image being lifted just slightly off the image panel. 
Step 3:  To complete my card and add a sentiment, I used the Celebrate Phrase and cut in turquoise cardstock.
Well, that's it for me for this week. I hope I have given you an idea for another way to use this sweater die. See you next Saturday.

dies I used to create card: 
http://www.scrappingcottage.com/cottagecutzuglybutcutesweater.aspx

http://www.scrappingcottage.com/cottagecutzexpressionspluscelebratephrase.aspx


Friday, December 07, 2018

Warm Wishes

Happy Friday!  I had two motivations for today's card: 1) it's getting closer to Christmas so I need quick cards to make (I'm a little behind) and 2) I wanted something cozy.  We've had some cold weather here for the past two days (okay, 52 degrees, but COLD for Southern California!)  So my card fits both those criteria.
The cable knit embossing folder coupled with a plaid that reminds me of flannel is the perfect pairing for the sweater from Ugly But Cute Sweater die.  This card goes together quickly.
I die cut all pieces in white using the sweater from Ugly But Cute Sweater, mittens from Coffee & Cocoa Warm Wishes and snowflake from Season's Greetings w/ Snowflakes dies.
I used markers to color all the pieces except the snowflake.
Then I assembled them.
I embossed an A2 white panel using the cable knit embossing folder and cut a 5 1/2 x 1 1/2 inch panel from the plaid.  I also used a self adhesive sheet and cut "Warm Wishes" from green card stock.
I glues all the pieces down except the sweater which I popped up using foam dots.  After I had it assembled I decided the sentiment didn't stand out enough for my liking so I cut another using gold card stock.  By using the self adhesive sheet under the card stock it was easy to just adhere the gold sentiment over the green one.  I like how it turned out.  It gives the sentiment a little dimensions and you can just see a bit of green shadow!

Dies used:

Thanks for stopping by today.  I hope you have a wonderful and creative weekend!

Wednesday, November 14, 2018

Have Yourself a Cozy Little Christmas

Hello!  This is Sukie sharing a project for my guest designer post.  I have a fun project idea to add a personalized touch to those holiday gifts.
I started my project by cutting out the pieces from the Ugly But Cute Sweater die set.  I cut the tag with white card stock from the Nested Stitched Scallop Rectangle Set.
I dressed up my tags by adding a colored reinforcement punched with the We R Memory Keepers Hole Reinforcer Punch.  The cheery sentiment is from the Scrappy Moms (retired) "A Holiday to Remember" stamp set.  The tags were topped off with some Frosted Cranberry Trendy Twine.
The die cut sweaters were put together with bright, colorful card stock.  I ended up creating three different sweaters combining the elements from this die set, the possibilities are endless.  The pop of colors is perfect against the basic white tag.
These tags will be perfect for adorning holiday gifts.  The handcrafted touch will be great for personalizing those packages.
Here are the dies I used on my tags available over at Cottage Cutz: