Showing posts with label Sweetheart Doilies. Show all posts

Saturday, February 24, 2018

Miss Petunia Bunny (New Die)


Hello Scrapping Cottage friends! Thanks for taking the time to stop and visit today. It's Mary Marsh here bringing you the Saturday edition of the Blog. Have you noticed the days are getting longer? We are getting closer to Spring and Easter.

We have a new release of dies. There is a In-Stitches release with 12 new dies and a Spring release with 21 new designs. And, some other good news is that for a limited time, you can get the new dies at 25% off. Just in time to create your Easter or Springs cards.

Today, I am using the new Miss Petunia Bunny die to create an Easter card.  She is just the cutest little thing. So let's get started with some details on how I created my card.

Step 1: This week I started my card with a sketch I found online. I thought it would work perfectly to showcase Miss Petunia as well as layers to my card. Since I like to use patterned paper, the addition of layers to my cards always works for me.
Step 2: I looked through my patterned papers and found this Spring Mix. I liked the bright colors so I matched it up with some corresponding cardstock.
Berry Burst Card Base: 4 1/4" x 5 1/2"
Patterned Paper Layer: 4 1/8" x 5 3/8"
Berry Burst Doily Circle: I used the largest of these dies
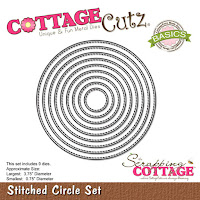
White Stitched Circle: I used the 4th largest of these dies
Berry Burst rectangle Layer: 1" x 5 3/8"

Step 3: I cut Miss Petunia Bunny using different colored cardstocks. The eggs in her basket I cut in white cardstock and then colored with distress inks - spun sugar, seedless preserves, tumbled glass, squeezed lemonade. Used a little pink chalk to add some color to her floppy ears. Attached the body pieces using Ranger Multi Matte Medium.
Step 4:  For the image panel I used a cloud template and sponged with tumbled glass distress ink. For the grass, I used mowed lawn distress ink and a dauber and sponged around the bottom of the circle.
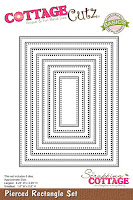
I realized I forgot to cut the larger rectangle panel. I used the 3rd largest pierced rectangle panel and cut in white cardstock. Decided to stamp a sentiment in the upper right corner with berry burst ink. I masked off the part of the sentiment I didn't want to use before i inked my stamp. For placement I used the Stamp-a-ma-jig.
Step 5: Now that the card elements are ready, I can start assembly. Added all the elements of the sketch to the patterned paper panel. I eliminated the scalloped trim on the long rectangle panel. I thought my diamond background paper was a bit to busy to add scallops.
I used dimensional adhesive to attach Miss Petunia Bunny to the image panel. I always like the look of the image lifted a bit from the background. It adds depth. 
 To finish off my card I scattered a few berry burst sequins. I hope I have given you an idea for using the Miss Petunia Bunny die. She is on sale for 25% off and there is plenty of time to get her for Easter cards.
 
See you next Saturday. Enjoy your weekend!
 
Dies I used to create card:
 
http://www.scrappingcottage.com/cottagecutzmisspetuniabunny.aspx

http://www.scrappingcottage.com/search.aspx?find=sweetheart+doilies

http://www.scrappingcottage.com/cottagecutzstitchedcirclesetbasics.aspx

http://www.scrappingcottage.com/cottagecutzpiercedrectanglesetbasics.aspx
 

Thursday, December 28, 2017

Valentine's Day!!

Hello Everyone!

It is Pam creating with you today! I hope you had a wonderful Christmas celebration!  I can't believe I am saying this but I am starting on my Valentine's!!! The little bear I am using is actually from our Get Well release.  But she is very versatile and so is the sentiment. They are perfect for Valentine's Day cards!


Design Steps:

 1.  Cut an A2 white card base then on the front flap cut off a 2 inch strip.  Cover the inside first with a red piece of card stock then a piece of DP.  Next on the left side of the inside cut a 2 x 5 1/8 piece of white card stock and glue inside to the left

2.  Using the Stitched Cupcake die set cut out 4 stitched red hearts and glue 3 of them next to the white panel on the inside of the card.  Then glue the remaining heart to the white panel as shown below
 3.  Next cut a piece of red card stock for the front flap at 2 1/8 x 5 3/8 then layer on a piece of DP at 2 x 5 1/8. Glue to the front
4.  Use the Sweetheart Doilies die and cut out the largest circle in white and then the next largest in red glue together
 5.  Cut the sentiment Sending Hugs in red using the Sending Hugs Bear die
5.  Glue the sentiment to the front flap of the card and also attach the heart doily

6.  Using the Sending Hugs Bear die cut out the bear in brown, the flower and bow in red, the stem in green and the tummy in tan.  Shade all the pieces and assemble them add black rhinestones for the eyes


 7. Place pop dots on the back of the bear and place the bear onto the heart doily


Cottage Cutz Products!


I love how the cute bear made this Valentine extra special!! Hope you give it a try!

Blessings
Pam

Saturday, November 11, 2017

Christmas Cocoa Thanks

Hello Scrapping Cottage friends! Thanks for taking the time to stop and visit today. It's Mary Marsh here bringing you the Saturday edition of the Blog.

Well we went from having record warm temperatures here in PA to having record cold temperatures. Tonight our low will be 19°. That's cold!! And when the cold comes can Christmas be far behind?

Today, I am showing another of the new 2017 Christmas dies released by CottageCutz This one the is Cocoa & Sweet Treats die. There are 3 different cup designs plus lollipops, candy apples, a donut, gingerbread man and a Christmas cake in this super cute set. The set also includes other Christmas icons - a tree, snowman and holly.

I know I will need some Thank You type cards after Christmas so that's the idea behind this week's card. Let's get started with some details on my card for today.

Step 1: I started my card by choosing my colors. I like making Christmas cards in non-traditional colors but this year I seem to all about the red & green. When I looked through my Christmas papers I found this piece with a circle background. I liked the whimsical appeal and thought it would work well with the images I planned on using.
Cherry Red Card Base: 4 1/4" x 5 1/2"
Patterned Paper Layer: 4 1/8" x 5 3/8"
 
I cut the die images I was using for my card. The cup was cut in a rich, cherry red cardstock that matches the designer paper.  I wanted to layer the cup inside a circle image and decided on using the largest of the Sweetheart Doily dies. I cut in a vanilla cardstock.
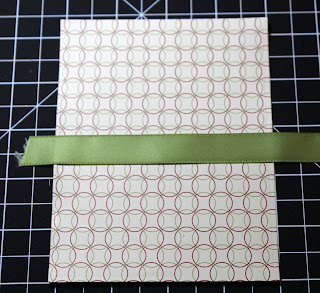
Step 2:  Time to start the assembly of my card. I love using ribbon on Christmas cards and decided to add an olive green strip across the center.
Once I put the Christmas Cocoa cup on the vanilla doily, I decided to add a red circle layer underneath. It made it pop against the background. I stamped the sentiment in a circle on vanilla cardstock in chocolate ink. I just continued the circle theme that is going on in my patterned paper. I used the stitched circle dies - the 3rd & 6th largest.
Added the image circle and the sentiment circle to the background layer.
Step 3:  To finish off my card, I added a gold cord bow and some green sequins. I hope I have given you an idea for a card using this cute new set. Have a great week-end and I will see you next Saturday.
 
Dies I used to create card:
http://www.scrappingcottage.com/cottagecutzcocoaandsweettreats.aspx

http://www.scrappingcottage.com/cottagecutzsweetheartdoilies.aspx
http://www.scrappingcottage.com/cottagecutzstitchedcirclesetbasics.aspx


Tuesday, May 23, 2017

Sweet dreams

Hi, Janja here!

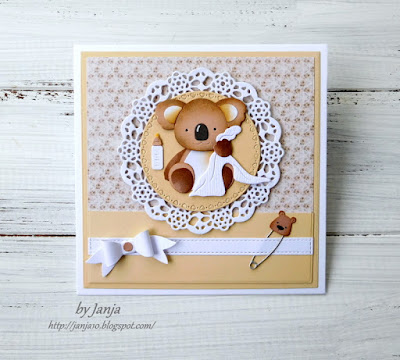
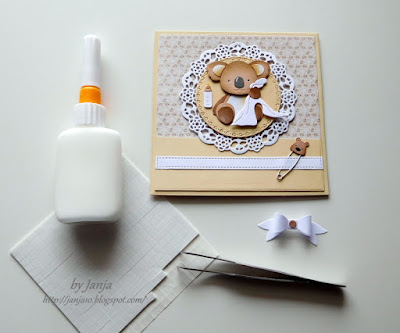
I have a lovely baby koala card, for you today. My card was made by using dies from the Baby release and the new Expressions plus release.


Supplies:
- CottageCutz dies: Baby Koala w/Blanket, Baby Diaper Pins, Baby Booties mini, Diaper mini, Sweet Phrase, Dream Phrase, Sweetheart Doilies, Tea Time Doily, Build-a-Bow, Stitched Wide Rectangle Frame Set, Stitched Wide Circle Drame Set, Circle Set
- white card base: 5.3 x 5.3" (13,5 x 13,5 cm), folded
- yellow cardstock: 5 x 5" (12,7 x 12,7 cm) and 4.76 x 1.57" (12,1 x 4 cm)
- patterned paper: 4.76 x 4.76" (12,1 x 12,1 cm)
- white and colored cardstock
- glue, double-sided adhesive tape, white fun foam

Koala's coat is in shades of ashen-gray, sometimes also in red-brown color. I gave it a brown color, combined with yellow background.
Cut out all the elements of baby koala and assemble them into a whole.


Find a patterned paper that you like, and choose a coordinating color of cardstock. Trim them to the appropriate size.


For the remaining elements use a white cardstock.


To keep the small hearts in openings, attach the self-adhesive foil on the backside. Glue both round cutouts, and add a circle from fun foam. If you prefer use self-adhesive foam tape.

Now it's time to assemble the card. 


Mount all the elements as shown on white card base. Use glue and self-adhesive foam pads.


For special occasions such as birth, it is nice to see a card that has also decorated the interior.


I added the small letter S at the end. I cut it out from the thanks phrase.
Attach a bow when the card is completed. 


Janet, our video artist has created a video showcasing some of the new Expressions Phrases. 


Have a lovely day!