Showing posts with label Stitched Sun Clouds & Umbrella. Show all posts

Friday, October 06, 2023

Fall Designs Group Post (Day 2)

Hello CottageCutz friends! Thanks for taking the time to stop and visit with us today. This post is featuring cards using the new Fall Release. There are 15 designs in this release and are available in the online store with special pricing.

The designs are so perfect for all your Fall projects- birthday, Thanksgiving, thinking of you, encouragement and home decor just to name a few. They allow you to add a beautiful touch of Fall to whatever you may be creating.

We have had a good response when we do a group post on a new release. It gives you the opportunity to see more card samples from the Design Team. There are 3 samples in today's post, and we also showed 3 samples on Wednesday. See Day 1 samples here.

Now onto our samples for today. 

Card 1: Our first sample today is from Kristine Breach.  She created such a playful Fall scene featuring the cute critters from the Autumn Friends die and paired it with the Fall Branch w/Swing. Love the owl sitting on the swing.  It's a larger format in a horizontal 5x7 card. 
Her images are all colored with Copic markers. The color scheme followed the Splitcoaststampers color Challenge #968 this week.  Optional was an "anything goes" theme. She took advantage of that by adding a few more Fall colors along with some neutrals.  
lemon-lime twist, daffodil delight, coastal cabana

Card 2: Our next sample for today is from Marla Harris. This tranquil Fall scene is so perfect for a Thanksgiving card.
She used the Fall Gate w/Flowers and the Fall Branch w/Swing dies to create this beauty. 
The images are all colored with Copic markers including the grass in the background. The sky is inked with distress oxide salvaged patina and peacock feather inks. The sunflowers, accents to the fence and pumpkin are all lifted off the background with dimensional adhesive to add depth. 

Card 3: Our last sample for today is from Melinda Beltran. She used the Fall Centerpiece and Autumn Garland dies and designed a beautiful home decor piece. She altered a Dollar Store find to create her own shadowbox. 
Melinda is quite the pro at altering items and achieving a finished upscale look. For this project, she moved away from the traditional Fall colors for her pumpkins and sunflowers to the trendy pastels that are being shown this season.  


That's it for our samples for today. We hope you have enjoyed the samples from the Team that we have presented these past 2 days. You can pick up these dies in our online store at a 30% off limited time sale.


Wednesday, February 22, 2023

Double Z-Fold Farm Scene

Welcome CottageCutz friends!

Kris here with some Wednesday inspiration for you!  In honor of our HUGE President's Day Sale going on right now, I've created a fun Double Z-Fold card using lots of dies that you can find on sale - up to 83% OFF! Shop early for best assortment - sale ends this Friday 24th!


This card was so much fun to make!!  We've lived right next door to an upscale ranch for 26 years, and have been lucky that they only keep the baby calves and their mamas in the field that borders our fence.  They're so cute when they frolic and play.  So I just HAD to buy a few cow dies. 

DESIGN STEPS:

1.  I cut a piece of light blue cardstock 4-1/4" x 11" - then scored at 5-1/2" and 2-3/4" (card base).

2.  I cut  a piece of lime green cardstock to 4-1/4 x 11" - then scored at 5-1/2" and 2-3/4" (grass).


3. I cut the lime green panel into (2) pieces of 2-1/4 x 11.  One of the panels I cut off the 2-3/4" end to make it a 2-1/4" x 8-1/4" piece.

4.  I die cut the tops of both green pieces with the Grass Slimline die - 83% OFF!!  ***BE SURE you are cutting the correct edge --- the longer green piece will have the 5-1/2" section on the left and the shorter piece will have the 5-1/2" section on the right!  


5.  I glued the shorter lime green piece to blue card base, clear to the right and aligned with bottom edge.  (You may find it easiest to attach just the part before the score line, then fold your card onto the short scored part so your card will fold flat to fit into an envelope.)  

6.  I glued the longer lime green piece to the front ***ONLY glue 1/2 of the longest scored section... and then the shortest outside edge section as pictured below.

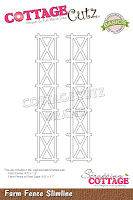
7.  I die cut the Farm Fence Slimline - 83% OFF!!  and scored it at 2-3/4" and 5-1/2" and glued it to the front grass piece as pictured.


8.  Next, I die cut all my design pieces and inked 'em up, and assembled!  

Just LOOK at all these SAVINGS!!  


9.  Glued everything in place and done!  ☺☺☺ How cute is this?


This card folds up to fit into an A2 envelope ☺


PRODUCTS I USED:


I hope you're inspired to see what you can create with your favorite CottageCutz dies!!

~Kristine

Saturday, April 30, 2022

Swans for Mother's Day

Hello CottageCutz friends! Thanks for taking the time to stop and visit with us today. It's Mary Marsh here bringing you the Saturday edition of the Blog.

We have a new release in the online store. It's our Australian Friends with 14 new designs. The dies are perfect for Mother's Day, Baby Cards, Kids & Adult Birthdays, Thinking of You, Thank You - just about any occasion you would need a card for.

They are currently on a limited time sale of 30% off the individual dies. For your viewing pleasure today, I am featuring the new Swan die. If you have followed my card samples here on the CottageCutz Blog, you know I am a user of designer papers. They help to create such great backgrounds. 

I have had these Landscapes patterns for a while. They are a big assist in creating a scenic card with your dies. Here are a couple of cards I previously made using these papers - Card 1, Card 2 . Today I am using another pattern and created a Mother's Day card. So let's get started with dome details of how I created my card. 

Design Steps:

I already mentioned the designer paper I was going to use. I didn't want to lose too much of the paper so I decided to make a square card. I paired the paper with a bright pink cardstock. I liked the look of it together and I think it complements some of the pink tones in the paper. 
Pink card base: 5 3/4" square
Designer Paper Layer: 5 1/2" square
Next, I cut my swan. Since this is a Mother's Day card, I wanted some cygnets (baby swans) in the scene. So I used the Mama Duck & Ducklings die, and I am calling it artistic license (lol)! I did look at some photos online and to me the cygnets look like ducklings. 
I stamped my Mother's Day sentiment onto a Stitched cloud. The cloud is from the 2018 In-Stitches release.   I used a light purple cardstock and stamped the sentiment in a grape ink. 
Now that all my elements are prepared, I am ready to start card assembly. I attached the designer paper to the card base with double sided tape.  The Swan images are attached with glue dots.
To finish off my card I added the sentiment cloud and then decided to add another one. I also cut a cattail from the Swan die and added that to my card. I had to move the little baby swan closer to the water pool. 
And, that finishes off my card for his week. I hope I have given you an idea for a different way to use this new Swan die. See you next Saturday!

dies I used to create card:


Saturday, June 05, 2021

Hey Chick

Hello Scrapping Cottage friends! Thanks for taking the time to stop and visit with us today. It's Mary Marsh here bringing you the Saturday edition of the Blog.

IT'S NEW RELEASE TIME! The collection is called COUNTRY FARM! It has the most delightful dies from Tractors to Cowboy Chicks! Each die is just full of awesome details and can be used for so many different occasions. All of the new dies are on sale at 25% off.

Today for your viewing pleasure, I am featuring the new Cowgirl Chick die. She is just the cutest little thing and even a bit sassy.  I thought it would make a great birthday card for a gal! So lets get started with some details on how I created my card. 

Design Steps:

I started my card by cutting the Cowgirl Chick die. For her hat and scarf I used the packaging colors because it's a perfect western look.
Next, I looked through my designer papers and found this one that already has an outdoor scene as part of the paper. I decided to make a square card because I didn't want to cut to much of the designer paper. 

Card Base: 5 1/2" square
Designer Paper layer: 5 1/4" square
Stamped my sentiments on both the clouds. I wanted the words to be a bit sassy like the chick. The "hey chick" sentiment has an exclamation point at the end. The clouds are from the Stitched Sun, Clouds & Umbrella die. 
Now I am ready to start the card assembly. I used dimensional adhesive to lift the image and clouds off the background. 
 
To finish off my card, I attached the image panel to the card base. I scattered a few red enamel dots just for some added interest. Well, that's it for me for this post. I hope I have given you an idea for a way to use this new die. See you next Saturday!

dies I used to create card: