Showing posts with label Stitched Sun Clouds & Umbrella. Show all posts

Friday, March 22, 2024

Miss Spring Bunny & Hot Air Balloon

Hello, welcome back friends!

Kris here to share some Easter inspiration with you!

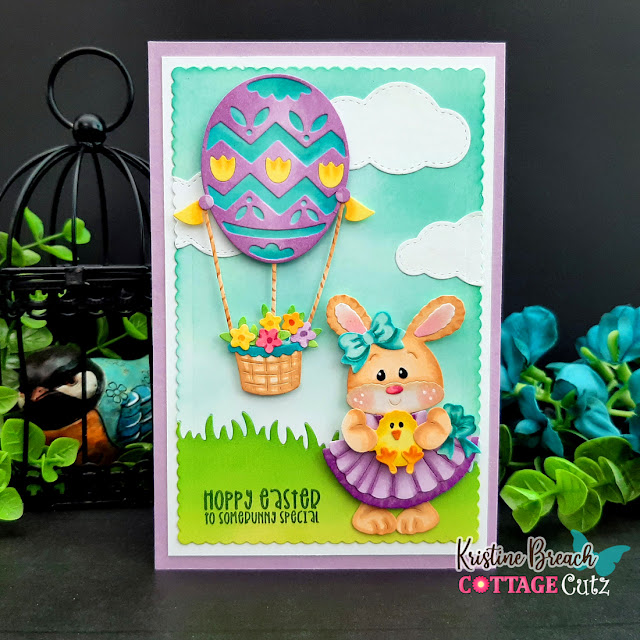
This Easter card is cute and SO EASY to make!  It features Miss Spring Bunny and the Spring Hot Air Balloon dies


I also want to point out that you have until 9 PM (Pacific) TONIGHT to take advantage of this:


DESIGN STEPS:

I die cut Miss Spring Bunny and the Spring Hot Air Balloon from white cardstock and colored with Copics, then assembled.

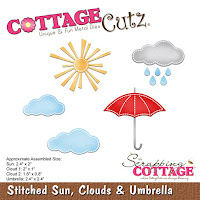
I also die cut the clouds from the Stitched Sun, Clouds and Umbrella die

(aren't these adorable?!)

I decided to make this a 4" x 6" card to get the height needed for the hot air balloon.  I cut a piece of white cardstock at 4 x 6" then I used the largest Scalloped Rectangle die and used the "die extension" method to make it fit within my 4 x 6" with an equal border all around.  

Next, I used one of the Grass Slimline dies to cut grass into the bottom portion of my scalloped panel.  Instead of layering my grass on top, I fit it back into the cut out section like a puzzle!  That way I have scalloped edges all around the 3 sides of my grass layer!  ☺ 


I added Distress Oxide ink to both pieces; Peacock Feathers for the top and Twisted Citron & Mowed Lawn for the Grass. 


I added my clouds and stamped a sentiment on grass, then layered onto a piece of white cardstock cut a li'l larger.  My card base is cut at 6" x 8" and scored in half at 4".  I popped my Bunny and Balloon onto front with foam tape.


Thank you so much for taking a peek today! 

HAPPY CRAFTING!!

~Kristine

Head over to Cottage Cutz and do a little shopping today!

Get Social With Cottage Cutz

Friday, December 01, 2023

Hello Sunshine Bay Window Card

Welcome CottageCutz friends!

Kris here to share this Friday edition of the blog.  It's the 1st day of December and there's actually snow flurries out my window as I type this up.  My card however is in stark contrast with a Spring/Summer theme featuring our brand new BLACK FRIDAY RELEASE!!  There are 2 bundles of this release that are both on sale at 60% off!!  Or you can get the individual dies for 30% off.   See the whole release HERE.  

TODAY is the last day of the Black Friday BLOWOUT SALE!!  Save up to 85% ☺


When I saw the window die in this release I decided to make a BAY WINDOW card and I think it turned out so cute!  I used the following dies:

Garden Window
Hanging Plants
Garden Butterflies & Bee
Garden Flowers
Sentiment, Hello Sunshine
Stitched Sun, Clouds & Umbrella (cloud)
Grass Slimline

(inside of card)

Design Steps:


I cut my side-folding card base 5-1/2" x 11" and scored at 5-1/2", 6-3/4" and 9-3/4"


Front of Card:

- I cut a piece of pink patterned paper 5-1/4" x 3" 

-  (2) pieces of plaid paper 5-1/4" x 1"

Inside of Card:

- I cut a piece of blue cloud patterned paper 5-1/4" x 3-7/8"

- a piece of pink patterned paper 5-1/4" x 1-1/4"

- a strip of polka-dot paper 5-1/4" x 1/4"

- a piece of green pattern paper 3-7/8" x 2" - die cut the top with Grass slimline


Front of Card:

- I glued the pink piece to the middle of my card front.  

- I die cut the window as shown above.  *Keep the window that is cut out for the inside. 


Inside of Card:

- I added strips of Scor Tape around the window opening 

-  adhered a piece of 3" x 4" window sheet.  


For the front of card:

- I die cut (2)  windows from white cardstock and glued them on top of each other.  

- I added 1/8" Scor Tape to back and adhered to acetate on the front of card.  

- I adhered the (2) plaid strips to side panels.


For the inside:

- I adhered the pink/white window that I had left over to the window sheet 

- I cut (2) pieces of yellow beehive paper to cover the taped acetate parts above and below the window (size will depend on your exact placement of your window).  

*NOTE:  I initially adhered the yellow paper above & below the window, but later decided to cover the lower piece up with the same green as my grass so my sentiment would stand out.  


- I adhered the blue piece inside ... about 1/8" to the right of my middle score line

- I adhered my grass on top.  

- I added strips of 1/8" foam strips to the back of my pink layer and placed centered between the blue/green layer and the right edge of card.  

- I glued my 1/4" polka-dot strip to the center of pink layer. 


I die cut the decorative elements from white cardstock and I colored with Copic markers then adhered to front and inside of card as pictured below.  


Here it is standing up with the front panel tucked behind the popped up side panel.


Check out this WHOLE amazing release 


Thanks so much for looking!  I hope you are inspired to get crafty with your favorite CottageCutz dies!  

~Kris


Saturday, November 18, 2023

Autumn friends Celebrate Thanksgiving

Hello CottageCutz friends! Thanks for taking the time to stop and visit with us today. It's Mary Marsh here bringing you the Saturday edition of the Blog.

It's new release time!!! We have our Christmas 2023 release in the online store that has 40 designs. It's an old-fashioned Christmas theme. You can pick up the individual dies at 30% off for a limited time.

We also have a new Fall 2023 release in the online store with 15 designs. You can also pick up these individual dies at 30% off for a limited time.

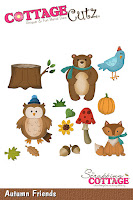
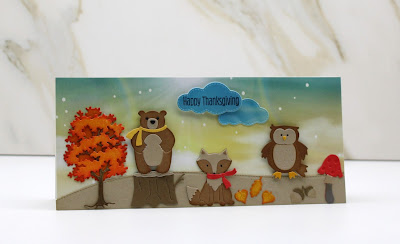
Today for your viewing pleasure, I am featuring the new Autumn Friends and the Fall Tree dies. I created a slimline Thanksgiving card for a family that has 2 young boys. I thought the whimsical style would be a perfect card for them. So, let's get started with some details of how I created my card. 

Design Steps:

I started my card this week with the colors. I used the colors from the Splitcoaststampers color challenge #974. We were to use poppy parade, crushed curry, pecan pie and crumb cake for the color combination. Optional was anything goes. I chose the addition of blue for this part. 
poppy parade, crushed curry, pecan pie, crumb cake 
I cut the Autumn Friends images in the challenge colors plus a few allowed neutrals. 

For the Fall Tree, I wanted the look of the trees we see in PA in the Fall season.  So, I cut in white cardstock and blended barn door and fossilized amber distress inks to get a beautiful Fall color. I colored the 3 leaves with the same inks. These inks are a match for the Stampin'Up colors. 
Next, I chose this pattern of designer paper for the card background. I liked the blue sky and the sun rays. It's from a pack called "heavenly skies" (Divinity Designs) and they are sized for a slimline card at 6" x 9".  
I cut a white card base 4" x 9" and the designer paper is also 4" x 9" to cover the white card front. 
 I attached the designer paper to the card base. And cut a slope in the crumb cake shade using the Hills Slimline die. They are both attached with double sided tape. 
I attached my images with clear drying glue except for the Bear & Owl. I used dimensional adhesive to have lifted slightly off the card base. 
To complete the card, I cut a couple of clouds using the Stitched Sun, Clouds & Umbrella die. I cut them from the leftover designer paper.  Stamped my Happy Thanksgiving sentiment and attached to the card base. 
That's it for me for this week. See you next Saturday. Happy Thanksgiving to all our American friends. 

Reminder: Marla has a new video and a giveaway on the CottageCutz YouTube channel. Click here.