Showing posts with label Stitched Square Set. Show all posts

Wednesday, March 06, 2019

Easter Wishes Card

Hello!  This is Sukie and today I'm sharing another card for my guest designer post. I used a combination of dies from the Spring release for this project.  These dies are currently on sale too! It's been a very, rainy few weeks here in Northern California which makes me eager for Spring.
I reached for sunny yellow and aqua inks for my die cuts.  I also incorporated some pinks, purples and greens which all remind me of Spring. The little bunnies in the collection are absolutely adorable.  I combined the Hatching Bunny, Peeking Egg Bunny, Spring Bunny w/Cart and the Bunny Kisses and Easter Wishes die sets for my card.
I created a polaroid type frame with the Stitched Square Set. A larger square was cut with my paper trimmer and inked.  The blue square was adhered inside of the frame and layered on the card base.
The bed of grass was adhered from one side of the frame to the other and the bunny eggs were tucked into the corners.  I slightly trimmed the bunny ear for a better fit on my card.
The bunny and cart were popped up on foam dots for added dimension.  A few flowers were tucked amongst the bed of grass and also popped up.
The "Easter Wishes" sentiment was stretched across the top of my card.  The whimsical color combination plays off the Spring color theme.
Here are the dies used on my card, available here:

Saturday, March 02, 2019

Peeking Bunny (New Die)

Hello Scrapping Cottage friends! Thanks for taking the time to stop and visit with us today. It's Mary Marsh here bringing you the Saturday edition of the Blog.

We have a new release of 36 Spring dies in the online store. There are a variety of designs so perfect for Easter or Spring cardmaking. Take a look in the store you definitely won't be disappointed. And, they are currently on a 25% off sale.

For my card today I am using the new Peeking Egg Bunny and the Bunny Kisses and Easter Wishes dies. He is just the cutest little thing peeking up from the Easter egg.  Just begging to be placed on a card design (lol)!!! So let's get started with some details of how I created my card.

Step 1: I started my card this week with a sketch. I am using the Splitcoaststampers weekly sketch #738. It has lots of layers and the design was a unique one that I thought I would tackle. 

I first decided to figure out what I was going to do for panels 2, 3 and 4. After studying the sketch, I figured I could use a square die and cut it in half for element 2 and 3. Then layer 4 would be the complete square. Tried out my idea first on white paper and when it worked I cut the actual panels in the card stock I was using. Here is a photo that shows what I did.
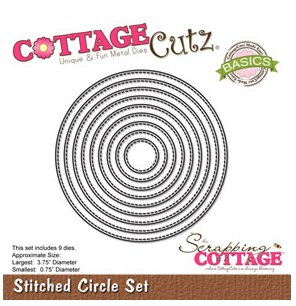
Used the largest of the Stitched Square dies.
Then I cut it in half. Now I have the perfect shape for this sketch.

I selected my designer paper then colors that coordinate with the pumpkin shade. I chose a medium purple and a lighter green. I liked the whimsical appeal of the designer paper. I thought it would work well with this sweet little peeking bunny.

Card base: 4 1/4" x 5 1/2"
Designer Paper: 4 1/8" x 5 3/8"

Next up was cutting my bunny. I used a naturals white cardstock. I like the little speckles in it. Works well for bunnies.  Cut the egg in a medium blue and the flowers in pink and purple.
Step 2: All the card elements are cut and I am ready to start assembling. First I attached panels 2 & 3 to the designer paper.
Attached the image panel with double sided tape. Then I cut the panels to form the straight edge per the sketch.
After the white image panel was attached, I decided I should sponge some background clouds. I laid the stencil on the panel and sponged with tumbled glass distress ink.

I attached the sweet little bunny with dimensional adhesive. I thought it would look better for him to be lifted slightly of the panel.
Now for element 5 of this sketch. I didn't want to use a piece of cardstock or ribbon then a spark went off. I thought I could cut the Bunny phrase and stamp the word "hugs" for a different approach to element 5. I should have planned this out better but sometimes my cards are designs in progress. It was a bit difficult to stamp after the bunny was attached. But with the help of my stamp-a-ma-jig, I pulled it off.
Then I attached the Bunny phrase. It was cut in purple cardstock and the same shade of purple ink for my sentiment.
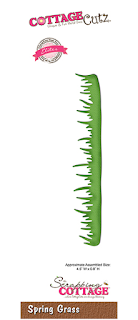
To complete my card, I attached this panel to the card base. And then as another afterthought, I added a couple of patches of grass under the egg. I also sponged the bottom of the image panel with ink that matched the grass.
Well, that's it for me for this week. See you next Saturday.

dies I used to create card:


Saturday, December 02, 2017

Joy Nativity in a Z-Fold Card

Hello Scrapping Cottage friends! Thanks for taking the time to stop and visit today. It's Mary Marsh here bringing you the Saturday edition of the Blog. Hope you were able to jump in on some of the huge savings with our Black Friday sale that was held on the online store.

Today, I am back to Christmas cards. The time is getting shorter and I need to finish up my cards for this year. That is my plan for this weekend. For this post, I decided to make a Z-Fold card and feature the Joy Nativity and Angel Trio dies. So lets get started with some details on this card.

Step 1: this week I started my card with the fancy fold I wanted to use. I like the Z-Fold and thought it would work well with the dies I wanted to showcase. This fold makes a very nice card presentation and is not difficult at all to make.

Dark Brown Card Base: 5 1/2" x 8 1/2"
Step 2: Cut 2 pieces of patterned paper- one is 3" x 5 1/2" and the other is 1 1/4" x 5 1/2".
Attach the 3" piece to the cardstock between the scored lines.
Turn the card over and line-up the 1 1/4" patterned paper to the corner of the card.
Used my bone folder and reinforced the scores that I made on the cardstock. I folded back the score line on the 1 1 /4" panel and now I have my Z-Fold card.
 
 
Step 3: I created the front panel for my card. I used one of the angels from the Angel Trio die and on the square panels I used the Stitched Square (4th largest) and the Square Set (3rd largest) dies.
Assembled the square panels and attached the angel with dimensional adhesive.
I used doubled sided tape and attached the panel to the 1 1/4" panel.
Step 4: Now onto the inside of the card. I used the Joy Nativity die for the inside panel. I also used another of the angels from the Angel Trio die.
Attached the pieces to the card inside with glue dots and Ranger Multi medium matte adhesive. After I attached the kneeling angel I decide to add a few pine sprays to ground the image. I also added some stars to this panel. I used the stars from the Snowglobe Friends die.
I also added stars to the front image panel to complete my card. That's it for me for this week. I hope I have given you an additional idea for a Christmas card. Especially if you bought these dies when the big sale was going on. See you next Saturday!
 
 
Dies I used to create card:


Sunday, March 19, 2017

100% Country Scrapbook Page


Hi! It's Janet with SugarShine Designs here to share with you my very first post as a video designer for CottageCutz. I'm so happy to be given the opportunity to share projects with you. You will see a variety of projects from me including scrapbook pages, cards and other dimensional projects.

Today's project is a scrapbook page featuring the adorable stamp and die set, Farm Animals. This set is so cute! I couldn't help but use them in a page about my family's visit to a ranch in Arizona a few years ago. This set has so many applications that I'm sure you'll see these animals show up in some of my future projects.


For the photo mats, I used three stitched die cut shape sets including the circle, oval and square sets. I also used the double-stitched rectangle set which adds a unique look. The Spring Grass die is used in the page's title.


Click the video link below to see how the page was made using all these great dies. Thanks for stopping by and have a great week!


Dies Used in Today's Project:

 Farm Animals Set
 Spring Grass Die


 Double-Stitched Rectangle Set

 Stitched Circle Set

 Stitched Oval Set

 Stitched Square Set