Showing posts with label Stitched Circle Die. Show all posts

Saturday, January 26, 2019

We Go Together


Hello Scrapping Cottage friends! Thanks for taking the time to stop and visit with us today. It's Mary Marsh here bringing you the Saturday edition of the Blog. We have a new release of Valentine & St Patrick Day dies in the online store. Each one is cuter than the next and they are on sale for a limited time at 25% off.

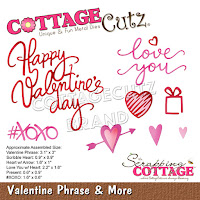
Today for your viewing pleasure I have a Valentine card using the Love Latte & Donut + the Valentine Phrase & More dies. So let's get started with some details and a tutorial on how I created my card.

Step 1: I started my card with the idea of using the weekly sketch #733 from Splitcoaststampers. I liked the layout and thought it would work well for the dies I had in mind.
I wanted to stick with the traditional Valentine colors of red and white with some black, pink & blue accent colors for the images. I found several patterned papers that I liked but eventually settled on this one. It is part of a Valentine collection of papers. I thought I should stick with paper that is a bit more playful because of the images and sentiment I am using.
Started cutting the card images using a medium brown and pink for the donut, a darker brown for coffee in cup and a caribbean blue for the coffee cup.
I cut the images to go across the top panel (element 6 of the sketch). I cut these in black and red cardstock. Wanted a contrast across the top. I only cut 4 because I thought the "xoxo" image would count as 2. The sketch has 5 images across.
I used the 2nd largest Stitched Circle dies to cut my circle for element 4 of the sketch.That size was large enough for my coffee cup image and also my sentiment. Before I stamped the sentiment I placed my coffee cup at the bottom left and then used the Stamp-a-ma-jig for the placement of my image.
Step 2: Now that all the card elements are cut, I am ready to start card assembly. I attached the designer paper to the red layer with double sided tape. My top rectangle panel is embossed with a heart embossing folder. This panel is 1" x 5 3/8".

I attached my sentiment circle with double sided tape. I cut the top portion of it off and slid the circle under the red embossed layer. 
To secure the images across the embossed panel, I used glue dots and Ranger multi medium matte. 
Attached the coffee cup and donut to the image panel. 

And then, to finish off my card I attached to the white card base and scattered a few hearts to the image panel. 
Well that's it for me for this week. I hope I have given you another idea for using these 2 sweet Valentine dies. See you next Saturday.

Dies I used to create card:


Wednesday, November 21, 2018

Baked with Love Layout

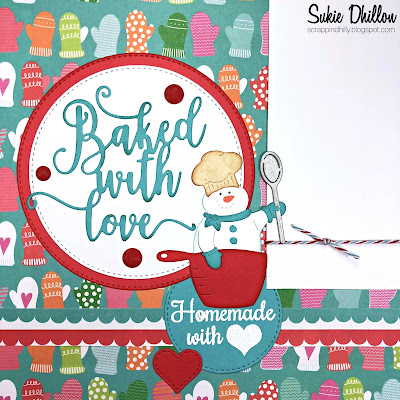
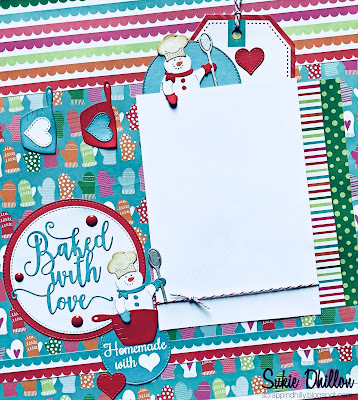
Hello!  This is Sukie to share a layout page for my guest designer post.  When I saw the adorable Measuring Cup Snowman die, I was immediately inspired to create a layout page to memorialize our holiday goodie baking event.
I found the perfect papers in my stash with the oven mitt background. The rich colors are so beautiful.  I cut out a few of the measuring cups and an additional snowman for extra embellishments on my page.  All of the die cuts were inked on the edges for a bit of dimension.
The Stitched Circle Set was used for the different sized die cut circles. The hearts are from the Stitched Heart Set.
I tucked in a journaling tag behind the photo mat accented with a die cut heart.  The sweet snowman was placed on the die cut circle and adhered next to the tag with some Glue Dots Adhesive Tape.  A bit of Peppermint Icicle Trendy Twine was the perfect accent on my photo mat and tag.
A line of measuring cups hanging along the edge of the paper provides a fun element on my layout.  The hearts were adhered to the measuring cups with some Memory Book Glue Dots.
The whimsical title was placed on the double die cut circle so it would pop on my page.  I simply added the the measuring cup snowman next to the title for a cohesive look.
I placed the title on my layout page and tucked in heat embossed sentiment from the Scrappy Moms (retired) "Filled with Love" stamp set.  A few enamel dots and die cut heart were the finishing accents on my layout page.
Here are the the dies I used to create my layout page available over at Cottage Cutz:
The Black Friday sale has already started over at Cottage Cutz with some amazing prices, head on over to check it out!

Wednesday, October 31, 2018

Introducing A New Guest Designer

Hello Scrapping Cottage friends! Thanks for taking the time to stop and visit with us today. We have a new guest designer with us for November and December. Let me introduce to you Sukie Dhillon. Here is a brief bio that will give you some information about Sukie.

"My name is Sukie Dhillon and I was born and raised in Northern California.  The most important thing in my life is my family.  I'm a proud Mom to 2 wonderful children who are both away in college. I've been married to my biggest fan and supporter for 27 years.  When I'm not working, I take cover in my craft room.  Creativity is an escape from my busy life.  I love being crafty and am passionate about creating cards, tags and scrapbook pages.  Creating with vibrant and bright colors brings me so much happiness.  I love to embellish my creations.  It's the simple things in life that bring me joy and playing with dies and paper is one of those things"!

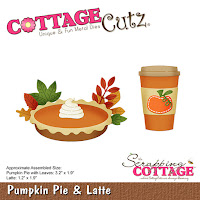
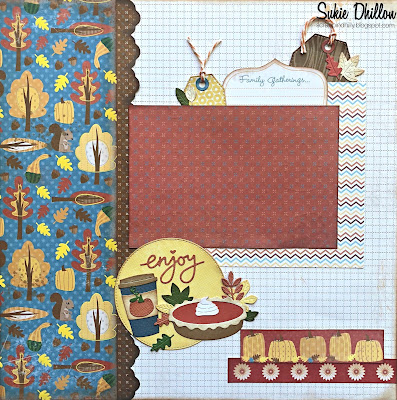
Today we thought we would give you a sneak peek of what's to come from our guest designer. Sukie is a talented scrapbooker. She has created a great layout today using some of the newest Autumn dies. CottageCutz dies are so perfect to use as embellishments and added accents to your layouts.  Her layout is featuring the Pumpkin Pie & Latte, Fall Phrases, Stitched Circle and Mail Tag dies.

Here are some other views of her layout.


Sukie will be posting her work each Wednesday in November and December. And, there will be details showing the steps of her work. Welcome Sukie. It's nice to have you as part of the CottageCutz team.
 
dies used to create layout:
http://www.scrappingcottage.com/cottagecutzfallphrases.aspx
 
http://www.scrappingcottage.com/cottagecutzpumpkinpieandlatte.aspx
 
 
http://www.scrappingcottage.com/cottagecutzmailtagset.aspx

http://www.scrappingcottage.com/cottagecutzstitchedcirclesetbasics.aspx


Saturday, April 14, 2018

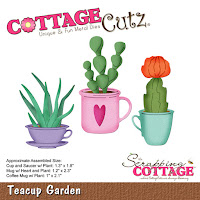
Teacup Garden (new die)

Hello Scrapping Cottage friends! Thanks for taking the time to stop and visit with us today. It's Mary Marsh here bringing you the Saturday edition of the Blog. We have a new release of dies and they are 25% off for a limited time. The new dies are the Llamas & Botanical. There are 13 new designs in this release.

Today for your viewing pleasure, I am featuring the new Teacup Garden die. I thought it would be a good one to use for a Mother's Day card. So let's get started with the details on how I created this card.

Step 1: This week I started my card with a sketch I found online. I thought it would work perfectly to showcase the Teacup Garden image as well as add layers to my card. Since I like to use patterned paper, the addition of layers to my cards always works for me. This one already had the layer panels and shapes sized out. I usually just estimate sizes but this worked for me this week.
Step 2: I looked through my pattern paper and found this design that had cups on it. Even a cup with a heart - how perfect!. I just had to decide on my other card colors. For my card base, I used melon mambo cardstock that matched the patterned paper.

The center square layer is patterned paper from the same collection. I used the 2nd largest  stitched  rounded square  die to cut it and then a corner rounder.
On the long gray panel I used an embossing folder that somewhat matched the patterned paper underneath it.

Card Measurements:
Melon Mambo Card Base:  4 1/4" x 5 1/2"
Patterned Paper Background Layer: 4 1/8" x 5 3/8"
Gray Circle: 4th largest Stitched Circle die
White Circle: 4th largest Circle die
Step 3: Once the card colors and papers were selected, I was ready to cut the teacup and succulent image. For the cup I used melon mambo cardstock, a garden green for the succulent and a pink for my heart, This die even includes a piece to simulate dirt. For that,  I used chocolate chip cardstock.
Step 4: I started some of the card assembly. Attached all of the panels except the image panel. I wanted to stamp my sentiment first so I would have the placement I wanted before I attached the image.
Since I was using a photopolymer stamp set, I pulled out my MISTI just in case I didn't get a good image the first time around. I thought the first stamping was a bit light so I inked and stamped a 2nd time. 
I attached the cup to the white circle with dimensional adhesive and then attached it to the gray circle.
 
 Step 5: Instead of another circle that is in the sketch, I decided to use a Stitched Heart and stamp the "Mother Phrase' on it. With a sketch you don't always have to use the shape called for. As long as your finished product looks like the sketch layout, you're good.
 
The stamp I am using is a cling stamp so I used my stamp-a-ma-jig for placement. With this tool you are stamping on plastic, and in the photo it looks like its not a good image. But, you are only using the plastic for a straight alignment. Once it's stamped, it's fine and usually with the cling stamps I get a good impression the first time. I haven't figured out how to use the MISTI with these stamps.
 
 
To complete my card, I attached the heart. I thought about adding some sequins or enamel dots. But with the background paper pattern being a bit busy I thought they would be lost. So it's complete as is and now I have another card for Mother's Day. 
I hope I have given you another idea on a way to use these new dies. For additional samples, look back on the blog. the DT has been showing them all week. I will see you next Saturday.
 
dies I used to create card:
http://www.scrappingcottage.com/cottagecutzteacupgarden.aspx
http://www.scrappingcottage.com/cottagecutzcirclesetbasics.aspx

http://www.scrappingcottage.com/cottagecutzstitchedcirclesetbasics.aspx

http://www.scrappingcottage.com/cottagecutzstitchedheartsetbasics.aspx
http://www.scrappingcottage.com/cottagecutzstitchedroundedsquaresetbasics.aspx