Showing posts with label Spring Grass. Show all posts

Thursday, March 17, 2022

Spring Chicken

 Hello Friends

Happy St. Patrick's Day!! I hope you are wearing green!!

Today, I am making a thank you card because my stash is running a little low.  I decided to use the cute Spring Chicken for my card.  I love the little sign she has with her.  You can really put any sentiment you want on it.


Design Steps
1.  Use an A2 white card stock base and cut a piece of blue 4 1/8 x 5 3/8 run it through a cloud embossing folder
2.  Using the Spring Chicken die and cut the pieces out of tan, rust, brown, pink, yellow, purple, red, and green.  Shade the pieces with ink and glue together with a fine tip glue.  Stamp your sign with Thank You
3.  Cut 3 white frames using the largest of the Pierced Wide Rectangle set.  Glue the frames together.  Use the Spring Grass die and cut it out using green card stock.  Glue the grass to the back of the frames

4.  Layer the back of the frame with dimension tape.  Adhere it to the blue cloud card stock
5.  Glue in the Chicken then the sign.  Finally add in the flower and the white ribbon bow. Glue the blue panel to the white card base and your card is complete

CottageCutz Products


We have more inspiration on our YouTube Channel check it out HERE
Thanks so much for stopping by!  And I will see you next Thursday.

Blessings and Take Care


Wednesday, September 08, 2021

There's a Scare in the Air!

Hello! This is Sukie and today I'm sharing a Halloween card for my design team day.  All of the products used on my card are part of the huge Labor Day sale going on in the store

I used the Lil' Bluebird Designs Home Sweet Home stamp and die set for my card and changed it up to create a Halloween theme.  I pulled out my Distress Inks to watercolor all of the stamped images.  I cut out a couple of grass strips from the Spring Grass die set.
The film strip and stars are from the Film Strip Slimline die set.  I used some Oxide Inks to ink blend the rectangles by masking off my card base.
Once I adhered the film strip onto the background, I inserted the grass along the bottom edge of each of the frames.  The little Halloween houses were placed along the grass.
I continued to build the spooky but cute scene by adding the remaining colored images.
To complete the Halloween scene, the little stars were scattered inside each of the frames.
The final touch on my card was a Halloween themed sentiment from one of the stamp sets in my stash.
Here are the products used on my card:

Thursday, August 19, 2021

Missing You

 Hello Scrapping Cottage Friends,

It is Pam creating with you today on the blog!

It is time to make the CottageCutz family a little bigger.  We are adding a brand new line of Photopolymer Clear Stamps call Lil' Bluebird Designs.  We are kicking off this new line with 16 new stamp sets that have coordinating dies.  Make sure to check all of them out by clicking HERE

 Today, I am featuring the Forest Friends set.  I have family all over the country so I love sending Miss You cards to them.

Design Steps:

1.  Use a Slimline card which measures 8 1/2 x 3 1/2.  Cut a piece of blue DP 3 1/4 x 8 1/4,  also cut out 3 white Windows using the Window Slimline die
2.  Stamp your images in Memento Black ink using the Forest Friends Stamp set
3.  Color the stamped images with Copic markers.  The colors I used are in the picture above.  After you are finished coloring use the Forest Friends Coordinating die set to cut them out
3.  Glue all three frames together then glue the blue DP to the back of the frame.  Use the Spring Grass die to cut out 2 pieces of grass on green card stock.  Cut the grass down to 2 1/2 inches and glue them into the bottom two frames as shown

4.  Using the Lighthouse w/Clouds die cut out 2 white clouds. For the little hearts I used the Love Cupcake die and red card stock.  I cut out 3 hearts.   Glue all of your pieces into the frame as shown above.  Add the sentiment, sequins and hearts and your card is complete

CottageCutz and Lil' BlueBird Designs


Thanks so much for stopping by today!  Please check out all the adorable new stamp set we have in the online store!
Blessings and Take Care
Pam

Thursday, August 12, 2021

Birthday Wishes

 Hello Scrapping Cottage Friends

It is Pam creating with you on the blog today!

It is time to make the CottageCutz family a little bigger.  We are adding a brand new line of Photopolymer Clear Stamps call Lil' Bluebird Designs.  We are kicking off this new line with 16 new stamp sets that have coordinating dies.  Make sure to check all of them out by clicking HERE

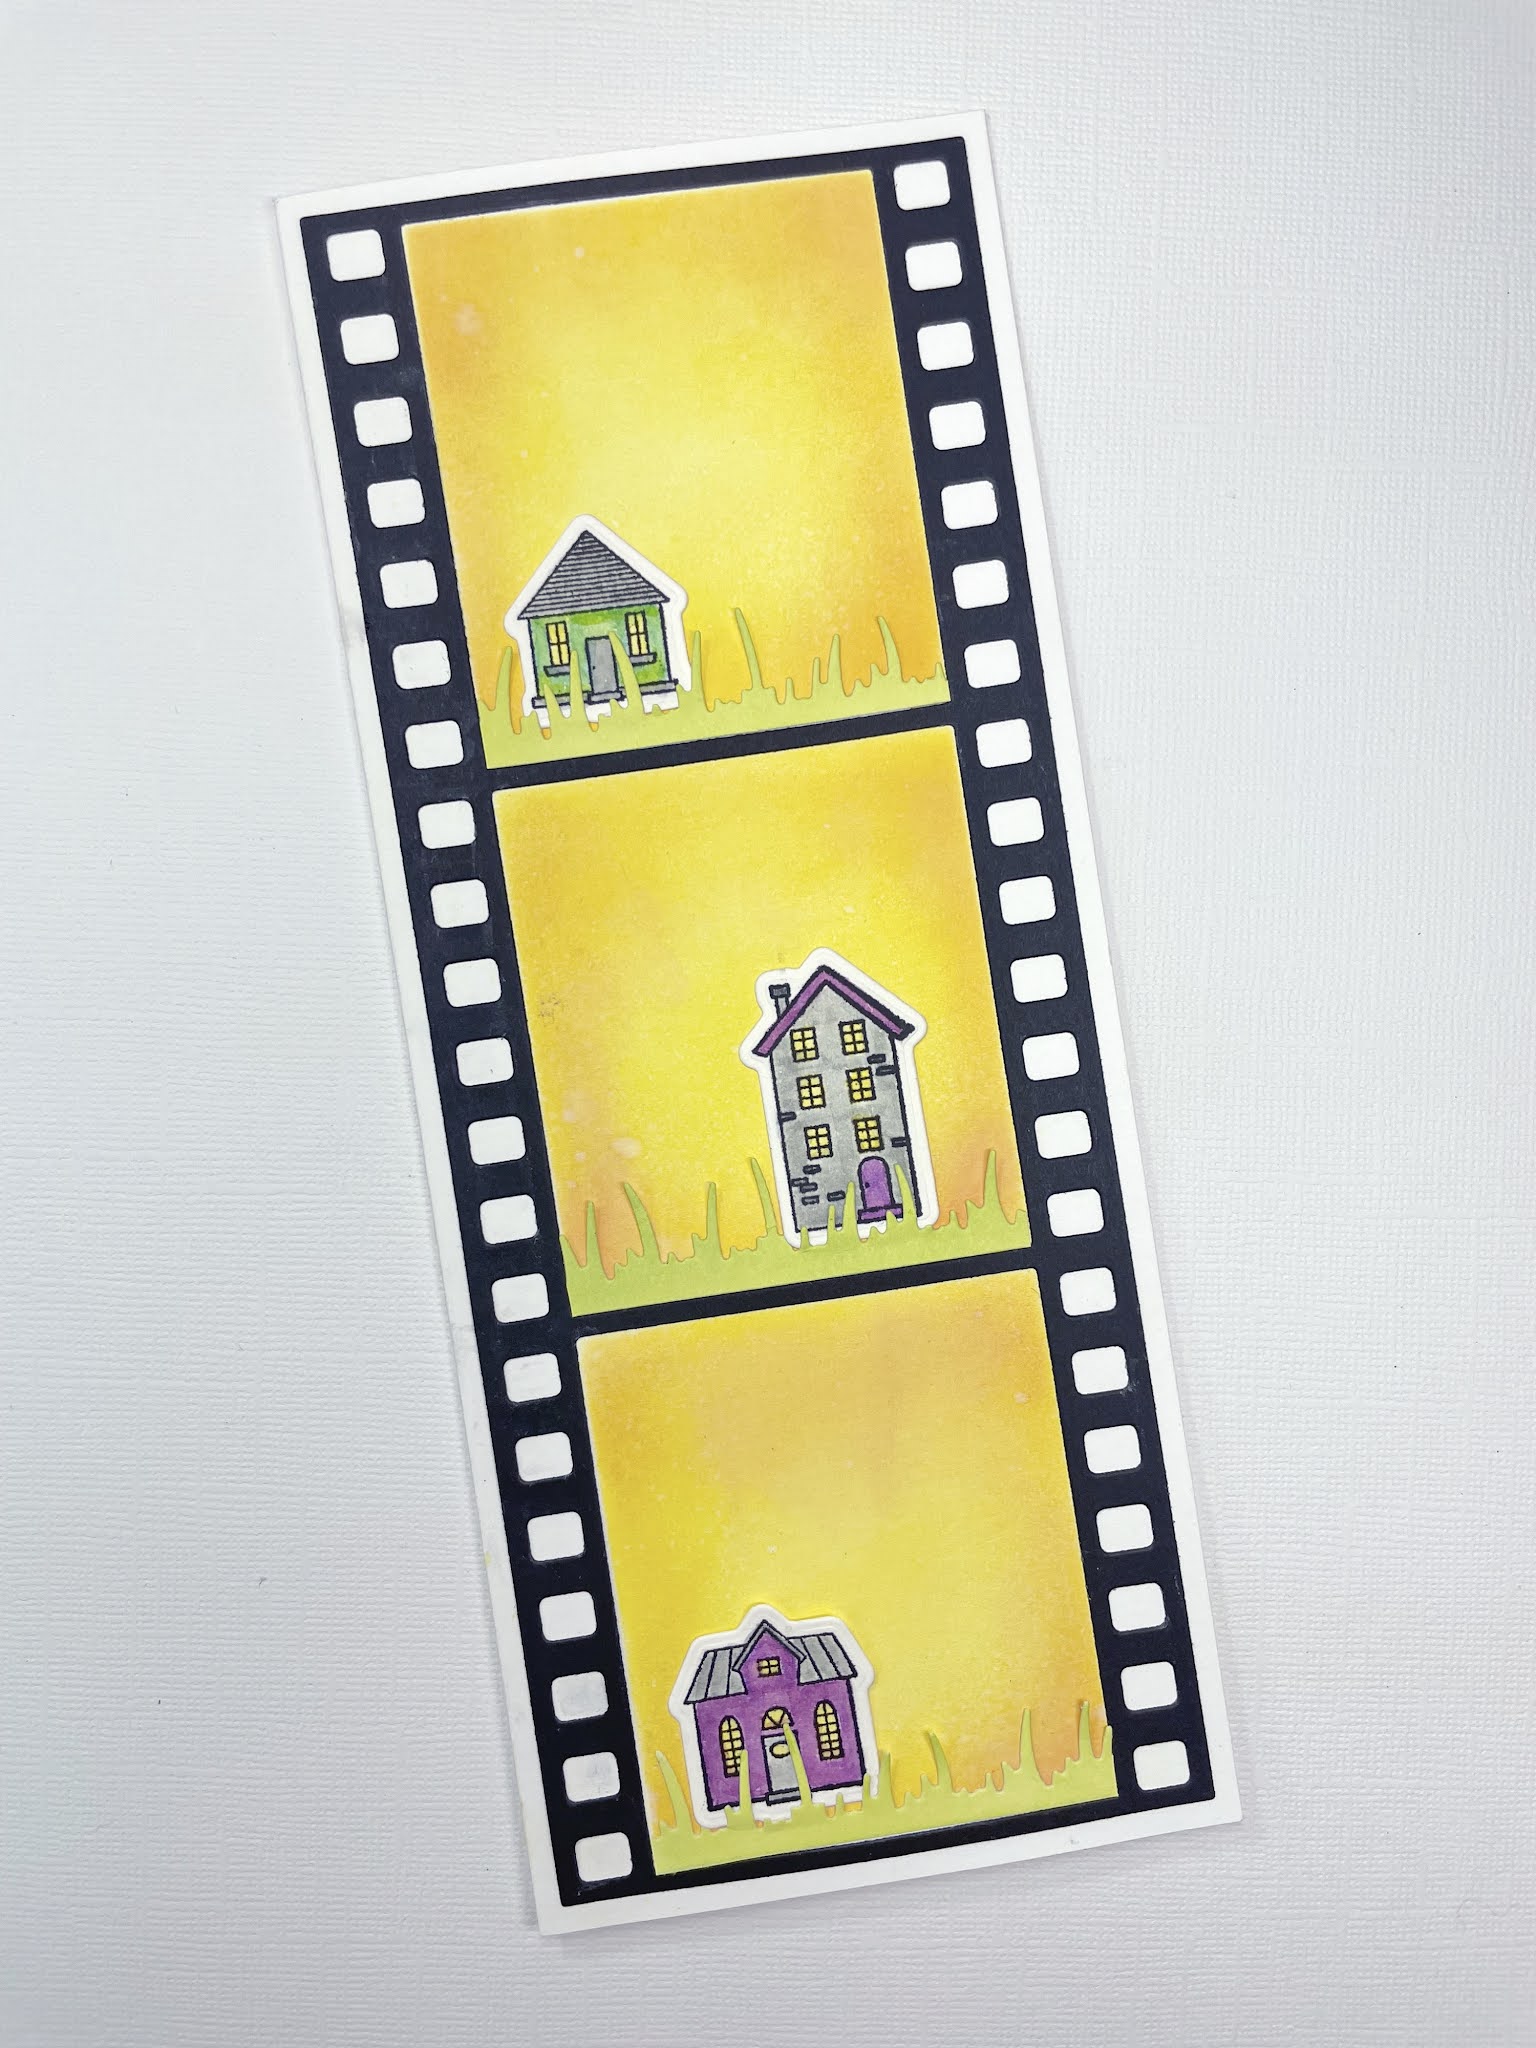
 Today, I am featuring the Happy Birthday set.  


Design steps:

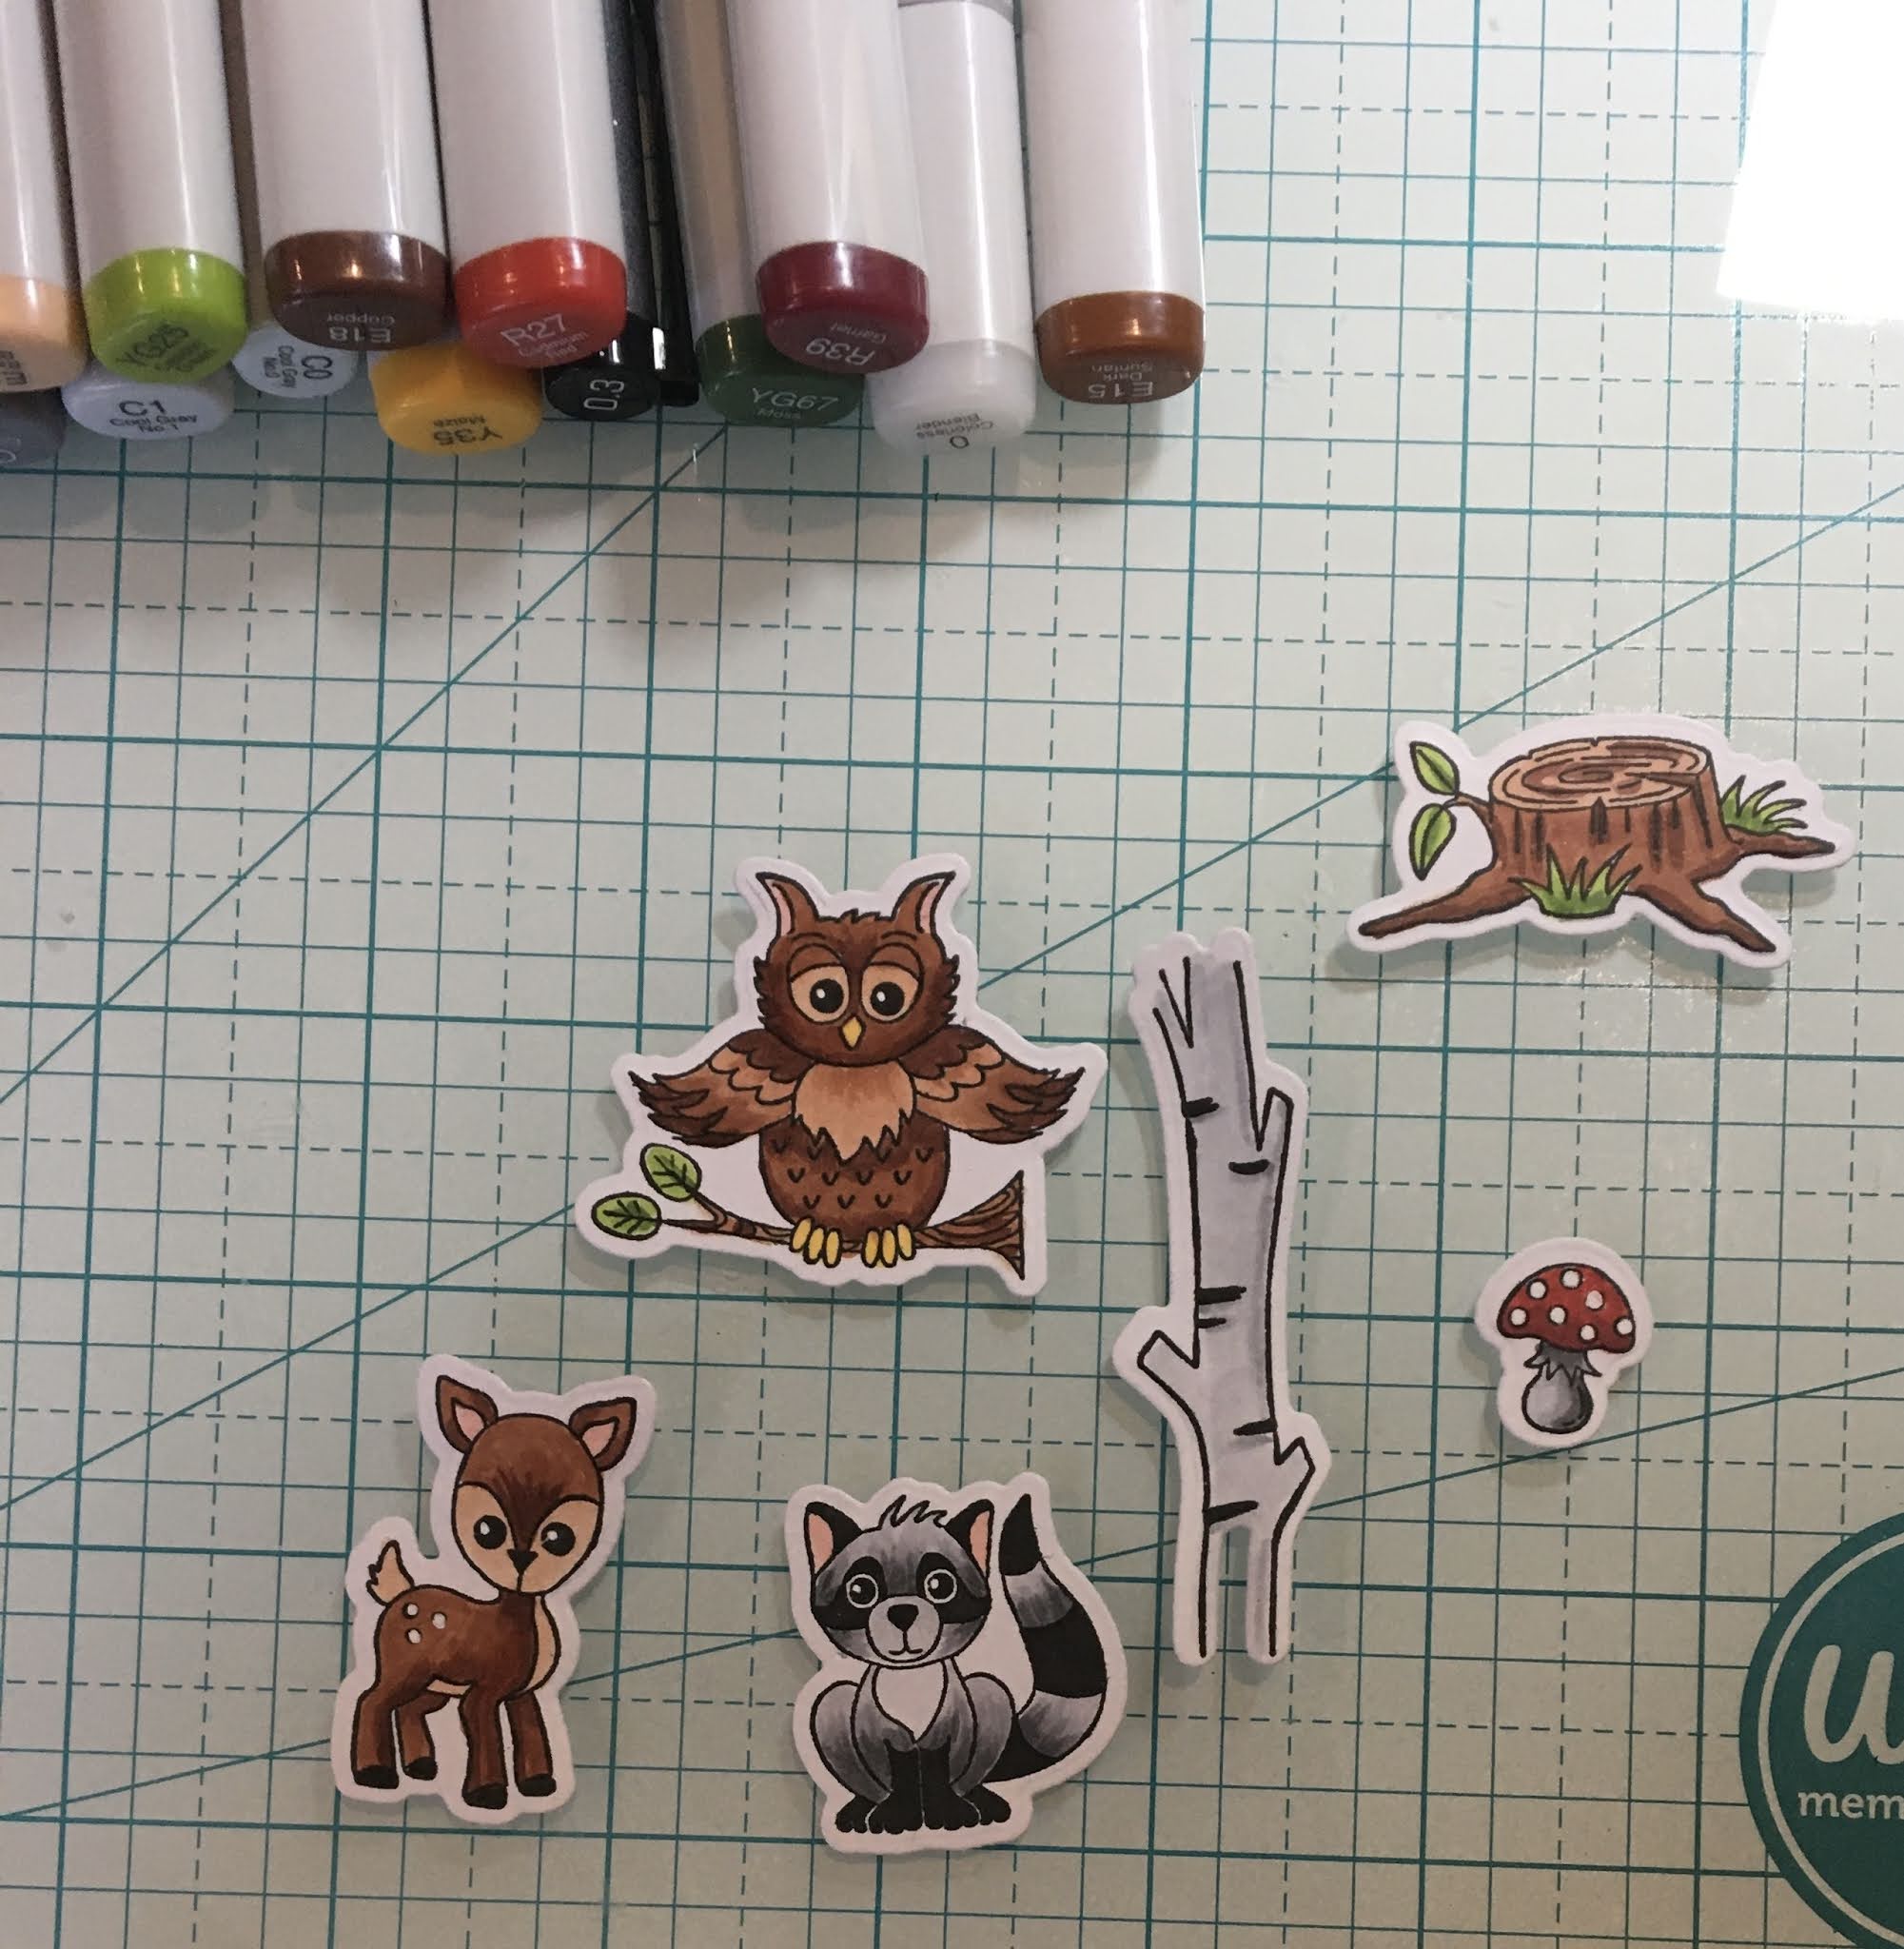
1.  Using the Happy Birthday set stamp the images in Memento Black.  Use your Copic makers (colors pictured below) to color your images and then cut them out with the coordinating dies


2.  Using the second from the smallest Pierced Square die cut out 4 white squares.  Blend the squares with a blue ink
3.  Create little scenes with the critters.  I used Spring Grass cut on green card stock and Hills Slimline for the brown card stock hills.  When the scenes on each square are complete I cut 4 white Scalloped Squares using the second from the smallest die.  Then I layered the pieced squares on top of the scalloped square

4.  Pop up the little squares as shown above.  Stamp your sentiment which is also included in the Happy Birthday stamp set.  And your card is complete

Lil' Bluebird and CottageCutz Products


Thanks so much for stopping by today!  Please check out all the adorable new stamp set we have in the online store!
Blessings and Take Care
Pam