Showing posts with label Sending Hugs Bear. Show all posts

Sunday, May 20, 2018

Blooming Meadows

Hi!

It's Anja here. Meadows around me are in full bloom. I love this time of the year because everything is blooming and colors are just beautiful. But not everyone loves this time of the year. I have a few friends and family that just waits for the trees, flowers and grass to stop blooming, because it gives them awful allergies. And because of all this sneezing around me I got an idea for today's project. I made two Feel better tags to send positive thoughts to all those who cannot enjoy the nature blooming.


For this project I used:
- Cottage Cutz dies (Flowers for Mom, Mail Tag Set, Spring Foliage Border, Ouch with Tooth, Sending Hugs Bear),
- white card stock for die cuts,
- Distress inks (Peeled Paint, Bundled Sage, Pine Needles, Mustard Seed, Mowed Lawn, Stormy Sky, Dust Concord, Seedless Preserves, Fired Brick, Barn Door, Forest Moss),
- brush,
- scissors,
- violet ribbon,
- paper glue.

First I cut the tags and colored them with Distress Ink and brush.


Then I die cut and colored flowers and other greenery.


Then I cut the sentiments and colored them with Distress Inks.


And then I had to glue everything together. I cut Spring Foliage Border into two pieces, one for each tag.


And this is all from me for today. Have a nice Sunday and see you again next week.

Anja Z.


Cottage Cutz dies I used:


Sunday, January 28, 2018

Sending Hugs

Hi!

This is Anja again. Yesterday Mary showed you some new dies that are already in the store. They are super cute. I'm still waiting for mine to come, so I used a cute bear die today and some Distress Oxides to make a simple card.


I used:
- Cottage Cutz dies (Sending Hugs Bear, Oval Set (Basics),
- Distress Oxides (Worn Lipstick, Candied Apple, Abandoned Coral, Fired Brick) and Inks (Forest Moss, Fired Brick),
- white card base 10,5x15 cm),
- white water color paper for background (10x14,5 cm) and die cuts,
- Zig brush pens (grey and flesh shades),
- black pen,
- heat gun,
- watercolor brush,
- silicone pad,
- paper glue.

First I made the background. I started with lighter shades and then got to darker ones. It shows on the pictures in which order I added the colors.


When I was satisfied with the colors, I spritzed water over it and dried the paper with the heat gun.


Then I used oval die (the second in size) and embossed it on the paper wit my silicon pad and Big Shot machine.


This time I used Zig markers to color the die cuts. I wanted the bear to have a more water colored look.


When I had everything colored I glued it together. And this is the finished card.


Have a nice Sunday and don't forget to check all the new dies in the store. You can get them on discount. Easter will be here soon.

See you next Sunday.
Anja Z.

Cottage Cutz products I used:


Friday, January 19, 2018

Kitty Valentine

Happy Friday!  It's Jeanne posting today with another Valentine's card!  I love this sweet kitty and had to make her grey like my sweet, old grey kitty, Andreya.
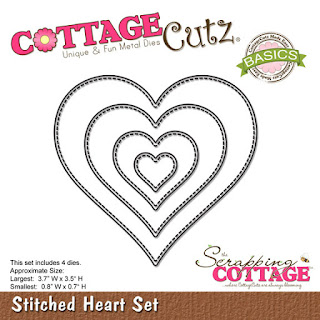
I started with an A2 (5 1/2 x 4 1/4 inch) card base in Real Red, a piece of patterned paper cut to 5 3/8 x 4 1/8 inches and a heart die cut using the largest of the Stitched Hearts dies.
Next, I cut out the cat and small heart using the patterned paper and two shades of grey - Basic Grey and Smoky Slate.
I used Smoky Slate ink and a sponge dauber to add some depth to the edges.  I colored the ears pink and nose black using Copic markers.  Then I assembled the cat.
I put an  adhesive sheet on the back of the red cardstock and die cut the sentiment.
Finally, I assembled the card.  Since the sentiment die also cut out a little red bow, I thought that would be the perfect finishing touch for my sweet kitty.  You can see it in the final card.
Dies I used:
http://www.scrappingcottage.com/cottagecutzkittywithspringchicks.aspx
http://www.scrappingcottage.com/cottagecutzstitchedheartsetbasics.aspx
http://www.scrappingcottage.com/cottagecutzsendinghugsbear.aspx
http://www.scrappingcottage.com/cottagecutzlovehearts.aspx

Thanks for stopping by today - have a wonderful weekend!


Thursday, December 28, 2017

Valentine's Day!!

Hello Everyone!

It is Pam creating with you today! I hope you had a wonderful Christmas celebration!  I can't believe I am saying this but I am starting on my Valentine's!!! The little bear I am using is actually from our Get Well release.  But she is very versatile and so is the sentiment. They are perfect for Valentine's Day cards!


Design Steps:

 1.  Cut an A2 white card base then on the front flap cut off a 2 inch strip.  Cover the inside first with a red piece of card stock then a piece of DP.  Next on the left side of the inside cut a 2 x 5 1/8 piece of white card stock and glue inside to the left

2.  Using the Stitched Cupcake die set cut out 4 stitched red hearts and glue 3 of them next to the white panel on the inside of the card.  Then glue the remaining heart to the white panel as shown below
 3.  Next cut a piece of red card stock for the front flap at 2 1/8 x 5 3/8 then layer on a piece of DP at 2 x 5 1/8. Glue to the front
4.  Use the Sweetheart Doilies die and cut out the largest circle in white and then the next largest in red glue together
 5.  Cut the sentiment Sending Hugs in red using the Sending Hugs Bear die
5.  Glue the sentiment to the front flap of the card and also attach the heart doily

6.  Using the Sending Hugs Bear die cut out the bear in brown, the flower and bow in red, the stem in green and the tummy in tan.  Shade all the pieces and assemble them add black rhinestones for the eyes


 7. Place pop dots on the back of the bear and place the bear onto the heart doily


Cottage Cutz Products!


I love how the cute bear made this Valentine extra special!! Hope you give it a try!

Blessings
Pam