Showing posts with label Pierced Wide Square Frame Set. Show all posts

Monday, February 05, 2018

Easter Morning

Hi, Lois here today.  I'm hoping that winter is over here in Florida.  I don't do well in the cold!  To keep my spirits up, I've been enjoying playing with the new release of Easter/Spring dies from CottageCutz.  Be sure to check them out over on the website while they're 25% off.  My card today uses the Spring Tree of Life die.


I wanted to try a bit of background sponging on my card to depict a sunrise, so I cut the image from white cardstock -- which would not take away from the background.


Using sponges, I made my background from Ranger Distress inks -- Scattered Straw, Wild Honey, Worn Lipstick, Milled Lavender, and Tumbled Glass.  I wanted the sun to be in the lower right-hand corner, so I slanted the colors.


I then laid my die-cut onto the sponged background and marked the edges.


I trimmed the panel slightly inside the pencil marks and glued down the diecut.


Then I cut my card base:

Purple - 8 1/2" x 5 1/2"
Pale yellow patterned paper (a watercolor wash) - 4" x 5 1/4"


Lining up my yellow paper in my MISTI stamp positioner, I stamped my Easter greeting . . .


. . . and constructed my card, placing the die-cut piece at an angle.


I cut a frame from the same purple cardstock as the base and added strips of foam tape to the back.


I then mounted the frame on top of my die-cut -- and I was finished.


CottageCutz dies used on my card are:

http://www.scrappingcottage.com/cottagecutzspringtreeoflife.aspx

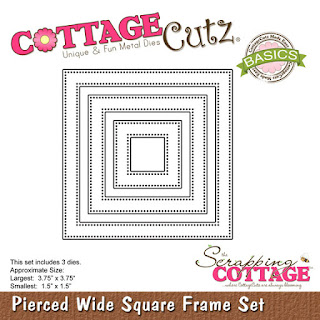
http://www.scrappingcottage.com/cottagecutzpiercedwidesquareframesetbasics.aspx


Monday, November 20, 2017

Thank You, Doctor!

Hi, Lois here with my pre-Thanksgiving post.  Along with Thanksgiving comes Black Friday.  The Scrapping Cottage/CottageCutz is celebrating Black Friday with a new release of 12 Get Well-related dies.  They will be available at special pricing for the bundle.  The one I used for my card today is called Medical Bag.  It's not actually a "get-well" card, but rather a thank-you card you might send your doctor for a job well done.


To start my card I cut a piece of heavyweight white cardstock 5 1/2" x 8 1/2" and scored it at 4 1/4".  In addition, I cut a piece of red cardstock 5 1/4" x 4 1/8" and a piece of black and white plaid patterned paper 4" x 5 1/8".


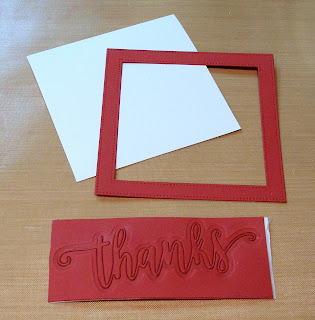
The reason I left only 1/8" difference in the layers on my card is because I wanted to cut a frame with the square wide-frame die, and I needed larger than normal base layers.  I also cut a piece of white cardstock slightly smaller than the frame and the "thanks" sentiment die.


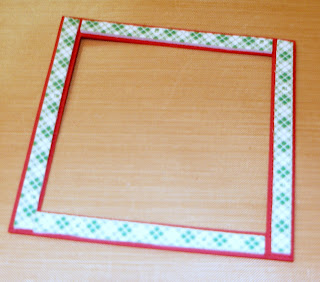
I then  added strips of foam tape behind the frame.

Now I was ready to cut the pieces from the Medical Bag die.  I've embraced a "tool" that Janet introduced us to in one of her videos -- a fun foam sheet wrapped with Press 'n Seal.  This is marvelous to keep all those little die-cut pieces from getting lost.  Thanks, Janet!!!


I sponged a little bit of darker blue on the caduceus and constructed the doctor's bag and stethoscope.  As I was putting the stethoscope together, I realized that the largest circle should have been gray, not black.  So I cut another circle from the gray cardstock.  I then stamped the sentiment onto the white panel inside my frame.


All that was left now was to complete my card.  I glued the "thanks" at the top of the card and the completed frame below it . . . and I was done.


Be sure to check out the CottageCutz website on Black Friday.  Here's a video showing all the dies in the Get Well release.

https://www.youtube.com/watch?v=Ziph4f2FWyE&feature=youtu.be


CottageCutz dies used on this card are:


http://www.scrappingcottage.com/cottagecutzpiercedwidesquareframesetbasics.aspx

http://www.scrappingcottage.com/cottagecutzexpressionsplusthanksphrase.aspx


Friday, May 20, 2016

Flowers on distressed background


Hi, is Vladka!

I love to work with Distress Inks, because it is so many possibility to use them and to play with them. So, I used three different colors today to create this card:


I will show you, how to create this background. Let's start!

Basics:
White card base: 5 1/2 x 5 1/2 inches (cut 5 1/2 x 11 inches, fold in half)
Additional piece of white cardstock or watercolor paper (5 x 5 inches)

Other Supplies:
CottageCutz Dies: Listed Below
Distres markers: Peeled Paint, Rusty Hinge, Fossilized Amber
Other: paint brush, water, acrylic block, paper trimmer, Sizzix machine, Scor-buddy,


1. With Doodle Flower Set 1 and Set 2 dies, cut 2 Flowers out from white cardstock. With Leaves and Stems die and Leafy Flourish 2 cut leaves and leafy flourish out from white cardstock. Color the flowers with Fossilized amber Distress Ink and distress the edges with Rusty Hinge. With Peeled paint Distress Ink color all the leaves. I used sponge to do this. But you can also color it with paint brush, distress inks and water, like I did it here. Spray the water on it and let it dry:


2. With Butterfly Kayla die cut the butterfly out with white cardstock and gently colored it the same way as flowers and spray it with water.

3. Flowers and greenery is prepared. Time to do the background. Take additional piece of paper and color the middle part with all 3 Distress Inks: Peeled Paint, Rusty Hinge, Fossilized Amber as shown on the photo.


4. Now spray a water on it. It can be pretty much water, so that flows here and there. Leave it to dry or speed the drying process with heat gun.


5. Take biggest Square from Pierced Wide Square Frame Set (Basics) and cut it out from previous colored piece of paper to get one square and 2 square frames.


6. To get more intense colors on the smallest square, colored it again with the same Distress Inks as before and add some watter drops on it to get this interesting splotches.


7. Now, glue square and both square frames on the card base and glue also flowers, greenery and butterfly on it, as shown on the photo. I also cut out the Best Friends words with Best Friends Expressions die and added to the card.


You really need to try this, because Distress Inks and the water can do magic and using them together with CottageCutz dies is a fairytale. :)

Have fun and thank you!

Before I go, I just want to remind you on our second CottageCutz challenge with theme Hello Spring. Link button can be found here!