Showing posts with label Pierced Wide Circle Frame Set. Show all posts

Thursday, July 02, 2020

New Summer Release!! Ahoy Matey!

Hello My Scrapping Cottage Friends!

It is Pam having fun with you on the blog today!

It is always exciting when a new release comes and this one is no exception! It is just perfect for summer!  And super fun for all of those pirate loving fans!  This release features 14 different designs and the bundle is a whopping 60% off right now!!  You can't go wrong with this special pricing!!  There is also a 4th of July sale going on too featuring many of the other dies.  Now is the time to stock up on all those essential dies you have been waiting for!!

I am using the new Ahoy Matey! die.  And the parrot is just adorable!!

Background Photo by Giga Khurtsilava on Unsplash
Design Steps:
1.  Cut out all of the pieces using the Ahoy Matey! die.  I used green, blue, black, white yellow and purple card stock 
2.  Shade the pieces using a small applicator and TH inks.  Assemble the pieces using a fine tip glue and a white gel pen for the eye.  I cut the Ahoy and Matey words twice and glued them together for some strength
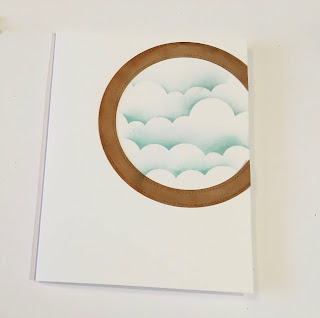
3.  For the background of this card I cut a port hole using the Pierced Wide Circle Frame die.  I inked it and then glued it slightly off  an A2 white card base as shown. Next cut off the part that hangs over the card edge.  I then masked around it and stenciled in the clouds using a cosmetic blender brush and TH ink
4.  Lastly I used the LawnMower dies inner wheels for the black port hole accents.  Glued them down and added Glossy Accents to them for some shine.  I glued down the Ahoy Motey! as shown and then pop up the parrot.  Your card is complete

CottageCutz Products


DON'T MISS THIS FANTASTIC SALE!!! THE PRICES ARE PHENOMENAL!!
I hope you have a wonderful 4th of July celebrating this awesome country we live in!

Blessings and see you next Thursday!
Pam

Monday, October 21, 2019

Holy Night

Hi!

It's Anja here for my Monday card sample post. I made a shaker card this time, using a manger scene.


I'll walk you a bit trough the process of making this card.

1. First I made the center circle part of the card. I cut two circles, one from the Pierced Circle Set and the second from Pierced Wide Circle Frame Set. I colored both using two darker shades of blue Distress Inks and a bit of black ink. Then I spritzed both with water and dried it.

2. Next I cut another whole circle from plastic foil and one more border circle frame from foam. I glued foam on the colored whole circle and filled it with mix of silver star confetti and silver glitters when glue was dry. I glued the foil on top and after that the colored frame. I let it dry.

3. Then I made the manger scene using the new Manger Scene die. I cut it twice from white card stock and once from dark blue card stock. I glued all three together. Then I used embossing ink and gold embossing powder to give it this golden look. I glued it on top of the shaker part.

4. I trimmed dark blue card stock for background (12x12 cm) and spritzed it with gold acrylic paint. I let it dry. Next I used gold ink to color the paper around the edges. I adhere the background on craft card stock. On top of that I adhered the shaker part. And my card was done.


Hope you like my Christmas scene.

Thanks for stopping by and see you again on Sunday.

Anja Z.


Cottage Cutz dies I used for this card:


Sunday, September 01, 2019

Ahoy!

Hi!

It's Anja here. Summer is coming to an end and I want to hold to it a little bit more. I tried to capture a bit of Summer in today's card.


For this card I used:
- Cottage Cutz dies (Compass, Map & Spyglass, Message in a Bottle, Paddles & Rope Ladder, Porthole, Seagull, Crab, Life Preserver, Pierced Wide Circle Frame Set, Circle Set),
- Distress Inks,
- craft card base (125x12,5 cm) and card stock for background (12,2x12,2 cm),
- white card stock for die cuts,
- gold pigment ink,
- black pen,
- embossing folder (wood),
- double sided adhesive tape,
- adhesive foam pads,
- foil (approx. 5x5 cm),
- paper glue,
- scissors.

First I cut all the pieces and colored it with Distress Inks and gold pigment ink. I cut two circle pieces of the porthole.


Next the paddles and the net.


Then the seagull. I used black pen for the eyes.


Next was life preserver.

And then the map and the spyglass.


I cut two bottles, one from foil to add some glass effect to the bottle.


Then I cut, colored and assembled the compass.


I also did the crab.

And two circles for the inside of the card.


Then I switched to the card base and background. I cut paper for the background from craft card stock and cut a hole to the bottom right side. I did a matching hole to the cad base.


I cut background paper to two pieces to get it through my embossing folder. Then I colored it with Distress Inks to get more dimension.


I adhere foil over the hole in the card base. And then I glued the wooden background over it. And after that I adhere all the small pieces to the front and inside of the card.


In the end I made an Ahoy sign and adhere it on the finished card using adhesive foam pads.


And my card was done.


Hope your Summer lasts a bit longer too. See you again next week.

Anja Z.


Cottage Cutz dies I used for this card:


Monday, May 15, 2017

Koala Shaker Card

Hi, Lois here with my Monday post.  CottageCutz recently released a whole batch of baby-related dies.  One of them is a cute koala, which I used on my shaker card today.


Supplies used on this card are:

Blue cardstock  - 8 1/2" x 5 1/2", scored at 2 1/8" and 6 3/8"
Blue cardstock 4 1/4" x 4 1/4"
White cardstock approx. 3 3/4" x 3 1/2"
Patterned paper (2 panels) 1 7/8" x 5 1/4"
Scrap of patterned paper approx. 3 1/4" x 2"
White fun foam
Acetate
Copic markers (B0000, B60, BG32, BG34,Y21, and 100)
Ranger inks - Tea Dye and Antique Linen
Various sequins and seed beads
2 black mini brads
Liquid glue, foam pop dots, and tape runner
CottageCutz dies - Baby Koala w/ Blanket, Pierced Wide Circle Frame Set,  Double-Stitched Circle Set, Double-Stitched Oval Set

When I was thinking about what I wanted to do with this cute koala, I thought he would look cute framed in a shaker card.  To start the card, I cut the koala from white cardstock and sponged him with Tea Dye and Antique Linen ink.  The blanket and baby bottle were colored with Copic markers.


Then I cut the card base and shaker pieces.  I tried an experiment and instead of using foam tape to create my shaker box, I cut three layers of white fun foam with the Wide Circle Frame die. 


As an afterthought (and not shown), I decided that the koala would look better if he were sitting on a little rug.  So I cut another piece of patterned paper using an oval die.  I layered the three pieces of fun foam using liquid glue, glued the white circle to the bottom, and let it sit until the glue was dried.  At the same time I glued the blue frame to the acetate circle.   I adhered the two 1 7/8" x 5 1/4" panels of patterned paper to each side of the "gate."

After the glue had dried,  I brushed the insides of the foam with some baby powder to make it less "sticky" (just in case some of the glue seeped out from between the layers and glued the shaker frame to the card base -- just on one side.


I constructed the koala using foam pop dots and glue.  It was at this point that I realized that he really should be sitting on a rug and cut one from another piece of patterned paper, which I glued to the inside of the acetate.


Then I poured  the various sequins and seed beads into the shaker box and glued on the acetate circle.   I adhered the 4" x 5 1/4" piece of white cardstock to the inside of the card and stamped a sentiment (not shown).  I must admit that, even though I had rubbed the baby powder around the inside edge of the glued fun foam, I did get some errant sequins and beads stick to the sides.  I may have to rethink that in the future.


I did enjoy making this shaker card and hope you might give it a try.

CottageCutz dies used on my card are:
http://www.scrappingcottage.com/cottagecutzbabykoalawblanket.aspx

http://www.scrappingcottage.com/cottagecutzpiercedwidecircleframesetbasics.aspx


http://www.scrappingcottage.com/cottagecutzdouble-stitchedcirclesetbasics.aspx

http://www.scrappingcottage.com/cottagecutzdouble-stitchedovalsetbasics.aspx