Showing posts with label Pierced Rectangle Set. Show all posts

Thursday, August 25, 2022

FORE!

Hello Scrapping Cottage Friends,

We have a NEW RELEASE which is perfect for all those sports fans in the family! It is called Baseball & Golf! It has 16 fantastic dies which will make your card making and scrapbooking pages look great! The release has special pricing right now so go and check it out HERE!

Not only is my husband a golfer but my two nephews take a swing at it too! So I am happy to make a few more cards with the golf theme.  Today's card features the Golf Ball & TeeGolf Basket of Balls, and Golf Bag and Clubs.  


Design Steps:

1.  Start with an A2 size kraft card base, green DP cut at 4 1/8 x 5 3/8, green plaid DP 4 x 5 1/4, strip of green DP 2 1/8 x 5 3/8 and a strip of newspaper DP 2 x 5 1/4
2.  Cut out the pieces using the Golf Ball & Tee Golf Basket of BallsGolf Bag and Clubs on green, red, white, brown and silver card stock.  Cut out the squares using the 6th from the largest Pierced Square die on kraft card stock.  Cut out the the rectangle 6th from the largest Pierced Rectangle die on kraft card stock
3.  Assemble the pieces using a fine tip glue.  I traced the golf basket and put a white liner behind it.  Using the Stitched Alphabet die cut out FORE in red
4.  Glue down the solid green DP to the card front.  Next glue down the plaid DP.  Glue the green strip to the newspaper DP and add it to the front as shown.  Glue the FORE, squares and the rectangle to the front as shown
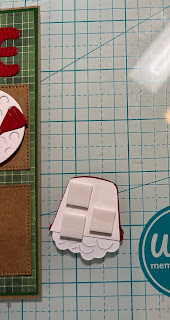
5.  Add dimension squares to the back of the golf basket, golf bag and the ball and then pop them to the card front as shown below and your card is complete

CottageCutz Products


We have more inspiration on our YouTube Channel check it out HERE
Thanks so much for stopping by!  And I will see you next Thursday.

Blessings and Take Care


Wednesday, May 25, 2022

Birthday Easel

 Hello Scrapping Cottage Friends

It is NEW RELEASE TIME!!

It is our Sweet Treats release!  There are 13 different designs and everyone of them can be used for a variety of occasions especially Birthdays!! The individual dies are 30% off.  This sale price won't last long so click HERE to hop on over to the store!

Today, I am using the adorable Easel Sign w/Flowers.  This die can be used to proclaim any occasion.  I think it would make a really cute Wedding announcement.


Design Steps:
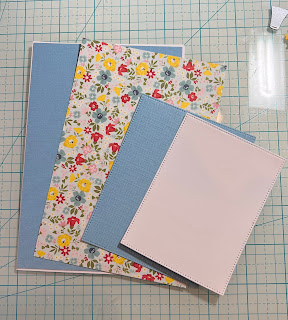
1.  Use a white 6 1/4 x 4 1/4 card base, 6 1/8 x 4 1/8 blue card stock, 6 x 4 flowered DP,  use the largest Pierced Rectangle die and cut out blue card stock and finally use the second from the largest Pierced Rectangle and cut out white card stock
2.  Use the Easel Sign w/Flowers and cut out the following card stock: red, yellow, green, silver, black and a piece of wood grain DP
3.  Stamp the black insert piece with VersaMark and emboss with white powder.  Assemble the easel with a fine tip glue
4.  Glue the white rectangle to the blue rectangle and add a strip of green to the bottom of the white rectangle
5.  Glue the easel to the middle of the rectangle and add a few flowers to the grass below the easel as shown above
6.  Glue the flower DP to the piece of blue card stock add the white ribbon tied in a square knot.  Then glue that panel to the front of the white card
7.  Place dimension tape to the back of the blue pierced rectangle and then pop it onto the card front as shown below and your card is complete

CottageCutz Products


We have more inspiration on our YouTube Channel check it out HERE
Thanks so much for stopping by!  And I will see you next Thursday.

Blessings and Take Care


Thursday, September 02, 2021

Hay There!

Hello Scrapping Cottage Friends

WE HAVE A NEW SENTIMENT PHRASES WITH SHADOWS RELEASE!!! You can pick up the entire bundle for an amazing 50% savings!! Or you can select individual dies at a 25% savings.  These dies have a wonderful font and look perfect with the Lil' Bluebird stamps!

I am using both the new release phrase dies and the Lil' Bluebird The Country Farm Stamp Set.


Design Steps

1.  My white base card is 6 1/4 x 4 1/4, Checked black DP 6 x 4, Cut a piece of red card stock with the largest Stitched Scallop Retangle, cut a piece of blue DP with the largest Pieced Rectangle die
2.  Using the Hills Slimline cut 2 pieces of green cards stock then glue together
3.  Using the Country Farm Stamp set stamp the images and color with the copics seen above
4.  After the images are colored cut them out with the coordinating die set
5.  Glue the blue pierced rectangle to the red scalloped rectangle then add the hills
6.  Wrap the red checked ribbon around the black checked DP then glue to the card base


7.  Add the little farm animals and the card front is complete


8.  For the inside I used a sentiment with a shadow Miss You.  I also added a little of the black checked DP

CottageCutz and Lil' Bluebird Stamps


Thanks so much for stopping by today and I will see you next Thursday.

Take Care and Blessings
Pam


Sunday, July 18, 2021

Happy Birthday

It's Anja here. I have a birthday card for you today. This time I used patterned paper for the background to emphasize this cute piggie.

For this card I used:

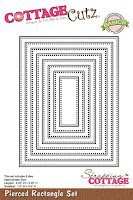
- Cottage Cutz dies (Playful Piggies, Pierced Rectangle Set),

- Distress Inks,

- craft card base (12,6x12,6 cm),

- white card stock for die cuts and background (3,5x12 cm),

- patterned card stock for background (12x12 cm),

- brown card stock for background (12,4x12,4 cm; 4x12 cm),

- black pen, 

- white ink,

- black pigment ink,

- sentiment stamp,

- acrylic block,

- adhesive foam pads,

- paper glue. 


First I cut and colored the pig. 

Next I cut the background parts. I used patterned and brown card stock.

I stamped the sentiment on a white strip of card stock. I also cut another strip of brown card stock to go underneath.

I placed all the parts to my card base and adhered it. Last I added the rectangle with the pig. I used adhesive foam pads to adhere that one. And my card was done.


And that's all from me for today. Have a nice Sunday and see you again tomorrow for my Monday's post. 

Anja Z.


Cottage Cutz dies I used: