Showing posts with label Party Animal Bus. Show all posts

Tuesday, May 04, 2021

Happy Birthday!

Hello!  This is Sukie and today I have a project to share for my design team post. Today's card follows the Throwback Tuesday theme featuring the fun and festive Party Animal Bus as the focal point of my card.  On Throwback Tuesdays the design team has an opportunity to use die sets from previous releases and this one was sitting on my craft desk just waiting to be used.  My card also showcases the new Slimline dies.

I used some cloud themed paper and cut it with the Nested Stitched Rectangle Slimline die.  Next, I affixed the hill cut from the Hills Slimline die set on the bottom edge of my card. It looked a little plain so I adhered another layer for a bit of dimension.  I was inspired to do this by another Cottage Cutz design team member, Pam.  You can check out her super cute layered hill card here. The adorable party animal bus was placed on top of the hill with a couple extra balloons floating above.  I heat embossed the happy birthday sentiment directly on my card base.  
Here are the die sets used on my card, available in the store:

Tuesday, September 03, 2019

Party Animal Bus

Hi, Janja is here with you.
Today I would like to show you another birthday card.


- CottageCutz dies: Party Animal Bus, Fancy Happy Birthday, Stitched Wide Rectangle Frame Set
- white card base: 4.25 x 5.5" (10,8 x 14 cm), folded
- colored cardstock
- colored ink pads
- cloud stencil
- glue, double-sided adhesive tape, self-adhesive foam pads

Start by die-cutting the bus from colored cardstock. Additionally color edges with colored pads.


Also die-cut a sentiment and two strips. I used the largest die of the set.


Create a cloudy sky background with a stencil, ink pad and brush.


Cut a white frame with two rectangle dies. The size should match the size of the cloudy sky background.
Now all we have to do is put together a card.


Have a nice day. 
Janja


Friday, August 23, 2019

Back to School Bus

Happy Friday everyone!  It's Jeanne posting today with a card that celebrates that most wonderful time of the year - back to school! This card is perfect to commemorate the first day of school.  I used the sentiment "ABC, 123" but you can also swap that out for "1st Day".  Since I don't know any wee ones who were having a "never-been-to-school-before" first day, I chose the more general sentiment.
 I used the Party Animal Bus from the new birthday release and cut out the pieces in various shades of browns and grays - a great way to use up scraps.  I used a dark yellow and a silver for the bus.
Using a fine tip multi-liner pen, I completed the eyes and noses on the critters and glued them together.
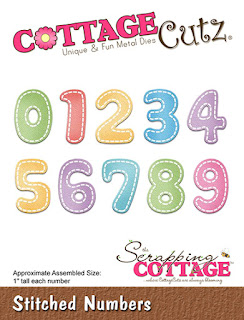
I cut the numbers and letters from primary color card stock using the Stitched Letters and Stitched Numbers dies.
This card is a little larger than usual.  It's an A6 - 4.5 x 6 inches.  I stared with a piece of black cut to 9 x 6 and then scored it in the middle for my top-fold card base.  Using wood look paper, I cut four strips .5 x 6 inches (the paper was 6 x 6 inch paper).
I glued two strips to the sides and snipped off the ends (so I didn't have to measure!)
Then I glued on the top and bottom strips, forming my school slate.
The bus went on next with all the animals.
Finally I added the ABC, 123, the bow and enamel dots in all four corners as nails or rivets.  I used foam dots to adhere the fenders over the wheels and wheel wells.

Dies:
http://www.scrappingcottage.com/cottagecutzpartyanimalbus.aspx

http://www.scrappingcottage.com/cottagecutzstitchednumbers.aspx
http://www.scrappingcottage.com/cottagecutzstitchedalphabet.aspx

Thanks for stopping by today and have a fun, creative weekend!

Don't forget to stop by the online store where there is a sale going on for a limited time on select Stamp & Die designs.


Sunday, August 04, 2019

Animals Celebrating

Hi!

It's Anja here. I have a simple and fun card for you today. Again using one of the new Birthday Release dies.

For this card I used:
- Cottage Cutz dies (Party Animal Bus, Celebrate Expressions),
- Distress Inks (Antique Linen, Shabby Shutters, Broken China, Barn Door, Fired Brick, Brushed Corduroy, Vintage Photo, Pumice Stone, Black Soot, Hickory Smoke, Picked Raspberry) and Oxides (Broken China, Twisted Citron, Peeled Paint),
- white card base (15x15 cm),
- white card stock for die cuts,
- silver pigment ink,
- black pen,
- plastic stencil (clouds),
- brushes for background,
- paper glue.

First I cut and colored all the pieces for the bus. I used black pen for the eyes.


Next I cut and colored the sentiment.


And then I made the background directly on the card base. I used brushes for coloring. I made the clouds with a stencil and grass just by coloring on the paper with the brush. I used Distress Oxides for better effect.


And when I had finished my background, all I had to do was glue the bus and the sentiment on top. And my card was done.


That's all from me for today. Have a nice Sunday and see you again next week.

Anja Z.


Cottage Cutz dies I used for this card:


Saturday, July 13, 2019

Party Animal Bus (new die)

Hello Scrapping Cottage friends! Thanks for taking the time to stop and visit with us today. It's Mary Marsh here bringing you the Saturday edition of the Blog. 

We have a brand new release of Birthday dies in the online store. There are 25 new designs and they are currently on sale at 25% off. This release is filled with cute little whimsical animals, birthday cakes, cupcakes and birthday phrases. Everything you need to create some outstanding birthday cards.

Today, I am featuring the Party Animal Bus. So let's get started with some details on how I created my card. 

Step 1:   As I have said so many times before, having a layout in mind at the start of my card is always a big boost for me. It jump starts my creative thought process. I love working with the sketches that are out there in the online world. That way I just choose the colors and designer paper and I am good to go. 

I had this sketch saved on one of my Pinterest boards.  I wanted to use festive designer paper and this sketch was perfect for it. The dimensions are already provided and that's a plus. I changed the dimensions just a bit.

This also fits with the inspiration challenge #710 on Splitcoaststampers. 
Gray Card Base: 4 1/4" x 5 1/2"
Pennants Designer Paper Layer: 4 1/8" x 5 3/8"
Coral Center Panel: 3" x 3 5/8"
Confetti Image Panel: 2 7/8" x 3 1/2"
Step 2: I cut the party animal bus using various cardstocks and used the die packaging for the colors. 
I cut the Birthday phrase in coral cardstock and it's from the Fairytale Birthday die. 
Used my MISTI to stamp the sentiment on coral cardstock in black ink. It helps with stamp placement and also if you have to repeat stamp an image. 
After I stamped I cut it to 1/2" x 4"  and then snipped in the flag ends. 


Step 3:  I am ready to start my card assembly. Attached all the layers with double sided tape. 

The image is adhered with dimensional adhesive. I wanted it lifted off the confetti designer paper. 
To complete my card, I attached the birthday phrase with Ranger multi medium matte. And, that's my card for this week. 
I hope I have given you an idea for a way to use this new super cute birthday die. See you next Saturday!

dies I used to create card: