Showing posts with label Oval Set. Show all posts

Wednesday, August 05, 2020

Sending You Sunny Smiles

Hello!  This is Sukie and today I'm sharing this card for my design team day.  There is a brand new release of Beach & Tropical dies which compliment the Pirates & Sea Creatures from the last die release.  Both of the die sets are currently on sale and also showcased on my card!
I cut out the pieces from the Treasure Chest Island, inked up all of my die cuts and put everything together.  I also cut out a tiny flower from the Tropical Bouquet die set.  The oval base and frame are from the Oval  and Pierced Wide Oval Frame sets.
I found this fun paper in my stash and trimmed it to fit my card base, it reminded me of a sandy beach.  I inked the edges for extra dimension.  I also stamped a sentiment on some coordinating card stock.
The oval frame was layered over the oval base and the die cut piecing was affixed to the framed set.
Next, I adhered the tropical scene on my card base.  The sentiment tag was added at the bottom of my card.
The finishing accent on this card was the gorgeous flower which was used to embellish the sentiment tag. All of the little details are amazing on this little flower!
Here are the dies that I used on my card, available in the store:

Monday, May 25, 2020

Bear & Bees


Hello Scrapping Cottage friends! Thanks for taking the time to stop and visit with us today. It's Mary Marsh here bringing you the Monday edition of the Blog. Hope you are all enjoying your Memorial Day weekend. Even though it's a bit different of a celebration for most of us, it's still a day to honor our veterans. 

And speaking of Memorial Day there is a big sale going on to celebrate this holiday in our online store. You can save up to 70% on dies and the new Gardening release is 25% off. It's a good time to get some great prices on CottageCutz dies. These new dies are perfect for Father's Day, birthdays, thank you, or even a thinking of you card for the person who loves to garden.

For my card today, I am featuring the new Golden Bear die, and I created an outdoor scene in the sun with my cute little bear. This one is a birthday card for a friend and that greeting will be on the inside of the card. 

For the card colors I used the colors from the Splitcoaststampers color challenge #791. Plus you can add neutral shades and with this challenge dark green and brown are considered neutral shades. So that helped with the leaves and bear. 
daffodil delight, melon mambo, calypso coral
I cut the images in the challenge colors. My background paper is from a pack of watercolored backgrounds that have been a favorite go to for me lately. I love the colors they have blended together in this pack. And, then I don't have to do any ink blending. It's all done for me with the designer paper.

I used the largest oval die to cut out the striped designer paper. My hello phrase is from an older CottageCutz set - telephone die. It's currently on a 70% off sale. 

And, that's my card for today. See you next Saturday!

dies I used to create card:


Sunday, October 27, 2019

Under The Mistletoe


Hi!

It's Anja here. I have another holiday card for you. This one is really simple and fast to make, so you can make a bunch of it.


For this card I used:
- Cottage Cutz dies (Holly Mistletoe, Happy Holidays Polar Bears, Oval Set),
- craft card base (10,5x15 cm),
- white card stock for die cuts and background (10x14,5 cm),
- acrylic sprays (shades of green, red),
- vellum,
- double sided adhesive tape,
- heat gun,
- adhesive foam pads,
- paper glue.

First I cut the greenery. I cut two sets and glued it together.


Next I colored it with acrylic sprays and dried it with the heat gun.


Then I trimmed the paper for the background. I cut an oval out of the white paper.


I used double sided adhesive tape to glue the vellum on the card base. For the white paper I used adhesive foam pads.


When the background was adhered I glued the greenery and the sentiment on top. And my card was done.


Thank you for stopping by. Have a nice Sunday and see you again next week.

Anja Z.


Cottage Cutz dies I used:


Saturday, March 23, 2019

He is Risen Cross (new die)


Hello Scrapping Cottage friends! Thanks for taking the time to stop and visit with us today. It's Mary Marsh here bringing you the Saturday edition of the Blog.

We have a new release of 36 Spring dies in the online store. There are a variety of designs so perfect for Easter or Spring card making. Take a look in the store you definitely won't be disappointed.
For my card today I am using the new He is Risen Cross die.  There is such detail in the cross itself and it also comes with the He is Risen phraseSo let's get started with some details on how I created my card. 

Step 1: Having a layout in mind at the card start is always a big boost for me. I love working with the sketches that are out there in the online world. That way I can just choose the card colors and designer paper and I am good to go. I liked this week's sketch #741 on Splitcoaststampers because of the layers. I thought it could be bumped up a notch with the addition of designer paper, ribbon and a creative idea for element #3.

I looked through my designer papers to get one that would provide a nice background for the cross image but not overwhelm it. I settled on this one that I have had since 2013. I liked the colors in the paper and knew it would work well for an Easter card. 
Pistachio green card base: 4 1/4" x 5 1/2"
Indigo layering panel: 4 1/8" x 5 3/8"
Designer Paper layer: 3 3/8" x 4 5/8"

I cut the cross and the Risen phrase in the indigo cardstock. I layered it on the 4th largest Oval Set die.
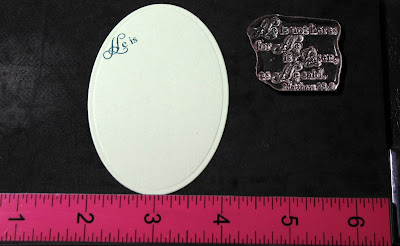
I wanted the words "He is" on the oval. So I masked off the stamp that I wanted to use and inked just those words in Indigo ink. 
 Step 2: Now that all the elements are cut I am ready to start card assembly. I attached the cross to the oval with dimensional adhesive. I wanted it lifted slightly from the background. 
I decided to use some ribbon for element 5 of the sketch. I first used a pistachio green and layered indigo. I thought it was to much of the same color so I went with a purple satin instead. It gave it just the touch of color I was looking for.  
I cut the Risen Phrase in Indigo card stock 2x and used Ranger multi matte medium to secure it to the designer paper background. I wanted it to stand out a bit more because of the pattern in the paper. 
 To finish off my card, I attached the panel to the pistachio card base with double sided tape. I scattered a few indigo enamel dots and that completed this card. I hope I have given you an idea for a new way to use this detailed cross die. See you next Saturday!!!


dies I used to create card:


Sunday, February 24, 2019

Happy St. Patrick's Day


Hi!

It's Anja here. Winter is slowly waving its goodbye and warmer days are coming. I can't wait for the Spring to come.

I made a simple card for today's post. I used an adorable Scottie die and made a card for St. Patrick's Day.


For this card I used:
- Cottage Cutz dies (Shamrock & Valentine Scottie, Oval Set),
- Distress Inks (Pumice Stone, Black Soot, Vintage Photo, Hickory Smoke, Shabby Shutters, Forest Moss, Mowed Lawn),
- white card stock for die cuts,
- white card base (10,5x15 cm),
- patterned paper for background (10x14,5 cm),
- printed sentiment,
- gold pigment ink,
- black pen,
- white pen,
- paper trimmer,
- adhesive foam pads,
- paper glue.

First I cut and colored the dog. I used black and white pen fr the eyes.


Then I cut all the pieces for the background.


I printed and trimmed the sentiment.


And than I assembled the card together. I used adhesive foam pads for the dog.


I'm still waiting for the Spring Release to arrive, but you can get it for 25 % off in The Scrapping Cottage store.

This is all from me for today.

Have a nice Sunday and see you again next week.

Anja Z.


Cottage Cutz dies I used:


Saturday, February 16, 2019

Cross with Spring Lilies (new die)

Hello Scrapping Cottage friends! Thanks for taking the time to stop and visit with us today. It's Mary Marsh here bringing you the Saturday edition of the Blog. 


We have a new release of 36 Spring dies in the online store. There are a variety of designs so perfect for Easter or Spring cardmaking. Take a look in the store you definitely won't be disappointed. 

For my card today I am using the new Cross with Spring Lilies die. This is a perfect die to reflect on why we celebrate Easter. 

Step 1: I started my card this week with the layout. I am using a sketch that I had saved on one of my Pinterest boards. I thought it would work great to show off the cross and allow me also to use some background designer paper. This particular sketch gave all the dimensions for the layers so it made creating the card a bit easier.
I just had to select my card colors and I decided on shades of purples and greens. 
For the center panel I used beige mesh ribbon and a light green seam binding. For the oval panel, I used the 3rd largest oval and stitched oval dies. 
I cut my cross using 2 shades of purple cardstock. I cut the lilies in white and then sponged the edges with a medium purple ink. Used Ranger multi medium matte for the cross and the lilies. 
I decided to put a single word sentiment on the image panel. I stamped it in the purple ink that matches my cardstock. 
Step 2: Now that all the panels, card base and cross are cut, I am ready to start card assembly. I used double sided tape for all the panels. I secured the ribbons with glue dots. To finish off the card I added a few sequins to the corner and the image panel.
Well, that's it for me for this week. See you next Saturday! This is also President's Day weekend and there is a sale on selected CottageCutz dies. Check it out here

dies I used to create card: