Showing posts with label Nordic Gnomes. Show all posts

Monday, September 24, 2018

Gnomes Bake Shop

Hi, Lois here with my Monday card.  Before showing the card, however, I wanted to let you know that the Christmas Release (Part 3) and new Halloween dies are on sale at 25% off on the CottageCutz website.  I hope you check them out.  There is also a cute new die, Dakota the Husky, which is available only in the CottageCutz store.

Now, on to my card!   I'm a big fan of fun-fold cards, and today's card is a Center Step Card.  If you're unfamiliar with this technique, you can find a tutorial on Splitcoaststampers.  This is my card for today.


Cardstock used for this card are as follows:

Brown - 5 1/2" x 11"
Red - 3 1/8" x 4 1/8"
White - slightly larger than 3" x 4"
Patterned paper - 3/4" x 5 1/4" (3 pieces)


I die cut the pieces for the bake shop from brown and white cardstock.


Using Copic markers and some distress ink, I colored the pieces and constructed my bake shop.


I then cut the gnomes from white cardstock . . .


. . . then colored and constructed the figures.


Following the directions from the Center Step Card tutorial, I cut, scored, and folded my card base from the brown cardstock.


After die-cutting the white piece of cardstock with the second largest Wacky Stitched Rectangle die, I layered the red and white pieces onto the center of the card; then glued the three strips of patterned paper -- trimming down the vertical strips to size.


I then added the bake shop and gnomes to finish the card.


CottageCutz dies used on this card are:

http://www.scrappingcottage.com/cottagecutzbakeshop.aspx


http://www.scrappingcottage.com/cottagecutznordicgnomes.aspx


http://www.scrappingcottage.com/cottagecutznestedwackystitchedrectangleset.aspx

Sunday, September 23, 2018

Gnomes Card

Hi!

This is Anja. I just love all the new gnomes dies. It is so adorable. I had to try another one for today's card.


For this project I used:
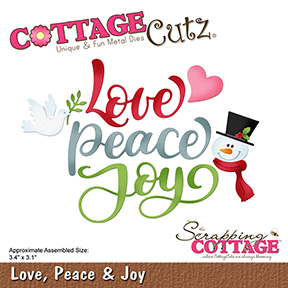
- Cottage Cutz dies (Nordic Gnomes, Love, Peace & Joy),
- Distress Inks (Stormy Sky, Chipped Sapphire, Peeled Paint, Forest Moss, Fired Brick, Aged Mahogany, Black Soot, Old Paper, Tattered Rose, Mustard Seed, Walnut Stain),
- white card base (1015 cm),
- water color paper for die cuts and background (9,6x20,6 cm),
- snowflake stencil,
- white glitter paste,
- spatula,
- heat gun,
- black pen,
- water spritzer,
- paper glue.

First I colored the gnomes. I used Distress Inks.


Then I colored the sentiment.


Next I made the background. I used smooching technique. I dried the paper with heat gun.


When it was dry, I used then stencil and spatula to apply the paste. I let it dry.


Then I just glued the background to the base and adhered the sentiment and the gnomes. And my card was done.


This is all from me for today. I'm also inviting you to check the online store for all the new goodies.

Have a nice Sunday.

Anja Z.


The Cottage Cutz products I used: