Showing posts with label Night in Bethlehem. Show all posts

Friday, December 25, 2020

Nativity Pop Up Box Card

Merry Christmas!  I hope you are having a wonderful holiday.  It's Jeanne sharing a special card with you today.  One that reflects the true meaning of Christmas.

I love making 3D projects and box cards are among my favorites.  There are many tutorials on the internet for pop up box cards.  Here is a link to one from Splitcoaststampers.

My favorite part of making this type of card is filling it.  I will admit that this card took some time and is not for those looking for a quick project.  But it is well worth the effort and makes for a truly special gift /card.

All my pieces are colored using Distress Oxide inks.  I think I used every brown Ranger makes to get a wide variety of shades!

For my night sky I used Stormy Sky, Faded Jeans and Chipped Sapphire along with Wilted Violet.  I left an area white for around the star and flicked water on the panel to add a few minor "stars".

For my sentiment I added my favorite verse of the Nativity from the Gospel of Luke - Luke 2:10-11

Below are some close in pictures of the card.


Dies used:


Thanks for visiting - I hope you have a blessed and joyous holiday!


Saturday, November 21, 2020

Night in Bethlehem Easel Card

Hello Scrapping Cottage friends! Thanks for taking the time to stop and visit with us today. It's Mary Marsh here bringing you the Saturday edition of the Blog. 

Our Christmas dies are in the online store. And, you can still pick them up on a 25% sale. We have Christmas Part 1 (22 new designs), Christmas Part 2 (21 new designs) and Christmas Part 3 (11 new designs).

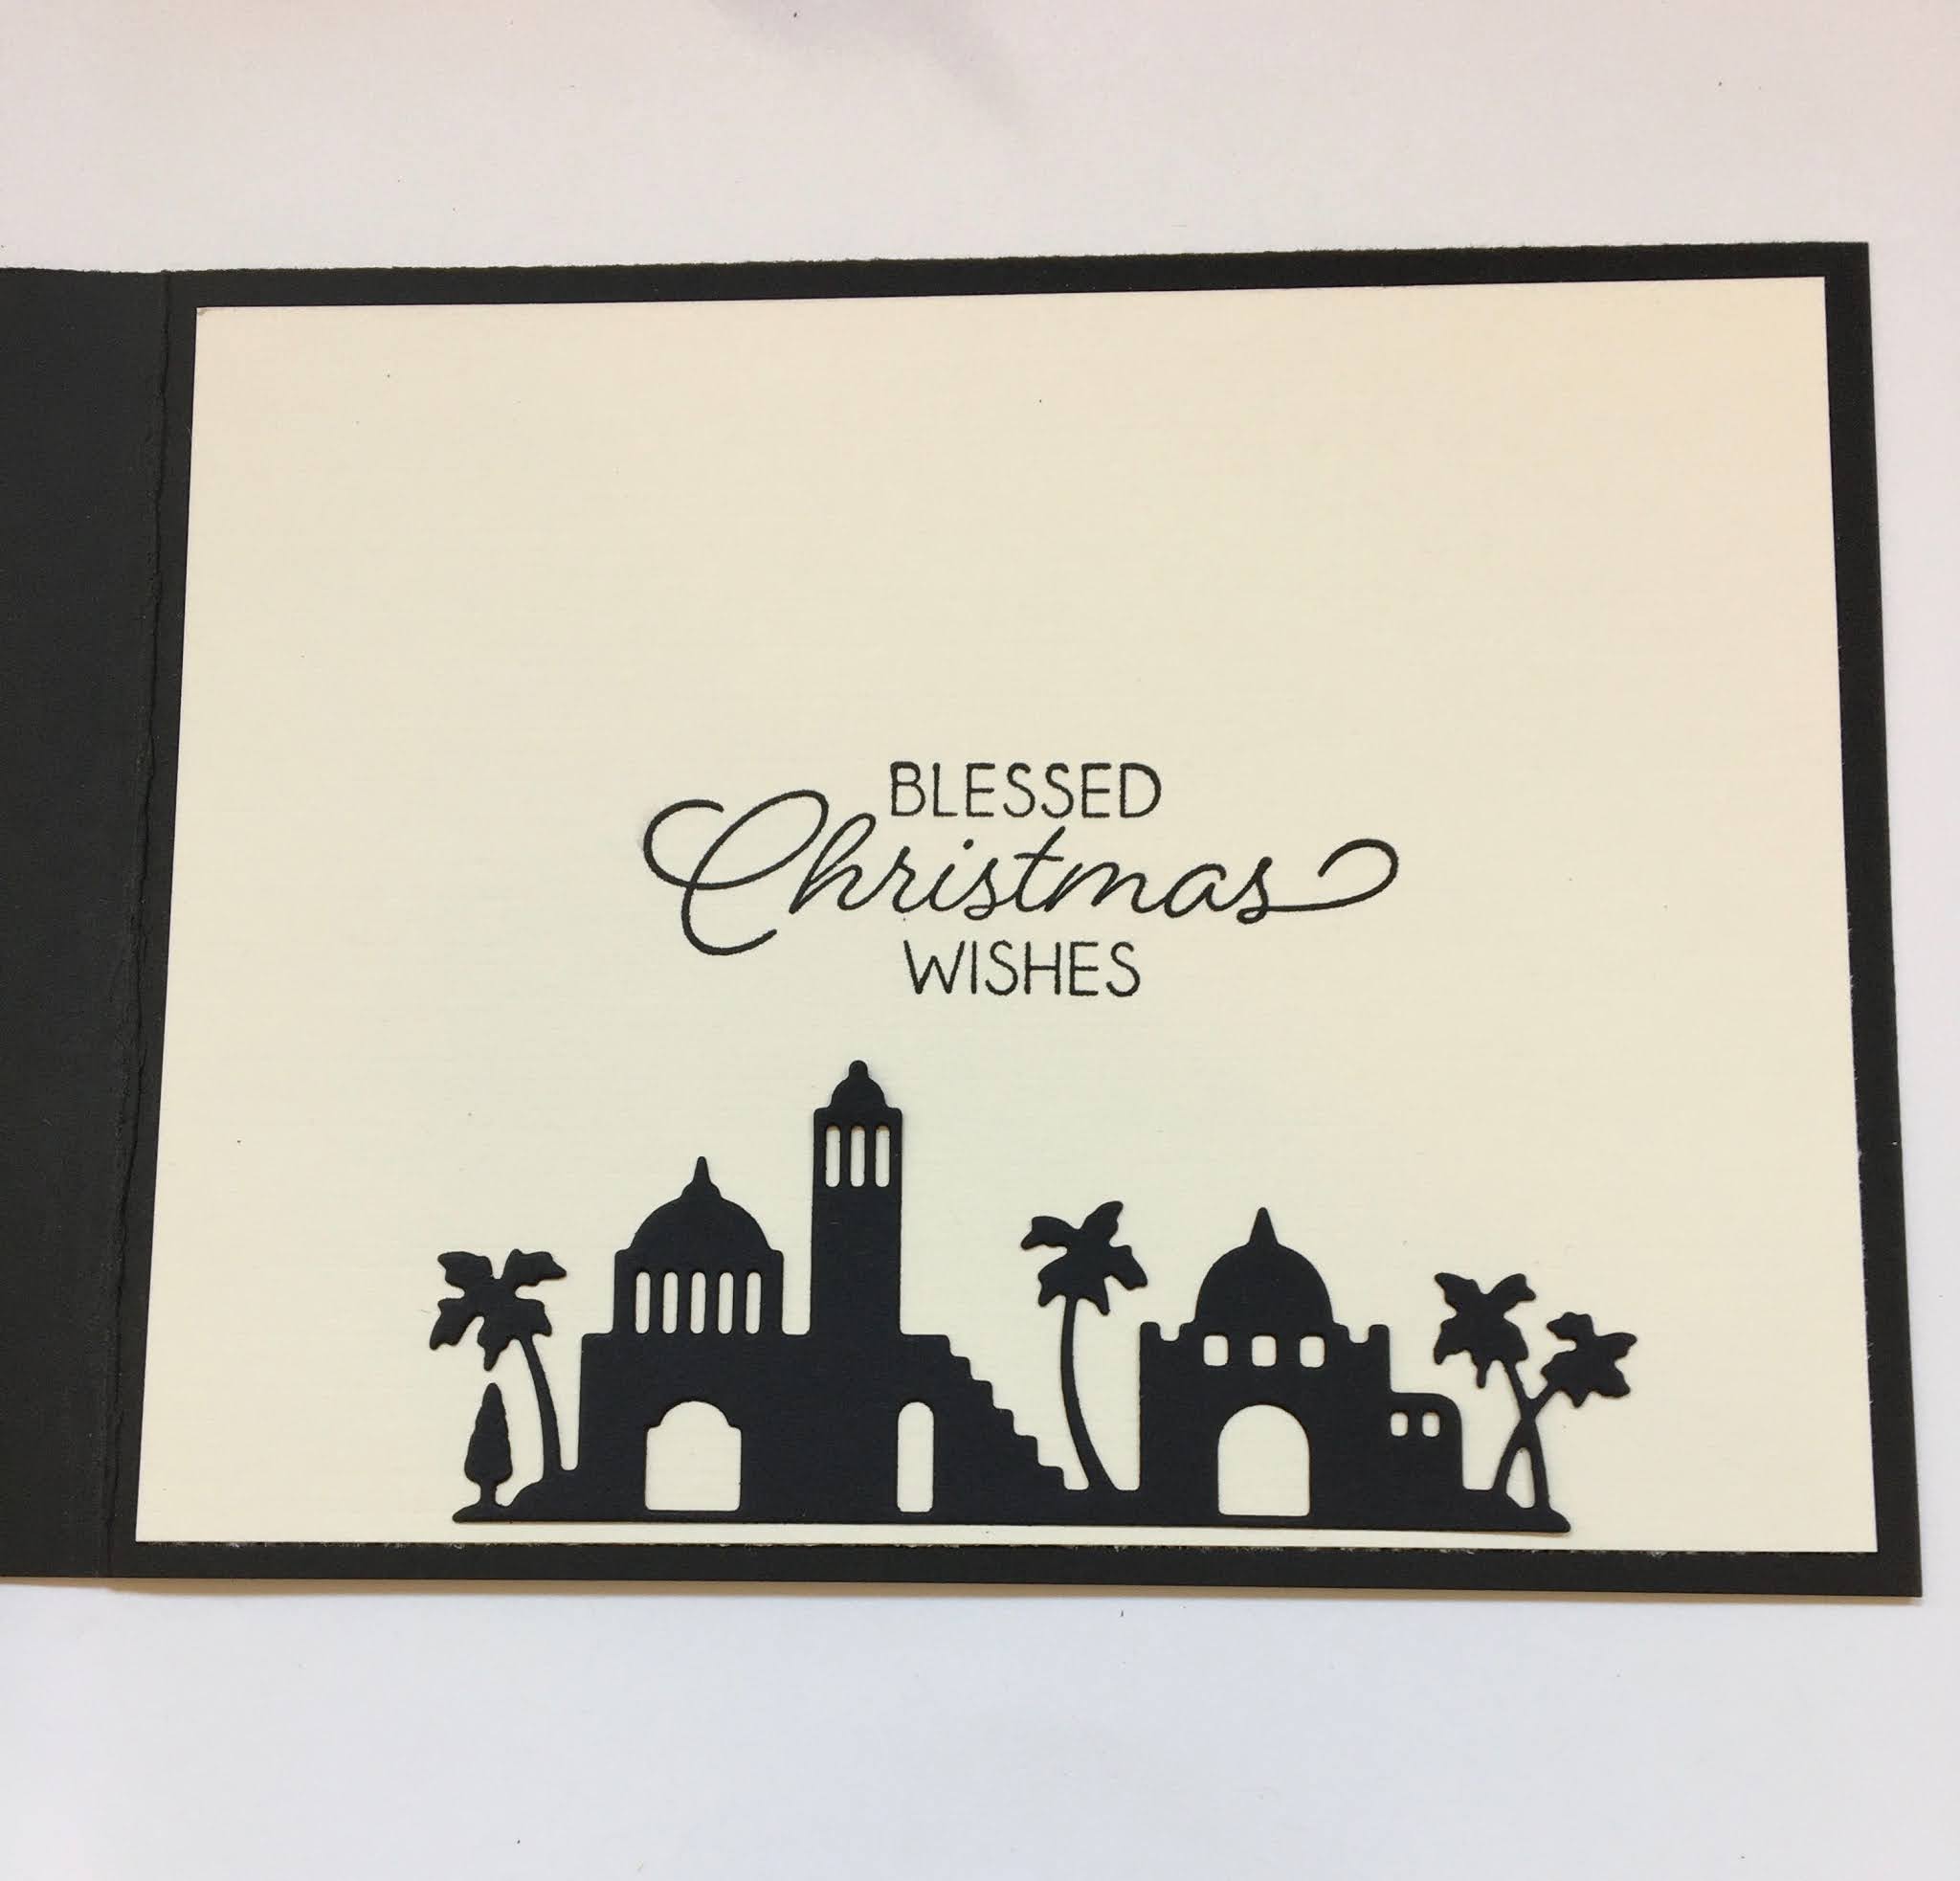
Today, I have for your viewing pleasure a card featuring the new 
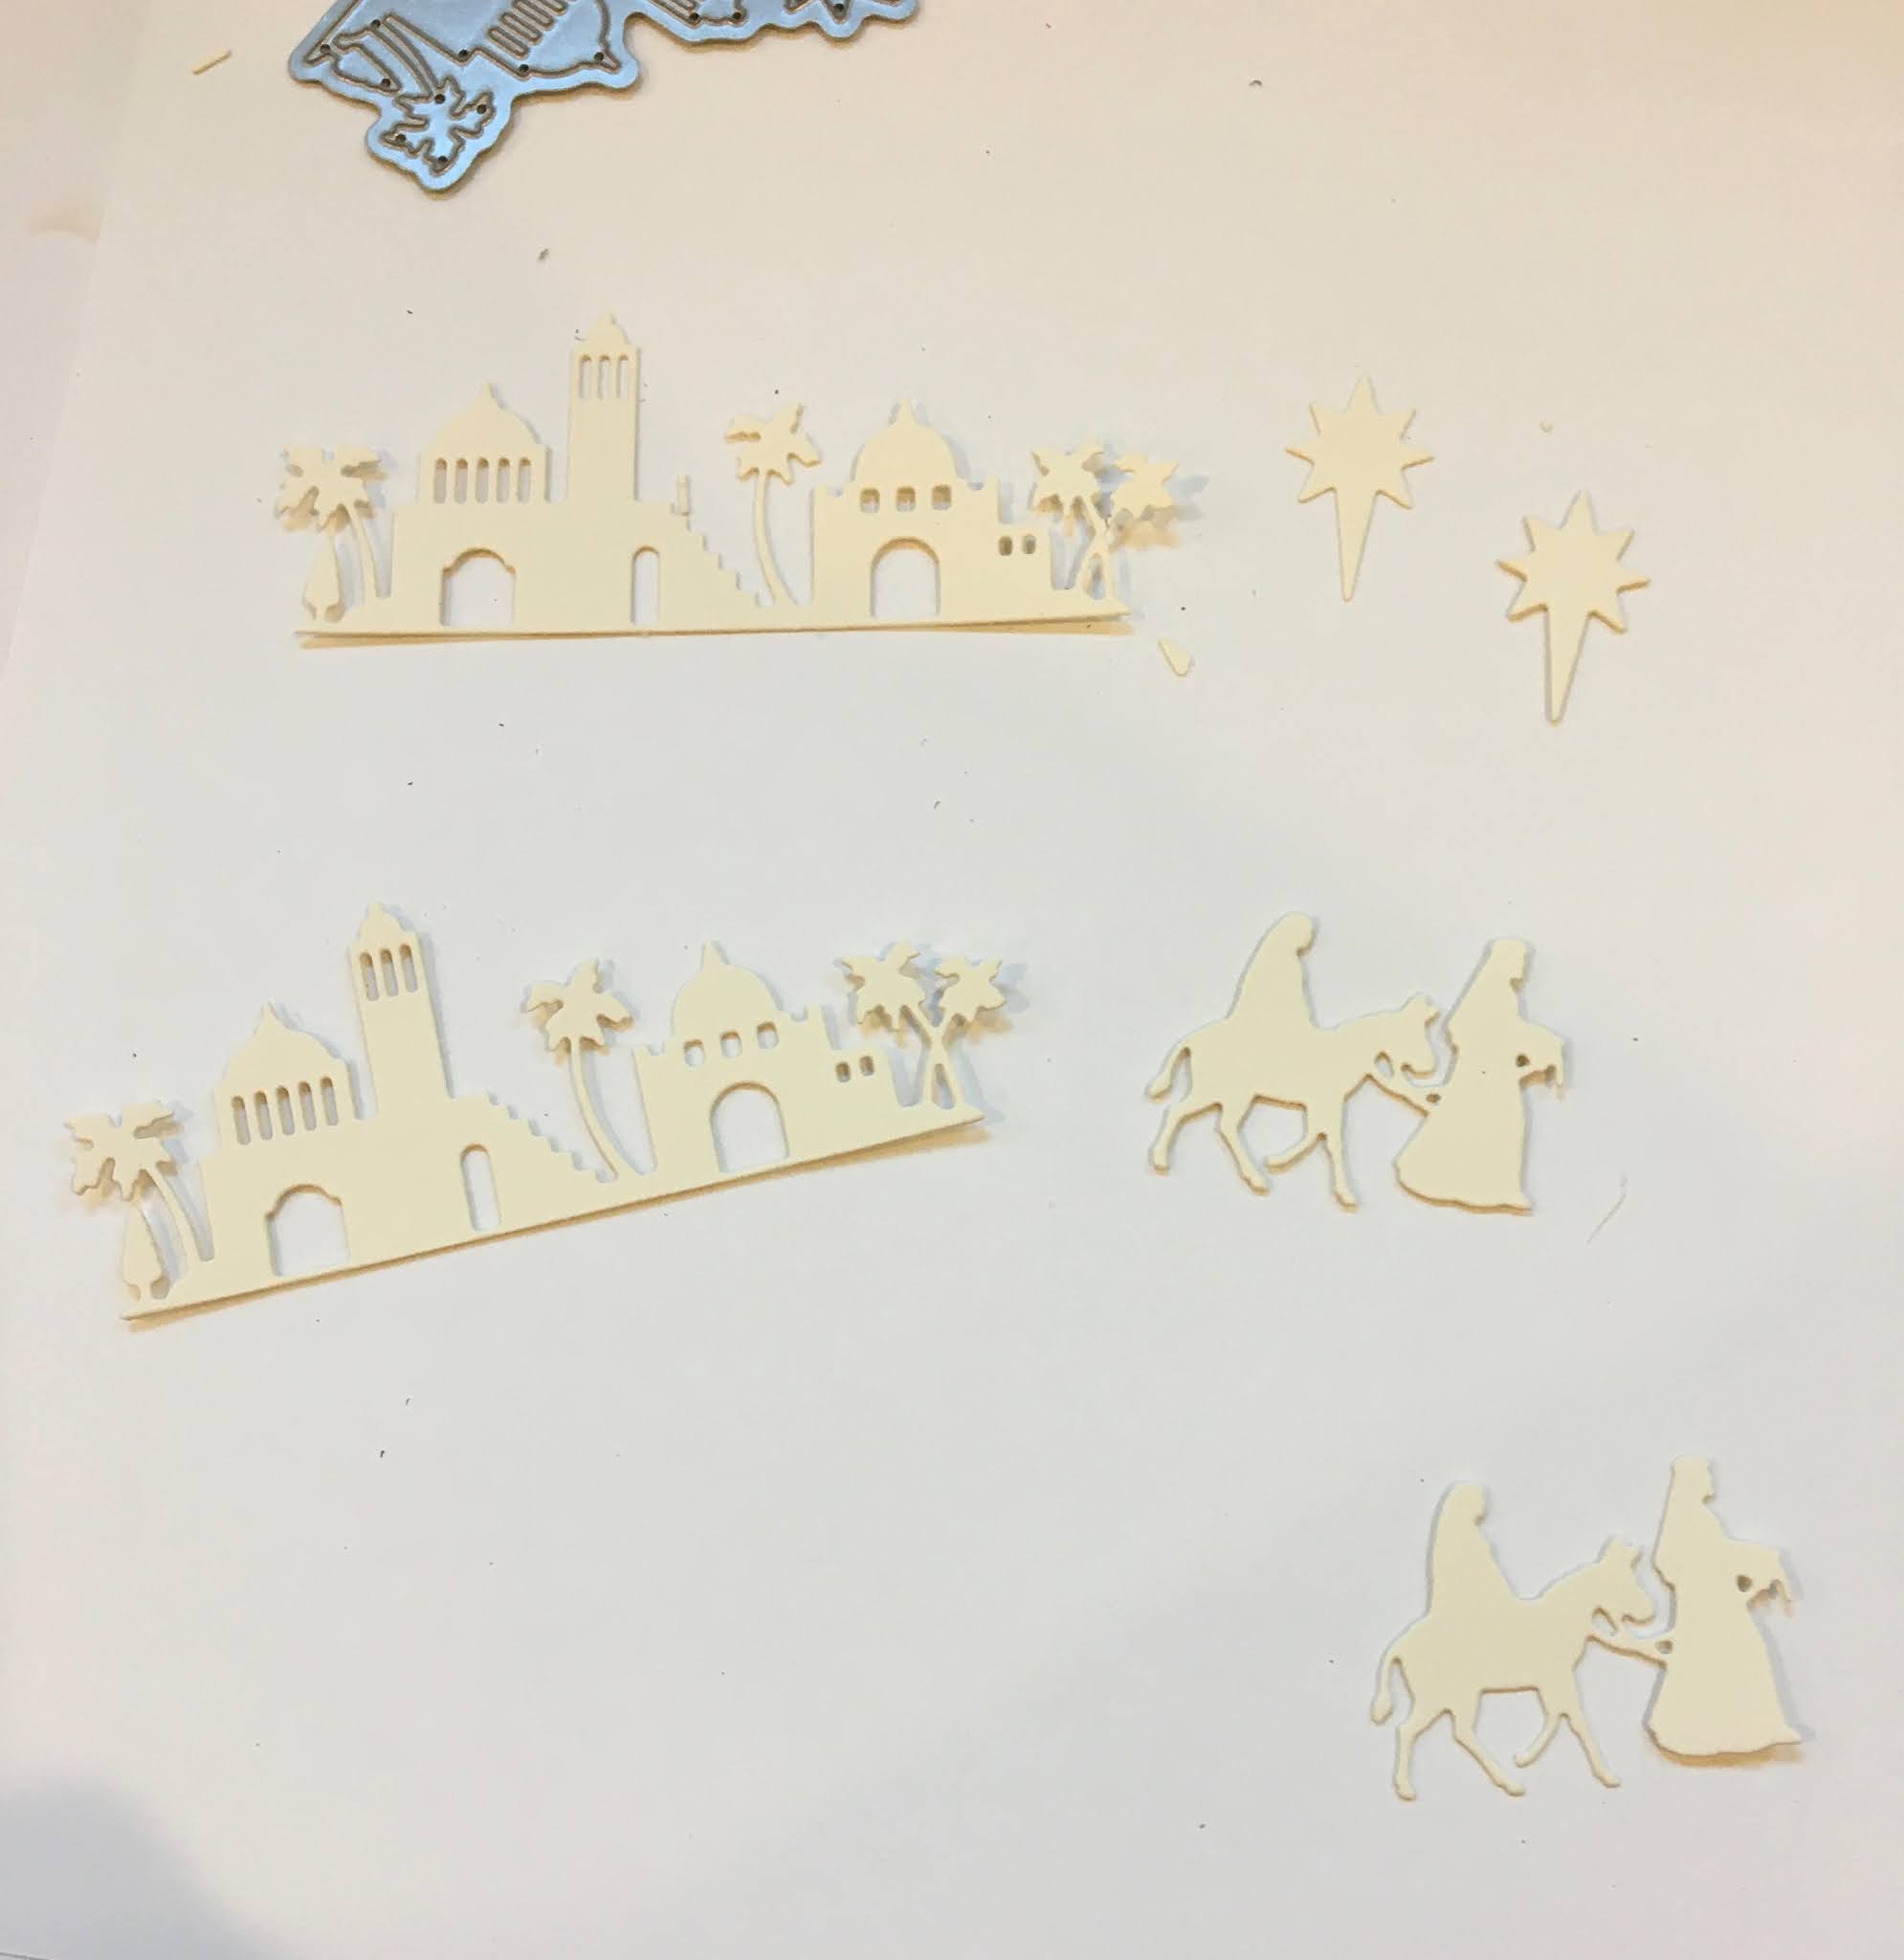
Night in Bethlehem die from the Christmas Part 2 release. This die represents, for me, the reason we celebrate this holiday. I used it on a circular easel design to give it an interesting presentation. So let's get started with some details of how I created this card.  

Design Steps:

I started off with creating the easel card layout. I followed a video tutorial from YouTube. Here is the link to the tutorial. 

I cut a piece of blueberry cardstock to 8 1/2" x 5 1/2", scored it at 4 1/4" and then folded in half. 
Now to create the card base, I used the largest Scallop Circle die. I laid it just slightly over the edge of the cardstock. You don't want the fold to cut. This gives you the card "hinge". 
This is what the card base looks like after I ran it through my Big Shot.  
Then I took the same die and cut another scalloped circle. This will cover the flat part of the cardstock and it's where I will attach my images.  
Next, you fold the top half of the card base making sure to line up the scallops. I added double sided tape to just the lower part of the fold and attached the 2nd scallop circle that I cut. 

Side view of card base after 2nd scallop was secured. This is the circular easel card base. 
For my background for the Bethlehem images, I had this watercolor galaxy paper. Using the largest Circle die to cut the layer for the card front. 
The images are cut from blueberry cardstock and adhered with dimensional adhesive to the designer paper. 
Attached the image panel to the card base with double sided tape. I decided to change the star color and cut it from a white glitter cardstock. I just adhered it over the blue star. I cut another circle from a kraft cardstock and then used just a section for the ground. 
For the card inside, I cut another piece of the galaxy designer paper. Stamped my sentiment in blueberry ink and secured to the designer paper with dimensional adhesive. This will serve as the card stop when the easel is opened. 
That's my card for this week. This was my first attempt at a circular easel card and I can say it wasn't difficult to complete. And, I think it makes a nice presentation for the Bethlehem images. See you next Saturday!

dies I used to create card:


Monday, September 21, 2020

O Holy Night

Hi Scrapping Cottage Friend

It Pam sharing with you this fine Monday morning.

I am using a gorgeous die today and it reminds me of the songs O Holy Night and Silent Night.  I have already made at least a dozen Christmas cards so I feel pretty good.  I usually make about 30 cards for special friends and family.  

Background Photo by Jerry Larry on Unsplash

  • This card went together really quickly.  I used a black A2 card base and then cut some music DP 4 x 5 1/4. Glue the music DP to the black card base.  
  • Cut a strip of black card stock 5 1/4 x 1 and glue it to the bottom of the card.  
  • Cut a piece of tan DP for the hills 5 1/4 x 3 and glue it to the music DP just above the black strip.   
  • Cut black card stock using the die Nativity Christmas Scene.  I decided to add just a touch of sparkle so I put some gold DP behind the star and and then glued the manger scene to the card.  
  • For the sentiment I used the Holy Nativity die cut out of black card stock.  As you can see I cut the O Holy Night from the bottom of the die then added gold DP to the back of the sentiment and glued it to the card
  • For the inside of the card I used another die Night in Bethlehem.  I cut it using black card stock and then glued it to the bottom of the inside of the card.  Stamp your sentiment and the card is complete

CottageCutz Products


Thanks so much for stopping by today and please take the time to stop by the online store.   As you can see we have some wonderful dies for this most holy time of year.
Blessings
Pam


Thursday, September 17, 2020

Bethlehem

 Hello Scrapping Cottage Friends

It is Pam sharing with you on the blog today!

The design team is taking turns using Part 1 and 2 of the new Christmas release.  So it is my turn to use a die from part 2 release.  The dies representing the birth of Jesus are just beautiful.  I am using Night in Bethlehem.  I found a card on Pinterest that I loved so I am CASing Dawn Griffith's card.  She made hers using stamps and I used dies.  Thanks Dawn for the wonderful inspiration.


Design Steps:

1.  Using the Night in Bethlehem die cut out the pieces 3 times each.  Glue the pieces together so you have  nice thickness and depth
2.  Use a navy blue A2 card base.  After folding it in half cut the front flap in half.  Place a piece of kraft card stock on top of the front flap that has been stamped with tiny navy stars and edged with TH Vintage ink

3.  Cut two pieces of cream colored card stock one 4 x 5 1/4 and the other 3 x 3.  Next using your navy and rust colored inks blend the inks at the bottom of the pieces.  Stamp the stars and sentiments in navy

4.  Glue the town of Bethlehem and star to the bottom portion of the inside of the card.  Make sure the star is high enough that it doesn't show under the front square

4.  Layer the 3 x 3 square with navy and then attach to the front flap of the card.  Add Mary and Joseph and your card is complete

CottageCutz Products


I love this card and I know all of my family will too.  I can't wait to make at least a dozen more of them because they are easy and represent my faith and feelings about Christmas.

Blessings

Pam