Showing posts with label Nested Stitched Scallop Oval Set. Show all posts

Friday, February 12, 2021

Big Top Birthday

Happy Friday!  It's Jeanne sharing today and I have a fun-fold birthday card using dies from the new Circus release.  This release has quickly become one of my favorites because the dies make such bright, festive cards.  The card I have today is an easy fun-fold and goes together quickly.

I used the Circus Tent die but any of the Circus dies would work just as well.  I picked three bright colors to use for the card - yellow, blue and red.

 I cut all my pieces from the Circus Tent, Circus Signs, Stitched Ovals and Scalloped Stitched Ovals dies and assembled them.

The fun-fold is called a Front Flap card.  I'll give you instructions here, but you can also find a video on Splitcoaststampers.

I cut a 5 1/2 x 4 1/4 inch base panel from blue and a 5 1/4 x 4 inch panel from striped paper.  Then I cut a 3 1/4 x 8 1/2 inch panel from red cardstock and scored it at 4 1/4 inches so I could fold it in half.  I cut a 3 x 4 inch panel from red dot paper that will be glued to the front of the folded panel.

After gluing the blue paper to the card base, I glued the red folded panel to the card about 1/2 inch from the left.  (Because I used striped paper I just aligned it with a stripe.)  Then I adhered my dotted panel to the flap.

Next I glued  my white oval to the yellow scalloped oval and adhered it to the right side of the front flap.

I had a fun sentiment that I stamped on a 3 x 4 inch piece of white cardstock and glued it to the inside of the front flap.

Finally I adhered my sign and tent.  This front-flap card is very easy to make and really showcases your image.  It's one of those cards that looks like it takes a lot of time and effort, but really doesn't.  For me that is about perfect!

Be sure to visit the online store where this fantastic release is on sale for a limited time!

Dies used:


Thanks for stopping by today! I hope you have a fun and creative weekend!


Wednesday, January 06, 2021

Happy Birthday

Hello!  This is Sukie and today I have a fun card to share.  I used one of the die sets from the Safari die release and changed it up to a birthday theme.  These die are so versatile and they work perfectly with all types of cards.

I used card stock to cut out all of the pieces from the Safari Ostrich, the Happy Birthday Phrase, the Oval Set and the Nested Stitched Scallop Oval Set.  The Happy Birthday Phrase was cut out twice for layering.  I went with a neutral theme for my die cuts.
I selected a basic striped paper for my card base.  The diagonal stripes add an element of interest against the set of nested ovals.
I layered the "happy" sentiment and offset it a bit so the white would show.  The sentiment was adhered along the top edge of my card.
Next, I affixed the other half of my sentiment along the bottom edge of my card base.  The layering of the 2 colors adds a shadow element to my sentiment.
The Safari Ostrich was centered inside the set of ovals finishing off my card.  The colors are not my normal go to colors however, I'm really liking the look of the non-traditional theme on this card.
Here are the die sets used on my card, available in the store:

Friday, November 13, 2020

Hang in There!

Happy Friday!  It's Jeanne today and I have a card of encouragement for those feeling overwhelmed by the holidays (and aren't we all feeling that way?)  This cute Santa is hanging on and I want to tell him and others "don't let go - hang in there!"

I used Copic markers and Distress Oxide inks to color the pieces of the image.  I assembled much but not all of the image.

I cut a green A2 card base, a panel 4 x 5 1/4 inches from a pine tree patterned paper, a white oval using the largest of the Nested Stitched Scalloped Oval dies, and an oval using the second largest of the Stitched Oval dies.

Using a stencil and DO ink I stenciled clouds on the Stitched Oval and stamped my sentiment close to the bottom.

Then I adhered my Santa to the oval just above the sentiment.  I knew I would need to adjust the branch so that is why I had not completely assembled the Santa before putting it on the card.

I trimmed the branch from the oval and glued it to the scalloped oval to form the medallion.

I tied a ribbon around the pine panel and added a small pine cone to the bow.  The love how this pattern is like  the tree Santa fell through!  The panel is glued to the card front.

I used foam tape and popped the medallion up off the front of the card.

The holidays can be stressful and I love how this little guy is hanging in there!

Be sure to visit the online store where the Christmas releases (Parts 1, 2 and 3) are 25% off for a limited time!

Dies used:


 Thanks for visiting today!  I hope you have a fun,relaxing and creative weekend!

Friday, October 23, 2020

Baking Spirits Bright

Happy Friday!  It's Jeanne today with a card that was very hard to make - but only because it made me hungry while making it.  All I could think about were freshly baked cookies! 

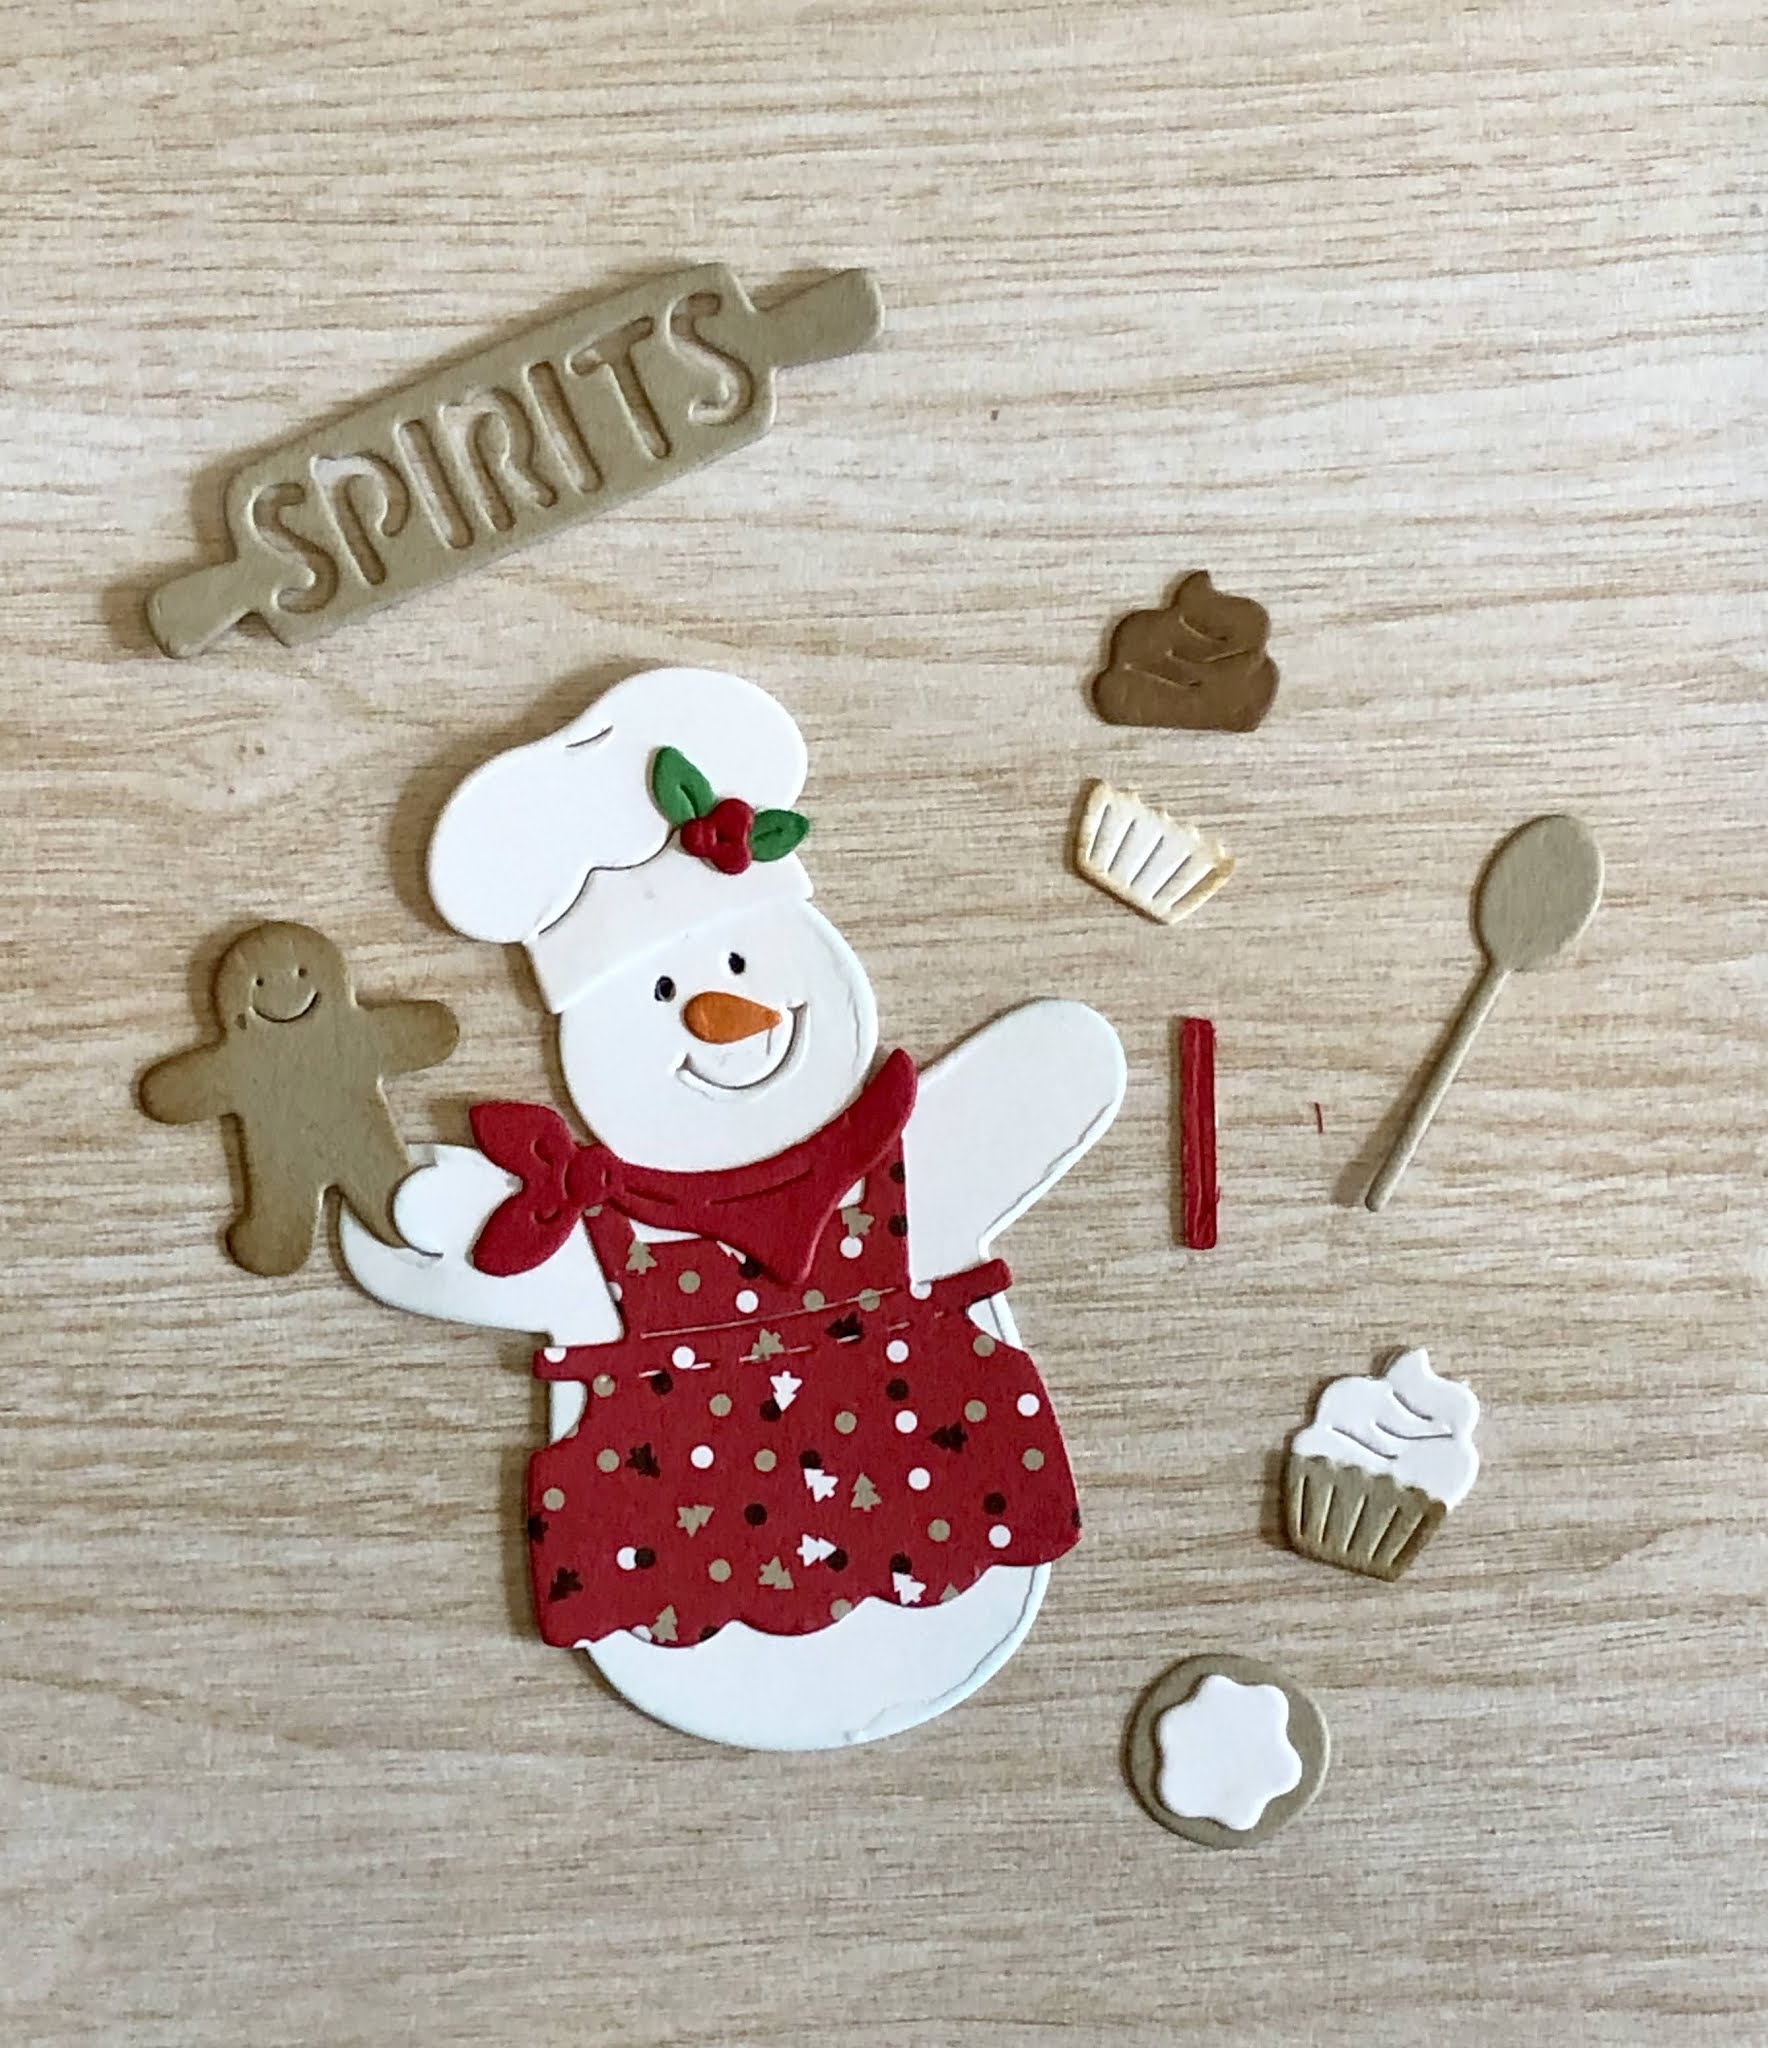
Gingerbread is one of my favorite Christmas themes and although these are snowmen in this die they fit that general idea.  I had some gingerbread themed patterned paper and knew that combined with this die it would make the perfect stand up card!

To begin I cut my pieces from white, red, crumb cake and a small patterned paper and cardstock.

I used Copic markers to color the nose and holly leaves and I shaded the snowman, cookies and cupcake with Distress Oxide inks.

Next, I cut a piece of crumb cake cardstock to 4 1/4 x 11 inches, then scored and folded it at the 5 1/2 mark (in half, top folding).  On the top flap I scored at the 2 3/4 mark and folded this, essentially folding the top of the card in half.  This will become my easel for the image.  I cut a piece of patterned paper to 4 x 5 1/4 inches and folded it in half at the 2 5/8 inch mark.

I cut two white rectangles using the 2nd largest of the Stitched Scalloped Rectangle dies, one red rectangle using the 3rd largest of the Stitched Rectangles, one white oval using the 2nd largest of the Stitched Scalloped Ovals and one crumb cake oval using the 4th largest Stitched Oval.  I like the Stitched dies but the plain, pierced or double stitched dies work too!

To build the easel, I glued the patterned paper to the top of my card matching up the folds.

I stacked the two white rectangles and adhered the red to the top.  The two pieces of cardstock allow the folded front to have a barrier to stand against when you open the card.

Using a fine tipped glue pen, I glued down my sentiment and a few extra sweets and baking tools.

 I glued my completed sentiment to the inside of the card, about 1/8 inch from the bottom.

I assembled the medallion for the front of the card...

and glued the bottom of it to the lower half of the front of the card.  I left the top free to pop up when the card is opened as an easel.

Finally, I tied a narrow ribbon behind the medallion on the upper part of the card for a little bit of interest when the card is closed.

I hope you enjoyed my card today!  This card would be perfect for someone who loves baking! Be sure to visit the online store where the new Christmas Release (Parts 1, 2 and 3) and the new Halloween release are on sale for a limited time!

Dies:


Thanks for stopping by.  I hope you have a fun and creative weekend!