Showing posts with label Mr. Peter Rabbit. Show all posts

Thursday, March 22, 2018

Easter Bunny

Hello Scrapping Cottage Buddies!

It is Pam from Stamper at Heart Blog Spot creating with you today! And before I get started I wanted to give you a heads up about the sales we are have at our store.  We have a Collection of new release dies called Rise and Shine that are currently 25% off and they are just so much fun!  To see some card samples from the design team click here and here!

Now on with today's card!  I am on my last Easter card for my friends and family in fact most of the cards are just about to go in the mail at the end of the week.  This is my last one and I just love how this little guy turned out in his overalls with the little buttons!


Designer Steps:
 1.  Start with an A2 white card base and cut a 4 x 5 1/4 piece of blue card stock.  Run the blue card stock through a cloud embossing folder
 2. Cut out the greeting using the Happy Easter Phrase die and white card stock.  Glue the phrase to the upper part of the blue embossed panel
 3. Cut out the white fence using the Victorian Fence die.  Then glue it just below the greeting
 4.  Next cut out a strip of green card stock 4 x 1 1/4 and 3 grass strips using the Spring Grass die
 5.  Layer the grass onto the bottom part of the card as shown
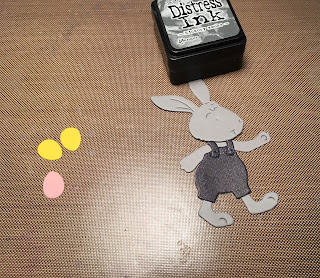
 6.  Using gray card stock and the Mr. Peter Rabbit die cut out the body.  Next use the same die and cut out the overalls in a denim DP.  Also using the same die and cut out the Easter eggs using yellow, orange, and pink card stock
7.  Shade the bunny with a gray ink then glue on the overalls add the black pearl eye and tiny buttons.  Glue the eggs into the grass and one in the bunny's hand and your card is complete.

Cottage Cutz Products


I hope that you are finishing your Easter cards too and that this little card has given you some inspiration!  As always thanks for stopping by!
Blessings
Pam


Sunday, March 04, 2018

Easter Wreath

Hi everyone!

It's Anja here. Easter holidays are approaching and it's time to make some Easter cards. I decided to make an Easter wreath, using the new Fresh Spring Floral. It allows you to make a perfect wreath. I used eggs instead of flowers.


For this card I used:
- Cottage Cutz dies (Fresh Spring Floral, Happy Phrase, Mr. Peter Rabbit, Nested Stitched Scallop Circle Set, Pierced Circle Set),
- watercolors,
- white watercolor card stock for die cuts,
- white card base (13,5x 13,5 cm),
- patterned paper (13x13 cm),
- acetate foil,
- adhesive foam pads,
- double sided adhesve tape,
- washi tape,
- black pen,
- white pen,
- paper glue.

First I die cut the pieces for the wreath. I die cut two sets. I used my new Gansai Tambi watercolors to color the greenery and the little flowers.


I added small white dots with white pen to the middle of the flowers.


Then I used the same colors to color a piece of paper. I drew stripes of different colors. I let the paper to dry.

 
I cut Easter eggs from different colors.


Then I combined everything into the wreath and glued it together.


I cut a scalloped circle and then die cut  another circle into it to make a circle frame.  I glued the frame around the circle cut from the patterned paper.


Then I cut the circle into the card base and pattered paper. I used washi tape to hold the die to the middle of the paper.


I put stripes of double sided adhesive tape around the hole and glued acetate foil on it.


I added adhesive foam pads on the other side of the patterned paper.  Then I glued the wreath on the foil and then the patterned paper on the card base.


Something was missing, so I decided to put a sentiment on the card. I die cut phrase happy from white card stock and glued it over the wreath.


I decided to hand write the phrase Easter inside. I used black pen.


And this is my finished Easter card.


Don't forget to stop by in the store and check out the new stitched collection of dies. They are so loely and you can still get them 25 % off.

Have a nice Sunday. I'll be back again next week.
Anja Z.

Cottage Cutz dies I used:


Monday, February 19, 2018

Eggs in a Basket/Wagon

Hi, Lois here with my Monday card.  Spring is making its way into Florida at last.  After a few cool/cold snaps, it's finally getting more like Florida weather around here.  CottageCutz has a new Spring release with some really cute flowery and Easter dies, which are on sale for a short while longer.   I've used several of them on my card for today.


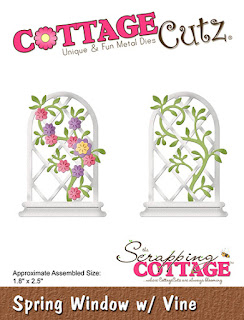
I started my card by running a strip of white cardstock through my Xyron sticker maker and then cutting out the Spring Window w/ Vine.


By putting the adhesive on the back of the cardstock prior to cutting, I'll be able to construct my window more easily on the card. 

I cut my card base as follows:

Purple - 8 1/2" x 5 1/2"
Gray - 4" x 5 1/4"


I wanted a brick background for my bunny, so I used a favorite technique of inking up my embossing folder with gray ink prior to running the cardstock through my Cuttlebug.  The ink is pressed onto the paper, creating the "mortar" between the bricks.


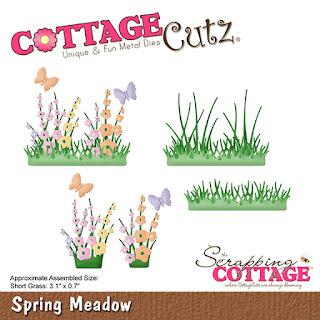
I then cut two sets of shapes from the Spring Meadow die.  I did this because I knew I would need more than just the single set of die-cuts for my little scene.


After coloring both the Spring Window and Spring Meadow die-cut pieces with Copic markers, I constructed my scene on the brick background.


As you can see, I saved the inner white pieces of the window to place into the window frame.  When I attached the front layer of grass, I put narrow strips of foam tape behind the die-cut pieces.  This would allow me to insert the bunny behind the grass.  I wanted to wait until after the bunny was on the card before placing the butterflies.

I then cut the bunny out . . .


. . . and colored him and his wagon and eggs with markers.


After constructing Mr. Peter Rabbit and his wagon full of eggs, I placed some small foam pop dots behind his head as well as the wagon and some glue behind his feet.  That way his feet would slip in behind the grass, but his head, body, and wagon would be popped up.


I then added the butterflies in the open space next to the window, and my card was completed.


CottageCutz dies used on my card are:

http://www.scrappingcottage.com/cottagecutzspringwindowwvine.aspx


http://www.scrappingcottage.com/cottagecutzspringmeadow.aspx

http://www.scrappingcottage.com/cottagecutzmrpeterrabbit.aspx