Showing posts with label Merry Christmas Tree. Show all posts

Sunday, September 18, 2022

Easy Christmas Easel Card

Happy SunDIE Cottage Cutz Friends!
Melinda here with you on this Sweet Sunday. Today I am sharing a fun and very easy easel card I created featuring dies that are part of the new Christmas Part 1 Release.

Here's a look at my completed card. 
It is a horizontal top folded A4 card base. I made it into a quick and easy easel card. This is a view of the card when open.

Here is a view of the card when closed.


I started by making a rosette. I cut two pieces of 1.5" x 12" of patterned paper. I then scored them length wise in .5" increments. 
I then fan folded them and then joined them together. I then glued the two ends together to make it circular. I then finished creating the rosette.


I then attached the rosette to the second largest scalloped circle die in white cardstock.

I then added a patterned paper mat onto a piece of 4.25 x 5.5 inch white cardstock base.

I then added the cute christmas tree die onto the top of the rosette. I added some cute dew drops to the tree. I used a piece of patterned paper and some ribbon to create a border along the bottom of the card face. Once it was done, I added it to the base of the card. I did this by adhering the top mat to the bottom half of the top base only. Do not glue the mat to the top half or anywhere above the fold.

I then cut a piece of patterned paper and mounted to some white cardstock. I used some foam tape to give it some lift. I then used the Merry and Christmas from the tree die. This serves as a stopper for when the card is opened. 

Here is one last look at the card. I think it turned out so pretty. 


Don't forget to head over to the CottageCutz YouTube channel and check out all of the amazing projects on there. Our video team is doing a wonderful job of filling the channel with all sorts of creative content! You don't want to miss it!

Dies I Used


Nested Scallop Die set


Pierced Circle Set


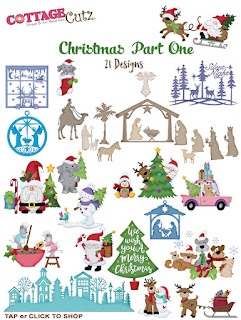
Here's a look at the entire release. Be sure to head over and grab them while they last!


Well that about covers it for today! Until the next time, have a wonderfully craft-die day!
Melinda Beltran

Friday, September 09, 2022

Merry Christmas Tree

Hello CottageCutz friends! Thanks for taking the time to stop and visit with us today. It's Mary Marsh here bringing you the Friday edition of the Blog.

It's new release time!!! We have new dies in the online store. It's time for our Christmas release and we have 21 new designs for Christmas Part 1. They are currently on sale for 30% off retail.

There is a great selection of religious, whimsical and some super cute birds and animals. All of your Christmas card making ideas are covered in this release. Today for your viewing pleasure, I am using the new Merry Christmas Tree die. So let's get started with the details of how I created this card. 

Design Steps:

Since I knew what die I wanted to use this week, I just needed a layout to show it off well. I checked out some sketches online and then found this one from Splitcoaststampers SC922.  I thought it would work perfectly and allow me to use designer paper to take the card up a notch. 
Now that I had my layout, I looked for a designer paper. I found a pattern that's from a 2018 collection that I liked. It has copper accents, so I used a brushed copper cardstock as an accent layer.  I attached it then remembered I forgot to take a photo (LOL). The card base is a rich wine shade- it's named merlot.  

Merlot Card Base: 4 1/2" x 5 3/4"
Brushed Copper Layer: 4 1/4" x 5 1/2"
Designer Paper: 4 1/8" x 5 3/8"
I cut the tree image in a blue-green cardstock paper and the Merry Christmas phrase in a rich wine shade both coordinate with the designer paper. Used the largest (3 1/4" x 4 1/4") Stitched Rectangle die cut in a sand cardstock as the frame for the tree image. 
Now for the element of the sketch with the horizontal lines, I decided not to cut the designer paper into strips. Instead, I cut 1/4" strips of the copper brushed cardstock and used those to divide the designer paper. Sketches are open to your interpretation, as long as you keep the layout looking similar.  
Next, I attached the tree to the rectangle image panel with dimensional adhesive. Then the rectangle panel to the designer paper layer also using dimensional adhesive. This adhesive was just a bit thinner to give a slight lift from the designer paper.  I also cut new stars for the tree image in copper brushed cardstock. The photo above shows them in gold. Added a few enamel dots to the image panel just for interest. 

To complete my card, I attached the panels to the card base with double sided adhesive. That's it for me for this post. I hope I have given you an idea for a way to use this new die. See you next week. 
Reminder: Our YouTube Channel has a new video from Linh Van. There is a giveaway for being a subscriber, liking the video and leaving a comment. Click here.

Die I used to create card: