Showing posts with label Lois. Show all posts

Monday, October 29, 2018

Merry Christmas from Dakota

Hi, Lois here with my regular Monday post.  The Scrapping Cottage (CottageCutz) has a die in its new Christmas release that is available ONLY on their website.  It will not be available from any other outlets.  Called Dakota the Husky, some of the design team members will be featuring him on our cards this week.  He is really cute!


I used the version of Dakota wearing his Santa hat on my card -- along with some new Christmas plaid paper I just bought last week.


I started my card by cutting out the die pieces from white cardstock.


I then colored him with Copic markers and put him together.


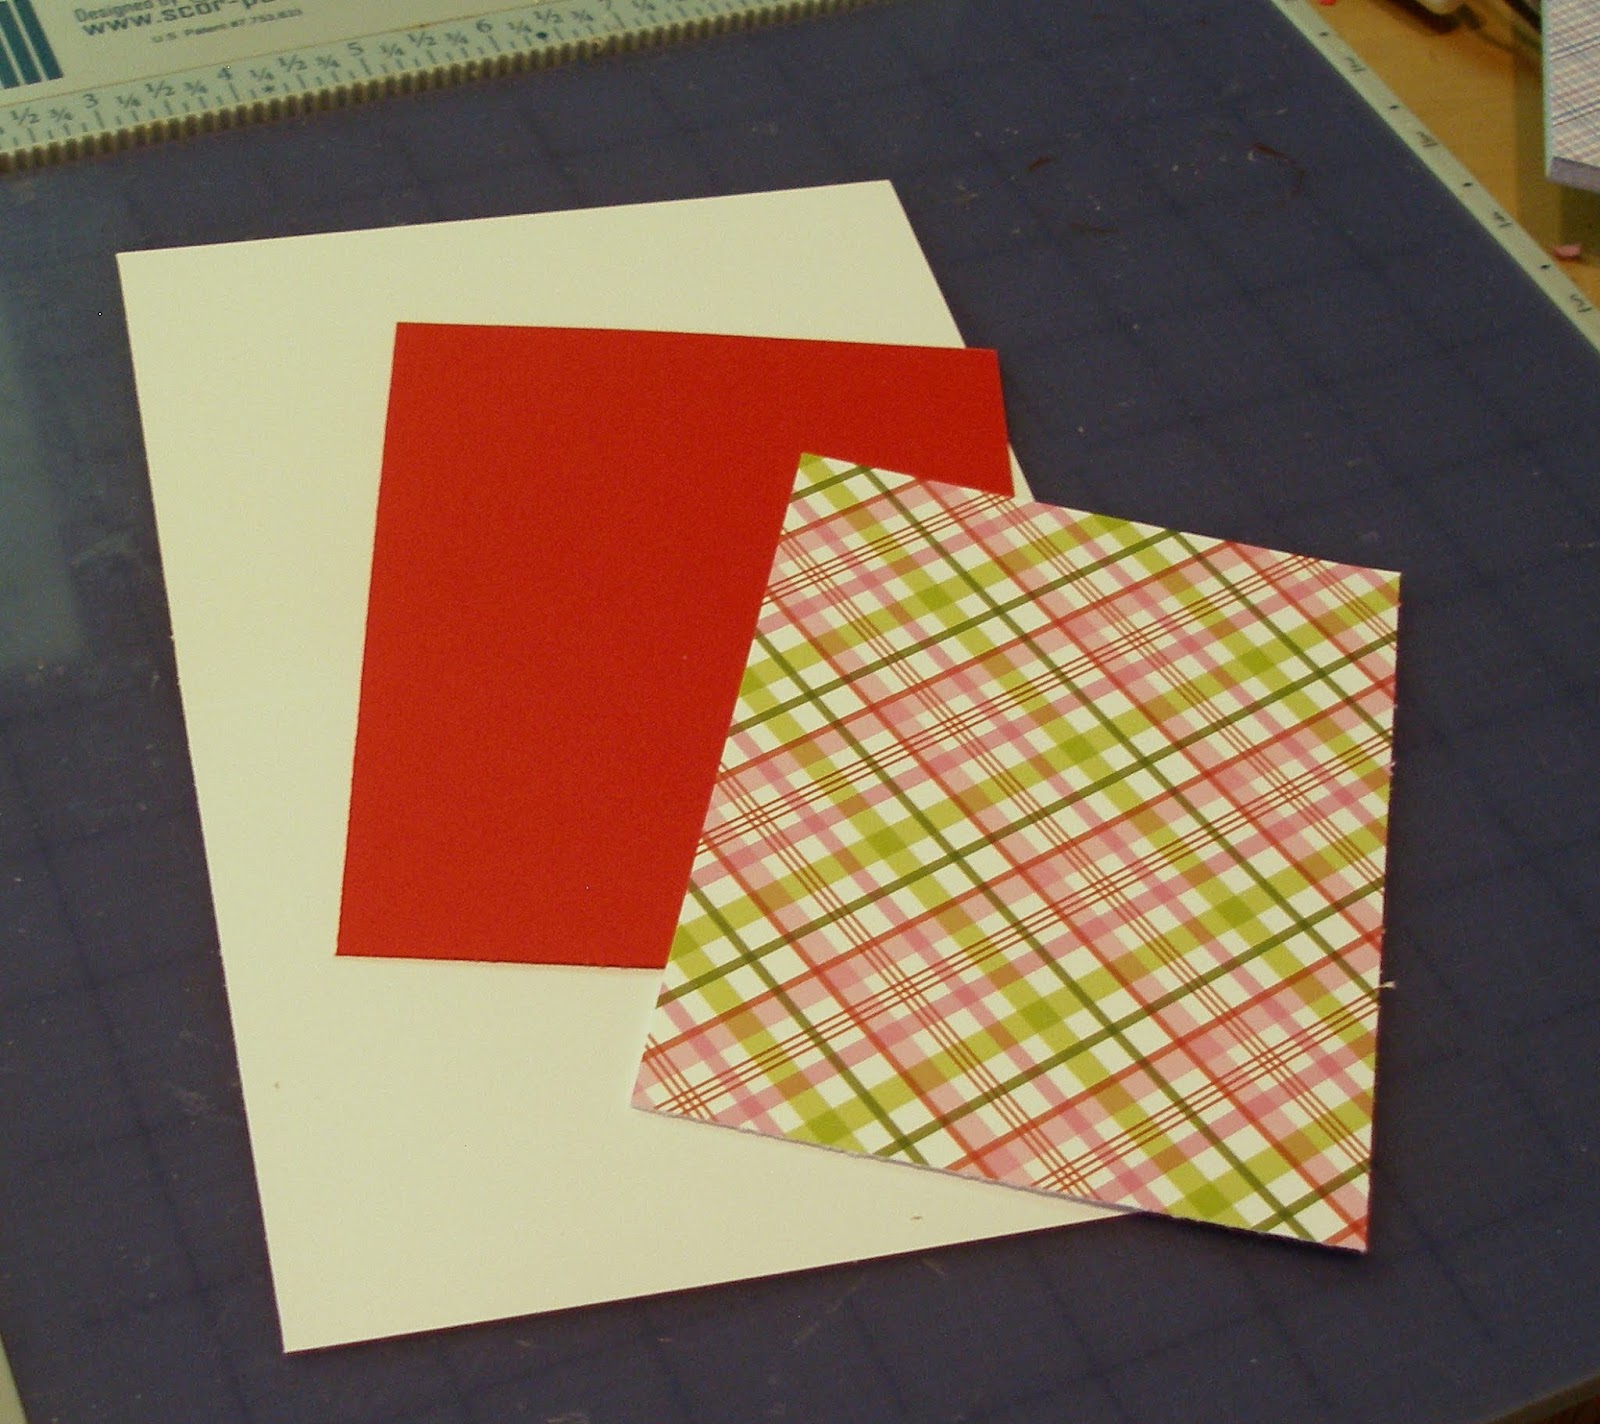
My cardstock measurements are as follows:

White - 5 1/2" x 8 1/2", scored at 4 1/4"
Red - 5 1/4" x 4"
Plaid - 5 1/8" x 3 7/8"


I then cut three ovals using the Cross-Stitched Ovals set.  To save cardstock, the red oval was cut from the center of the 4" x 5 1/4" layering piece.  The plaid oval came from a scrap.


I constructed my card, layered the ovals together, and placed some adhesive foam circles on the back of the oval and Dakota . . .


. . . placing them on the front of the card.


Using a Merry Christmas phrase, I cut the sentiment from dark green cardstock.


After gluing the sentiment on the popped-up oval element, my card was complete.


CottageCutz dies used on my card are:

http://www.scrappingcottage.com/cottagecutzdakotathehuskyexclusive.aspx

http://www.scrappingcottage.com/cottagecutzcross-stitchedovalsetbasics.aspx

http://www.scrappingcottage.com/cottagecutzexpressionsmerrychristmas.aspx

Monday, October 08, 2018

Snowy Village

Hi, Lois here with a Christmas card today, made with Christmas Village 1 from the new Christmas release from CottageCutz.  There is also a Christmas Village 2, which has two additional buildings.  It's on my wish list!  Be sure to check the website for the Christmas (part3) and Halloween releases, which are currently on sale at 25% off.


To start my card I cut my cardstock and snow-patterned paper, as follows:

White - 5 1/2" x 8 1/2", scored at 4 1/4"; and 4" x 5 1/4"
Patterned paper - 3 3/4" x 5"


After folding the card base, I glued the patterned paper in the center.


I then cut an oval into the smaller white panel and cut the oval in half.  These half-ovals will form the snowdrifts on my card.


I wanted the white panel raised up a bit, so I put foam tape strategically onto the back of the panel . . .


. . . and placed the half-ovals behind the opening.


I then adhered the panel to the card base.


I cut the images from a scrap of white cardstock.


I wanted a little splash of color, so I dabbed some Copic markers onto a small scrap, cut it to the size of the church window openings and glued it behind the openings.  I then colored the church doors and the heart over the house door with red, placed small strips of Scotch tape behind the openings and inserted the small die-cut pieces.


I applied a bit of BG0000 Copic marker along the edges of the snow drifts to give some dimension . . . 


. . . and placed the buildings and the tree within the opening.


At this point, I decided that the scene needed another tree and a bit of glitter, so I added some Stickles along the roof lines and cut another tree and slipped it behind the house.  My card was now finished!


CottageCutz dies used on this card are:

http://www.scrappingcottage.com/cottagecutzchristmasvillage1elites.aspx

http://www.scrappingcottage.com/cottagecutzdouble-stitchedovalsetbasics.aspx


Monday, October 01, 2018

Halloween Z-Box Fold Card

Hi, Lois here at the start of a new month  It's October -- time for colorful leaves, pumpkins, and Halloween!  Halloween is what I'm bringing you today.  CottageCutz has a brand-new release of really cool Halloween dies -- currently on sale at 25% off, along with their Christmas (Part 3) release.

I'm a big fan of fun-fold cards, and my card today is a relatively simple fun-fold card -- a Z-Box Fold card, using two of the new Halloween dies.


To start the card, cut cardstock and patterned paper as follows:

Black - 4 1/4" x 5 1/2"
Orange - 4" x 9 3/4"
Patterned paper - 4 3/8" x 2 7/8"
Patterned paper - 7/8" x 5 1/8" (one piece), 7/8" x 2 1/8" (two pieces)


Place the orange cardstock in your paper trimmer with the short side at the top and place the long side at the 1" mark.  Cut a 1" slit from the 3" mark down to the 7 1/2" mark.  


Place the cardstock in your scoring board and score down to the cut line at the 3" mark, up from the bottom at the 7 1/2" mark, and all the way through at the 5 1/8" mark.


Place Scor-Tape on the back of the largest section of the orange cardstock, as shown.


Fold on the score lines and adhere to the black 4 1/4" x 5 1/2" panel.


Cut three ghosts from the die.


Color and construct the ghosts.


Cut the Spooky Garland from a scrap of black cardstock.


Adhere the patterned paper to the card base and sponge around the front panel.  Add the ghosts and garland, and your card is completed.


CottageCutz dies used on this card are:

http://www.scrappingcottage.com/cottagecutzhalloweenghosts.aspx

http://www.scrappingcottage.com/cottagecutzspookygarlandelites.aspx