Showing posts with label Janja. Show all posts

Tuesday, June 02, 2020

Garden Cat with a Wagon

Hi Janja here. Welcome to the blog.
Today I would like to share with you a card made with another cute die from the gardening release.


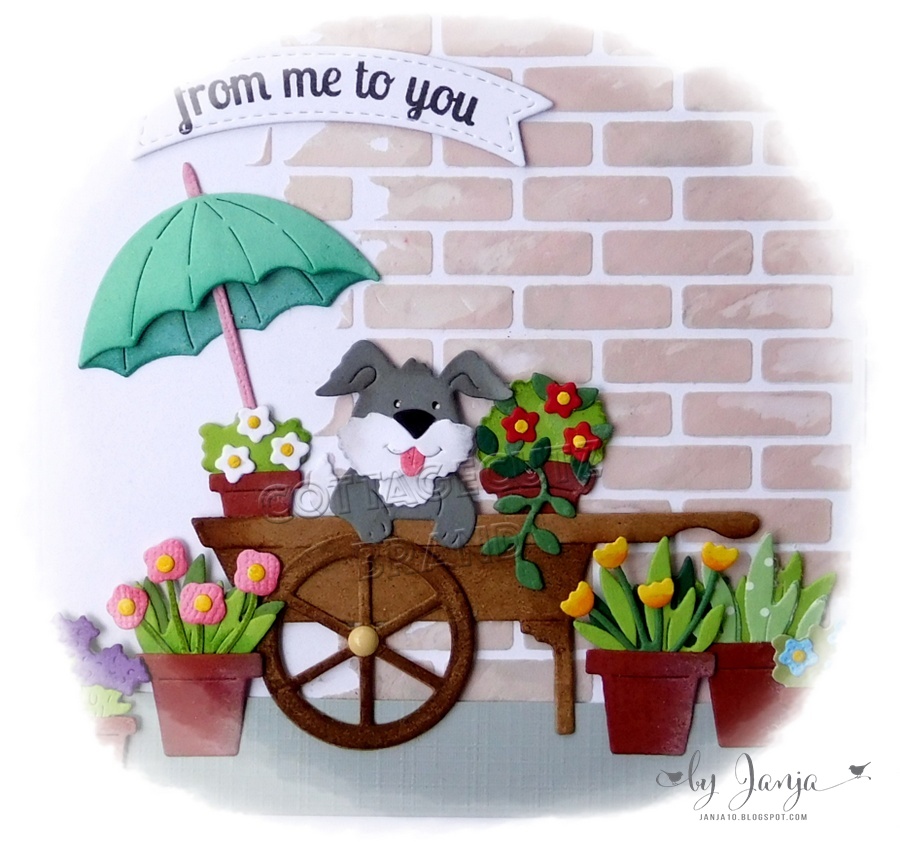
- CottageCutz dies: Garden Cat w/ Wagon, Holiday Gate With Wreath
- blank card: 5 5/16" x 5 5/16" (13,5 x 13,5 cm), folded
- white cardstock: 4 3/4" x 4 3/4" (12 x 12 cm)
- different colors of cardstock
- different colors of ink pads
- enamel dots
- glue, double-sided adhesive tape, self-adhesive foam pads

Start by die-cutting all the pieces for the main image out from different colors of cardstock. Shade all cutouts with ink pads.


Stamp the wood on beige cardstock with coffee-colored ink. Then cut out the gate twice. Use scissors to cut one in half. Assemble the fence.


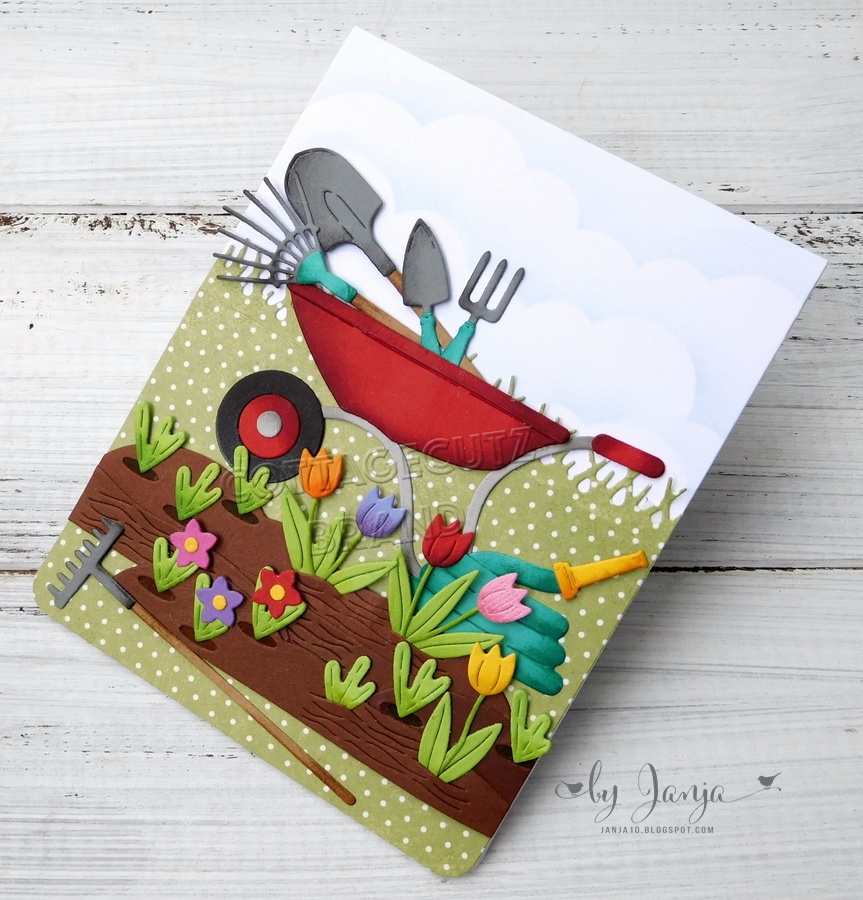
Trim white cardstock. Use a large brush and blue ink to shade the background.


Paste the main image on the prepared background as shown. 


On the back, add self-adhesive foam over the entire surface and attach to the front of the card.


Lastly add shade under the wagon and shoes. Use a light grey ink pad.


Thank you for stopping by. 
Janja


Tuesday, May 26, 2020

For a gardener

Hi Janja here. Welcome to the blog.
I have another card on the topic of gardening to share with you today.


- card blank: 4 1/4 x 5 1/2" (10,8 x 14 cm)
- patterned paper: 4 1/4 x 3" (10,8 x 7,6 cm)
- different colors of cardstock
- different colors of ink pads
- cloud stencil
- glue, double-sided adhesive tape, self-adhesive foam pads

Start making a card by cutting all the elements out from different colors of cardstock. Overshadow them with ink pads for more depth.


Cut out the grass border twice. Glue the lawn to white cardstock which is the same size as the card blank.


Create a cloudy sky with a stencil and a light blue ink. Paste the background on a blank card.


Gradually paste all the cutouts as shown.


Thank you for stopping by. And don't forget to check the Memorial Day Sale!
Janja


Tuesday, May 19, 2020

Puppy in a Garden Cart

Hi Janja here. Welcome to the blog.
Today, I want to share with you a card with a cute puppy in a garden cart.


- CottageCutz dies: Puppy in Garden Cart, Potting Shed (potted plants), Retro Tag Toppers
- blank card: 5 5/16 x 5 5/16" (13,5 x 13,5 cm), folded
- white cardstock: 4 3/4 x 4 3/4" (12 x 12 cm)
- grey paper strip: 4 3/4 x 5/8 " (12 x 1,6 cm)
- different colors of cardstock
- different colors of ink pads
- brick wall stencil
- white texture paste
- spatula
- enamel dot
- glue, double-sided adhesive tape, self-adhesive foam pads

I used different colors of cardstock for all the cutouts and colored the edges with slightly darker ink pads.
You can also use white cardstock and then color all the cutouts with any color media.


Cut a square out of white cardstock. Then apply a white paste, stained with grey and red ink, over the brick wall stencil and let it dry.


Cut a banner out of white cardstock and stamp a sentiment.


Add a grey strip to the bottom edge of the brick wall.
Complete the card.


Thank you for stopping by.
Janja


Tuesday, May 12, 2020

To brighten your day

Hi Janja here. Welcome to the blog today.
As much as I love creating my cards with lots of cutouts, it’s fun to take a step back occasionally and create a simple card.


- CottageCutz die Gardening Tomte
- blank card: 4 ¼ x 5 ½" (10,8 x 14 cm), folded
- white cardstock: 3 1/2 x 4 13/16" (8,9 x 12,2 cm)
- different colors of cardstock
- different colors of ink pads
- white ink pen
- glue, double-sided adhesive tape

Start by die-cutting all the pieces for the main image out from different colors of cardstock. For greater depth, use ink pads that are slightly darker than the cardstock.


Then cut out a rectangle from white cardstock.
To add a little more depth to the overall look, leave the die in place and shade around the bottom with a grey ink pad and blender brush. You will get white unshaded edges at the bottom.
I printed this cute quote later on the top.


Trim the selected patterned paper to the size of a blank card. Stick it on the front of the card.


Completed card.


Thank you for stopping by.
Janja

Tuesday, May 05, 2020

Birthday hamsters

Hi Janja here. Welcome to the blog.
For today's post, I wanted to create something vibrant. I used some dies from past releases and here is my birthday card.


- CottageCutz dies: Happy Hamster, Flower Pot House, Clouds & Sun
- blank card: 4 ¼ x 5 ½” (10,8 x 14 cm), folded
- white cardstock: 3 15/16 x 5 3/16” (10 x 13,2 cm)
- different colors of cardstock
- different colors of ink pads
- glue, double-sided adhesive tape, self-adhesive foam pads

First, cut out two hamsters, a large flower pot, grass and some individual flowers from different colors of cardstock. Shade all cutouts with ink pads.


Then cut the sun and white cloud out of the cardstock. Stamp a sentiment.


Trim white cardstock. Use a large brush and ink to shade the background.


Paste the background on the front of the card. Gradually paste all the cutouts as shown and we're done.


Thank you for stopping by.
Janja