Showing posts with label Happy Reindeer & Snowman. Show all posts

Thursday, December 22, 2022

Frosty Friends

Hello Crafty Friends!

It is Pam sharing with you today! Merry Christmas to all!

Well only 4 days left until the big day of celebration!! And of course I am getting a last minute gift ready.  And what is a gift without a handmade card!  So this is the last card of the season.  I used the Happy Reindeer and Snowman.


Design Steps:


1.  Using the Happy Reindeer and Snowman die cut out the following pieces of card stock:  brown, red dotted DP, green, black, orange, dark brown, and white.  Shade the edges with coordinating inks and a small applicator.  Assemble the pieces with a fine tip glue

2.  Use a white A2 card base, cut red dotted DP 4 18, 5 3/8, cut a piece of reindeer DP 4 3/4 x 3 1/2 (using the 3rd from the largest Pierced Oval die cut the oval in the center of this reindeer DP) and finally cut a piece of white 4 1/2 x 3 1/4 and sponge or brush with blue ink
3.  Glue the red dotted DP to the white card base, next glue down the blue inked card stock to the center of the red dotted paper.  On the back of the reindeer paper add dimension tape and then pop it over the blue inked paper
4.  Add the snow to the bottom of the oval and then glue down the reindeer and snowman.  Add the bow and your sentiment and your card is complete

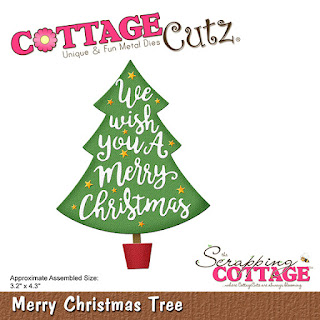
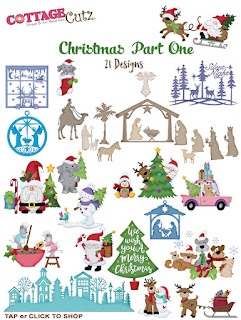
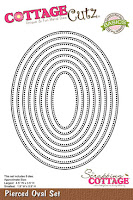
CottageCutz Products


We have more inspiration on our YouTube Channel check it out HERE

Thanks so much for stopping by!  And I will see you next Thursday.

Blessings and Take Care


Sunday, October 23, 2022

HoHoHo Screen Divider Card

Hello CottageCutz friends! Thanks for taking the time to stop and visit with us today. It's Mary Marsh here bringing you the Sunday edition of the Blog. 

It's new Christmas release time!!! We have new dies in the online store. Our Christmas Part 2 release with 36 new designs is available and ready for shipment. The individual dies are on sale for 30% off. It's only for a limited time so don't delay. You are going to love all the whimsical designs that are available in this release. There is something for everyone to make your Christmas cards extra special this year.

We also have Christmas Part 1 in the store and those dies are also available at 30% off.  There is a great selection of religious, whimsical and some super cute birds and animals. All of your Christmas card making ideas are covered in this release. 

Today for your viewing pleasure, I am using dies from the Christmas Part 1 release - Happy Reindeer & Snowman, Snowman w/Tree and the Christmas Tree Peekers. I also used an older die- Happy Ho Ho Ho for my sentiment from the 2019 release. 

I created a fun fold card called a Screen Divider. I made a card with this fold previously. Check here on this post for all the details. If you would like a video tutorial check this one from Splitcoaststampers. 

I used some non-traditional colors for my card. They are from the Splitcoaststampers color challenge #914.  We were to use granny apple green, melon mambo and highland heather for the color trio. I thought I would try these non-traditional colors for a Christmas card.
granny apple green, melon mambo, highland heather

I embossed the background panels with a "softly falling snow" embossing folder. On the first panel I used the Snowman w/Tree, the 2nd panel is the Christmas Tree Peekers and the 3rd panel is the Happy Reindeer & Snowman die. The "happy ho ho ho sentiment " was spread across the 3 panels.  The last panel I used for my stamped greeting.

That's it for me for this post. The team will be featuring dies from the newest Christmas Part 2 release all week so check back every day.

Reminder: Our YouTube Channel has a new video from Linh Van. There is a giveaway for being a subscriber, liking the video and leaving a comment. Click here.

Dies I used to create card:


Tuesday, September 20, 2022

Easy Reindeer and Snowman Christmas Card

Happy TuesDIE Cottage Cutz Friends!
Melinda here with you on this terrific Tuesday. Today I am sharing a fun and very easy card I created featuring dies that are part of the new Christmas Part 1 Release.

Here's a look at my completed card. 
It is a standard A4 Top Folding card. It is so easy to make, you could easily mass produce these.


I started out with all my die cuts cut from white cardstock. This is hands down my favorite technique. I guess I like to do this because I find coloring so therapeutic. While I don't have any coloring books, coloring in these die cuts is a great alternative.

Here is a shot where I am adding some chalking details to the snowman. It gives it a nice shading effect without having to bust out the markers.

Here is a closer look at the super cute snowman and reindeer. I added them to a pierced circle die that I cut from some patterned paper. I then added all of that to a scalloped circle die cut from some basic white cardstock. In this closeup you can also see the white paint that I used for the snow as well as for the snowman's cap.


Here is a closer look at the sentiment. I cut it from the Merry Christmas tree die . I added it to two layers of patterned paper to create a border.


Don't forget to head over to the CottageCutz YouTube channel and check out all of the amazing projects on there. Our video team is doing a wonderful job of filling the channel with all sorts of creative content! You don't want to miss it!


Dies I Used


Nested Scallop Die set


Pierced Circle Set


Here's a look at the entire release. Be sure to head over and grab them while they last!


Well that about covers it for today! Until the next time, have a wonderfully craft-die day!
Melinda Beltran

Monday, September 19, 2022

Origami 4-Drawer Easel Card

Happy Monday CottageCutz friends!  Kris here with an easel card that tops a set of 4 origami drawers that are perfect for gifting li'l treasures or small wrapped candies etc!  Although the card folds down flat, the boxes underneath do not, so this is one of those gifts that's perfect for giving in person ... or displaying on your entryway table for your holiday guests!

My card today uses 2 of the cutest dies from the NEW CHRISTMAS RELEASESnowman with Tree and the Happy Reindeer & Snowman  but ALL the individual dies in this release are  30% off for a limited time!!


While I am not the original creator of the 4-drawer easel card, I did create my own version back in 2010 using a simple origami fold for the drawers and then I came up with the measurements for the drawer casings.  You can of course just make 4 simple boxes from cardstock, but I think it's pretty to have them made inside and out from patterned paper - light weight scrapbook paper is key!  It's fun to go back to this project using NEW products through the years ~ Here is how I did it!

CUTTING & SCORING:
Red Cardstock 
•  Cut 5" x 10" and score at 5" and 2-1/2" 
•  5" square
•  4-3/4" x 1-7/8"

White Cardstock
•  (3)  4-3/4" squares
•  5" square
•  8-1/2" x 7-5/8"--- from that, cut (4) pcs. that are 7-5/8" x 2-1/8" and score each strip at 7/8”, 3 1/8”, 4 ¼”, and 6 ½”
•  4-3/4" x 2-1/4"  
•  Cut the smallest die from the Scalloped Stitched Rectangles Slimline  (*optional)

Teal Snowflake Patterned Paper
•  (2) 4-1/2" squares

Red/Pink Polka-Dot Paper
•  (4) 6" squares

DESIGN STEPS:

1.  I started by creating my easel card!  I layered one of my snowflake papers to a white mat then onto the 5" red square. 

2.  I added tape to the lower half of my closed card front and attached my snowflake piece on top.
 

3.  From one of my 4-3/4" white squares, I die cut 2 hills from the Hills Slimline set.  I glued the highest one directly to the snowflake layer, and I popped the front one up with foam tape.


4.  I die cut all my cute elements from the  Snowman with Tree and the Happy Reindeer & Snowman as well as the Merry Christmas with friendsI colored them with Copics and pieced together.  The reindeer's muzzle & scarf, and the snowmen's arms & hats are popped up with foam dots.


5. Once again, I attached my 2nd snowflake layer to my white mat (4-3/4" square) and then attached that to the INSIDE of my card.

 6.  I cut my white scalloped rectangle to a width of 4-3/4" and attached to my red mat (4-3/4" x 1-7/8").  I then added foam tape to pop it up so it will act as an easel and prop up my card front! (see photo below)

7.  I glued the die-cut snow pieces & sentiments and everything else was attached with foam tape.


Now to make our drawers and base.... stick with me, I PROMISE this is easier than it looks! ☺

8.  With one of your 6" square patterned papers, fold in half, then open it up and fold in half the other way as shown below.


9.  Fold all 4 corners up the center and keep them folded for the next step.


10.  Fold one edge up to the center, unfold that edge before you go onto the next edge until you have all 4 edges folded as shown below. 


11.  Now unfold the TOP and BOTTOM sections all the way, and then fold the side sections up ash shown below.  

12.  Using your pointer fingers, press in on the top corners which will cause the top section to pop up.  


13.  Now fold that top triangle over the folded edge and press it down, creasing all folds.


14.  Repeat on opposite edge.

15.  *Optional:  You can glue down the triangle flaps if you wish.


16.  Next, we need to punch holes in the front of our boxes (choose one of the thicker sides) and insert knobs!  If you don't have these button studs you can get creative with pipe cleaner, stacking foam dots and adding a charm, brad or decorative pull, etc. 


17.  I used my Crop-o-dile to add the holes in the same spot on all 4 drawers.


18.  Now to make our drawers casings!  Fold and burnish your (4) strips that are 7-5/8" x 2-1/8"

19.  *Important!!!  Glue the ends so that the SHORTER end is OVER (outside) the longer end as shown below.

20.  Now, before you start gluing, just place your casings onto the 5" square base so that ALL the seams are facing the inside, and so that you only have ONE open end along each edge.  In the photo below, the left box is the open end of the casing, where we will slide a drawer into, but the one next to it on the right is the side of the next casing.  

*You will want your boxes to be touching each other, so you will have a small border around. Once you have them centered..... no seams are showing on the outside, and only ONE opening per edge.... Glue them down, one by one! 


21.  Insert your drawers!


22.  With drawers pushed all the way in, add glue to the whole top being careful not to get too close to the outer edges - you don't want seepage! ☺  Then attach your easel card to the top, centering it with the white base under the drawers.


23.  Attach your 4-3/4" x 2-1/4" pc. of white cardstock to the back of your easel as shown below.  This is a spot for you to write a personal message to your recipient.  OR, you could write a note and put it in one of the drawers!  ☺


24.  Be sure to add some wrapped candies or li'l gifties inside your drawers!  Christmas candy isn't out yet here, it's all Halloween, so I added some caramels to mine for now.  They won't last long enough to gift this to someone, LOL!!!


Here are the Products I Used:


THANK YOU for taking time to visit today!  
I hope I inspired you to get crafty with your favorite CotageCutz dies!  

~Kristine