Showing posts with label Happy Halloween. Show all posts

Friday, October 12, 2018

Carmel Apple Treat Bags

Happy Friday!  It's Jeanne today with a super quick and easy tag  for treat bags.  Even though I don't have little ones, I get Trick-or-Treaters; mostly neighbors' kids and I love to do something extra for them. This project is perfect for the little ones that you want to do a little extra for, or if you're a mom and have a classroom of kids that needs treats, this is also for you!
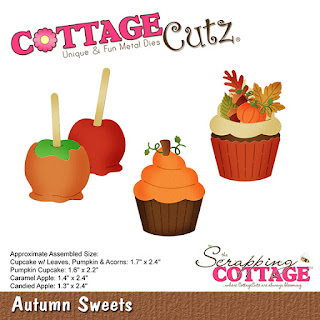
This project uses the new Happy Halloween and Autumn Sweets dies along with the Mail Tag Set (a super versatile set and one of my favorites!).
I cut the apples from the appropriate colors of card stock and two sentiments and tags/reinforcements. This makes two double sided tags.
I used a sponge dauber and the matching ink colors to add some depth to the edge.  If I were making multiples (let's say 30 for a classroom) I would not do this and they would still be very cute.
For each tag, I assembled an apple and glued it to the front of the tag.  I added the reinforcement at the top.
Then I glued the Happy Halloween to the back of the tag along with another reinforcement.
These are tied to the bags with ribbon - so cute and so easy.  A fun treat for those little ones! (Although my husband and adult daughter have been eyeing the candy corn!  LOL!)

Be sure to visit the online store where the new Autumn, Halloween and Christmas Part 3 dies are on sale for a limited time.  There are so many cute designs to choose from!

Dies:
http://www.scrappingcottage.com/cottagecutzautumnsweets.aspx
http://www.scrappingcottage.com/cottagecutzhappyhalloweenelites.aspx
http://www.scrappingcottage.com/cottagecutzmailtagset.aspx

Thanks for stopping by today!  I hope you have a relaxing and creative weekend!


Thursday, October 04, 2018

Halloween Potions!

Hi Scrapping Cottage Fans!

I really appreciate you stopping by today!  It is Pam creating with you on the blog.

Halloween is fast approaching and I am getting all of my cards ready to send out.  My friends, nieces, nephew, brother and sister love getting them.  So I have designed one that is relatively easy so you can make multiplies pretty fast.


Design Steps:

 1.  Use an A2 black card stock base cut a piece of DP just slightly smaller than the base.  Cut a piece of orange polka dot paper 4 in x 3 in
 2.  Glue the orange dotted paper to the top of the DP.  Add a piece of glittering black ribbon between the two papers
 3.  Mount the DP panel to the black card front
 4.  Use some green DP and cut a circle using the Nested Scalloped Stitched Circle Set.  I used the second from the largest.  Next using the Happy Halloween die cut it out in black cards stock.  Then use a small piece of orange and cut out just the pumpkin
5.  Glue the orange pumpkin on top of the tiny piece of yellow card stock.  Then glue the orange pumpkin on top of the black pumpkin.  Glue the sentiment to the center of the scalloped green circle.  Pop the scalloped circle to the card as shown below
CottageCutz Products


Thanks for stopping by and don't forget this awesome Halloween die is on sale right now in our online store for a big 25% off!  Visit us for all the fun and wonderful savings!

Blessings
Pam