Showing posts with label Grass Slimline. Show all posts

Thursday, August 10, 2023

Happy Fall

Hello Friend

I am in Arizona where the temperature has been soaring.  It has been over 100 degrees for a month!  So needless to say I am ready for fall!   I am trying to wish autumn here a little quicker with this cute little fall card.  I made this card with a variety of older dies.  The focal point is the Sweet Fox die which is available in the store now!  

I saw a card by Ann Chuang on Pinterest that I loved.  So I used her card as my inspiration.


Design Steps:

1.  Start by cutting all the pieces using the following dies, Sweet FoxMushroom Fairy Garden, Pumpkin Pie & Latte (leaves), and Rustic Sign & Trees (log) and these colors of card stock: red, yellow, rust, orange, tan, green gray, black, white and brown


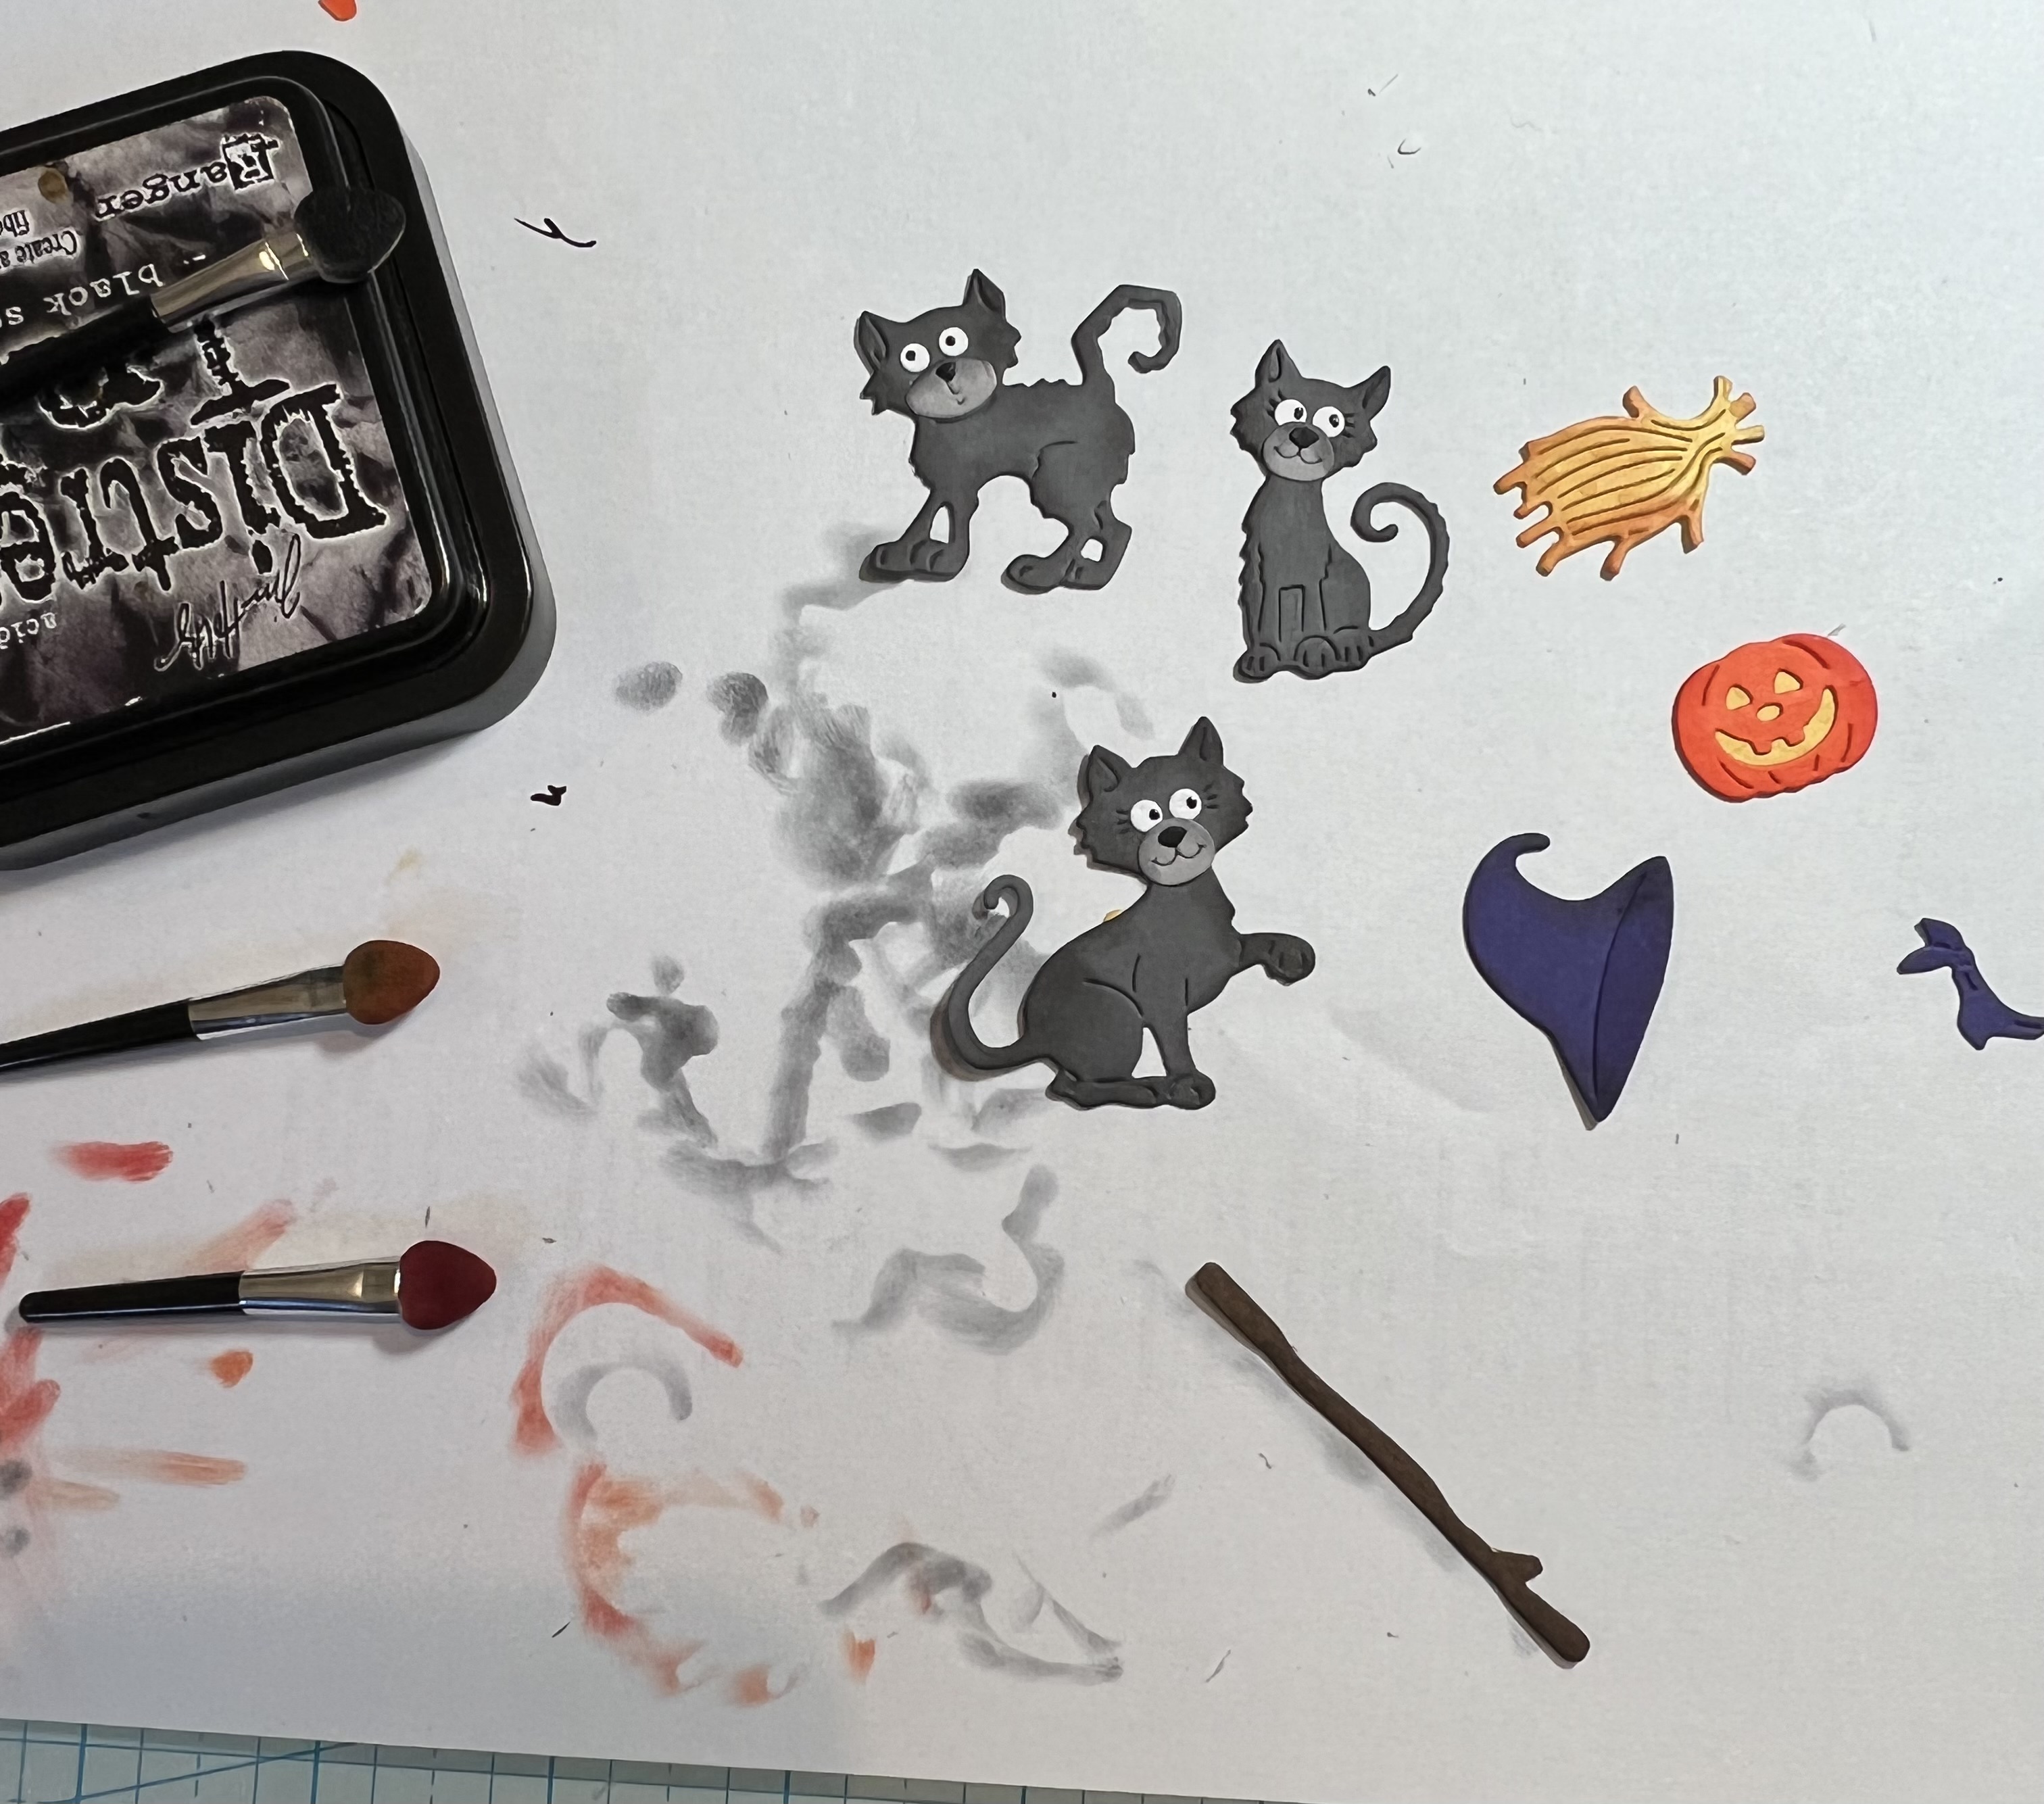
2.  Ink all of the pieces with coordinating inks.  I used TH inks and a small applicator.  After you ink assemble the pieces with a fine tip glue

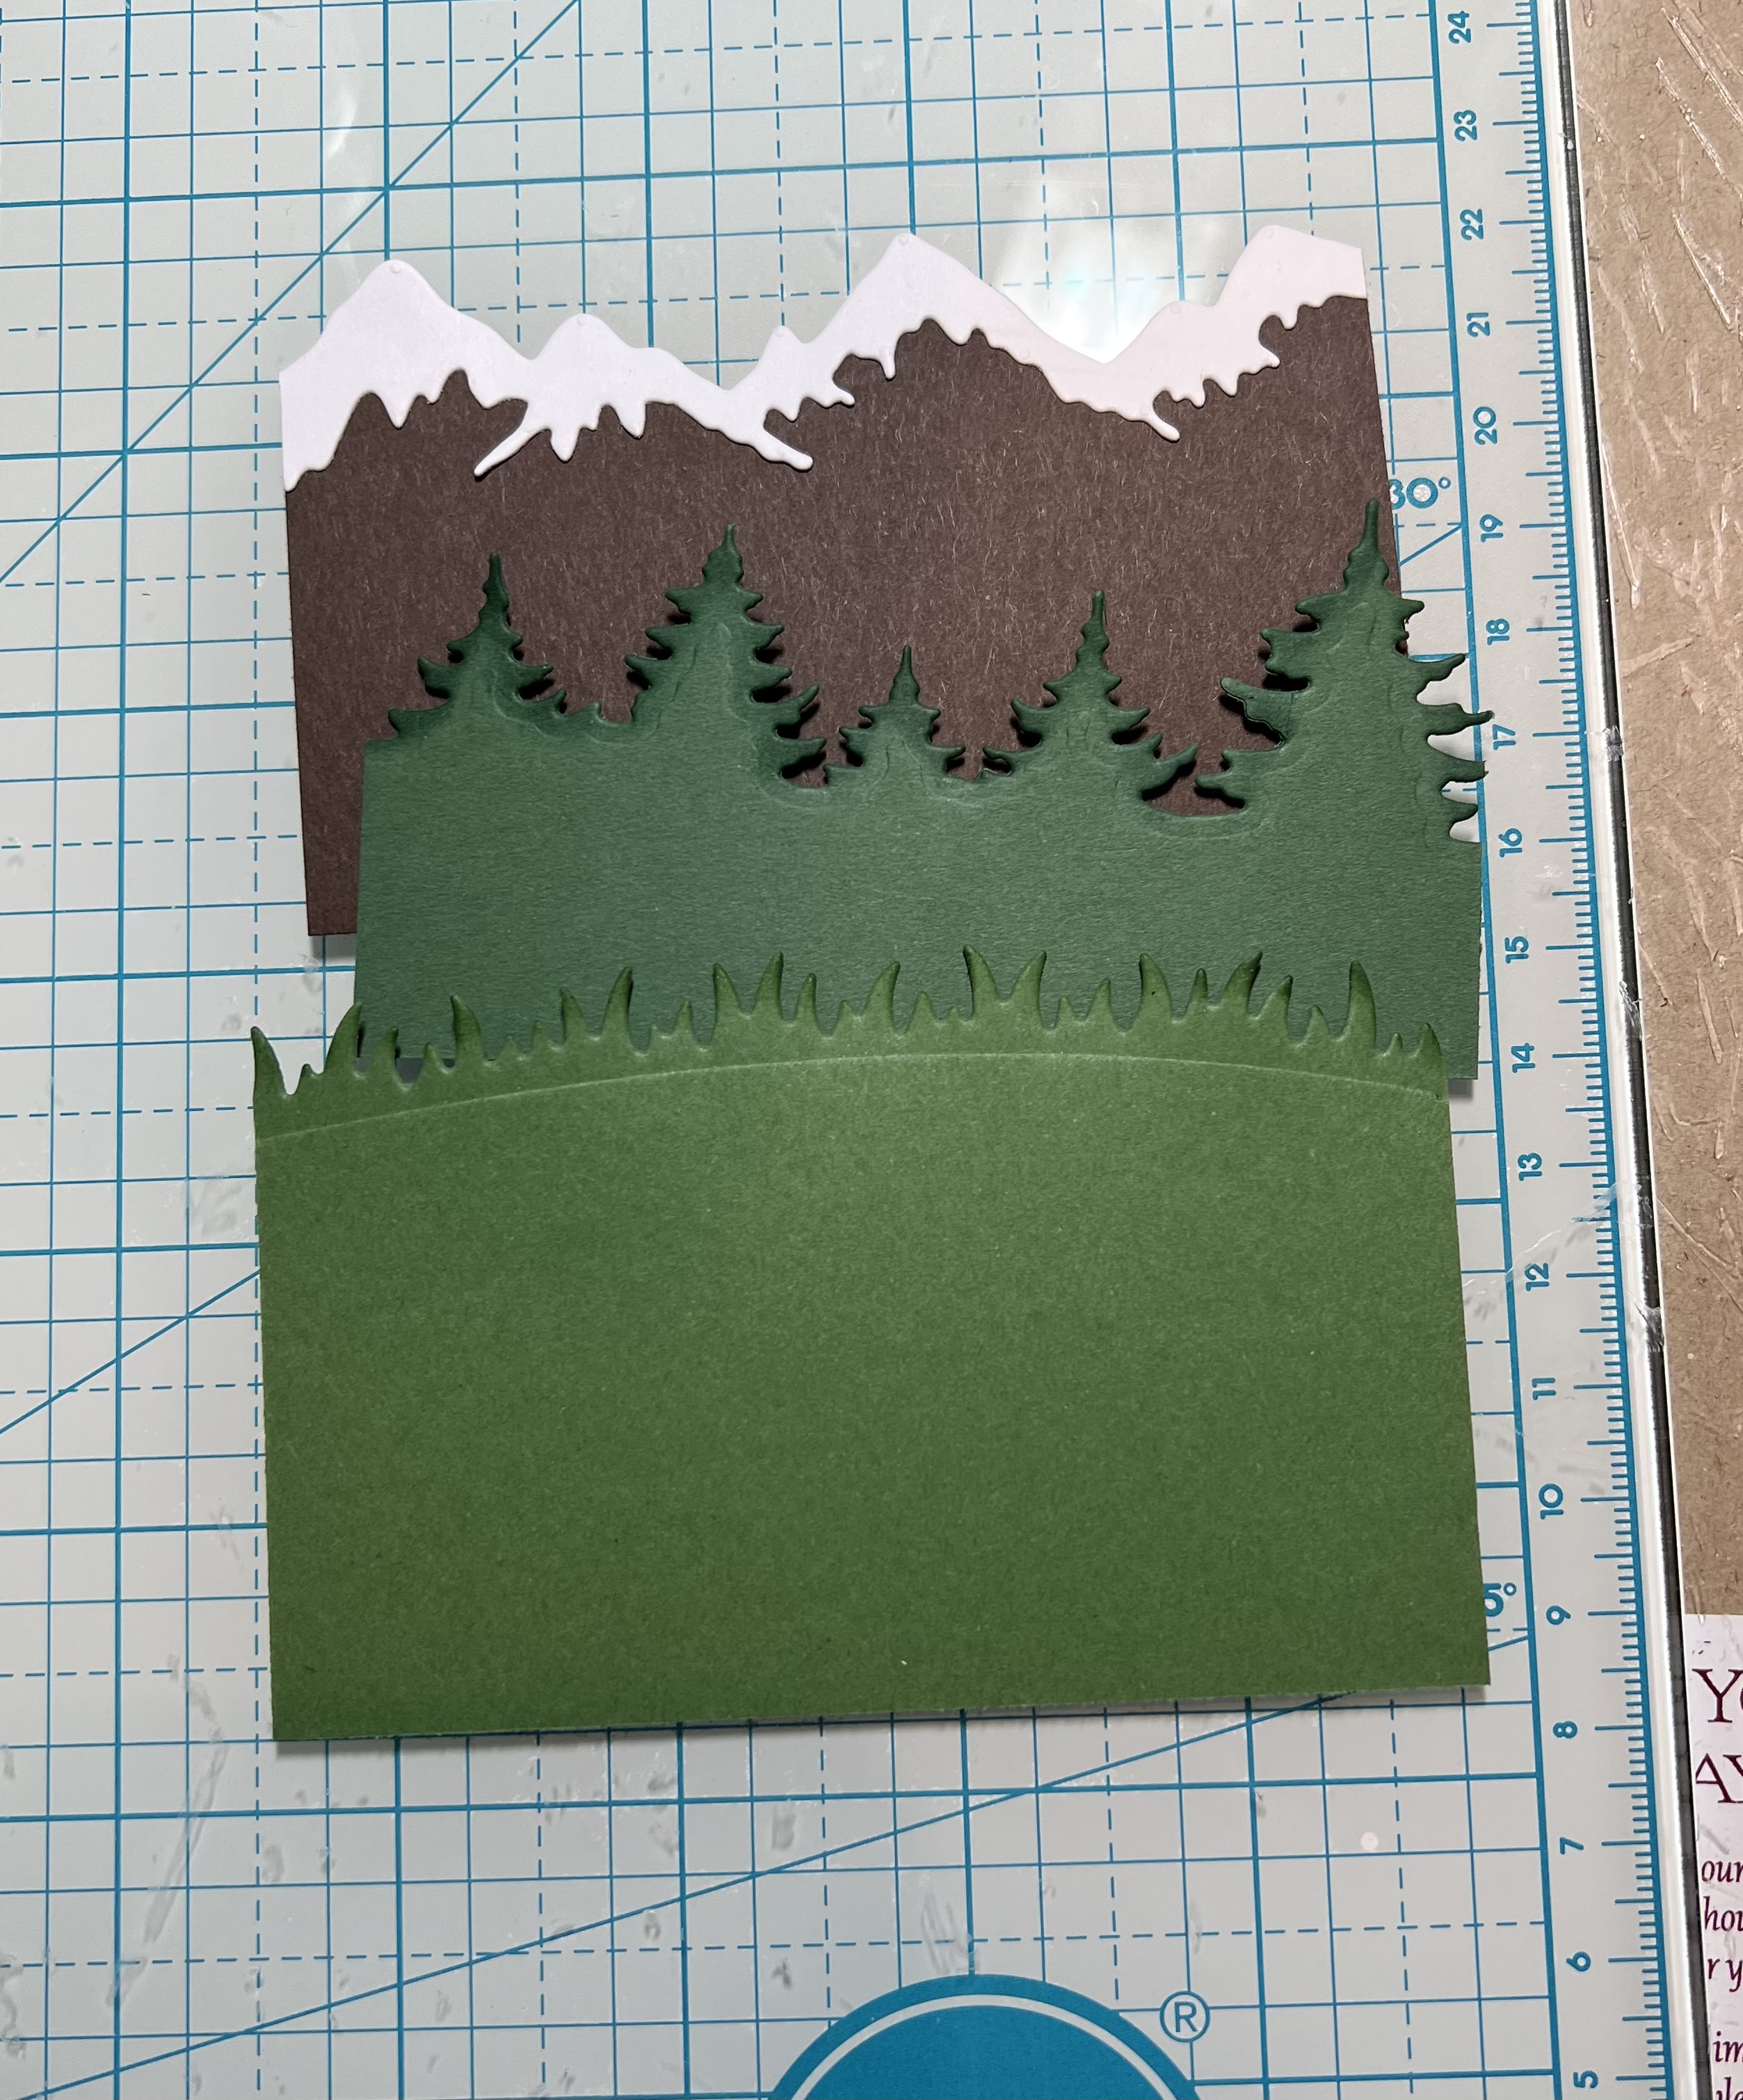
3.  The card base is a gray A2 size.  I cut a piece of DP 4 1/8 x 5 3/8.  The birch trees I cut out of gray using the Merry Christmas w/Deer Family die.  I inked them before I glued them to the DP. Then I glued the DP to the card front

4.  Cut the grass from a 4 1/8 x 2 piece of green using the Grass Slimline die.  Glue the grass to the bottom of the card.  Add the log and the fox to the center of the grass as shown above

5.  Continue to add the Mushrooms, little clumps of grass, foliage and fall leaves to the card as you like.  You can see by the finished card below I moved a few things around before glueing them down
6.  Add the sentiment stamped on gray and layered on rust and your card is finished
7.  I had a few pieces left so I decorated the inside for a little surprise!


We have more inspiration on our YouTube Channel check it out HERE

Thanks so much for stopping by!  And I will see you next Thursday.

Blessings and Take Care


Thursday, May 18, 2023

Relax

Hello Friends

It is Pam sharing with you today.

It is so much fun when you get to see friends retire.  It start a whole new chapter in life.  When I retired it lead to many new adventures! A move from California to South Carolina and then back to Arizona.  We have explored many interesting places in Arizona so maybe it time to try out another state!  We have lived in Ohio, Washington, Oregon, California, South Carolina and Arizona!!  What state is next??

Here is the retirement card I made using the new release die Pond w/Cattails.  I also used some of our slimline dies for the background.


Design Steps:

1.  For the background I used an embossing folder and then I lightly inked it with a brayer
2.  Using the the Mountain & Tree and Grass Slimline dies cut out brown, white, dark green and light green card stock.  The mountain is about 2 1/2 inches tall, the trees are 2 inches tall and the grass is 2 1/4 inches tall

3.  Glue the mountains to the blue sky card stock about 1 1/4 inches from the top.  Next glue down the trees as shown followed by the grass
4.  Using the Pond w/Cattails & Lily Pad die cut out the follower card stock: blue, green, gray and brown.  Shade the pieces with coordinating inks.  Assemble with a fine tip glue
5.  Use a Kraft card stock A2 base and glue the blue sky panel to the card front.  Add the sentiment and your card is complete

CottageCutz Supplies


We have more inspiration on our YouTube Channel check it out HERE

Thanks so much for stopping by!  And I will see you next Thursday.

Blessings and Take Care


Monday, May 08, 2023

Car and Balloons

Hi and welcome to a new week of crafty inspiration!! 

Kris here to share with you a cute and simple card featuring the car from the Spring Bunny Car, the balloons from the Spring Party Car, (both from our latest Spring Release!) and I added some previously released dies such as a dog from the Christmas Puppies, and the Slimline Clouds and Slimline Grass to help create my scene.  ☺


I started with this week's Color Challenge at SCS (CC946)
Cherry Cobbler
Pacific Point
Old Olive
Bermuda Bay
+ the dessert option= masculine


also used last week's Ways to Use It Challenge (WT946):
Feature a cloud/s - I stenciled them AND used a cloud border die!


Design Steps:

• I cut my card base 5-1/2" x 8-1/2" and scored at 4-1/4" for a top folding A2 card.

• I cut a scrap piece of white cardstock to 5-1/4" wide and shorter than 4" which is what I would have cut it to if it wasn't a scrap.  I then sponged clouds on it using Salty Ocean Distress Oxide ink.

• I cut a piece of Old Olive c.s. at 5-1/4" wide & die cut the top with the Grass Slimline die, then I stamped a sentiment in bottom right corner.

• I cut a piece of white at 5-1/4" wide and die cut the bottom with the Clouds Slimline die. 

• I cut a piece of road patterned paper (from La-La Land Crafts) at 5-1/4" wide.

 • I then die cut my car from Pacific Point, Bermuda Bay and white cardstock and used Copics to color the white pieces.  I cut the dog from white and the balloons from each of the challenge colors.  

• I then layered them onto my card front as shown below:


• I added some baker's twine in the Bermuda Bay color behind each balloon, then loosely tied them together (I removed this tie later).


• I then added a pop dot behind each balloon and attached it where I wanted them on my card front.

• I then added a strip of Scor Tape where I wanted to tack down the strings (behind the car) and removed the tie.


• I pulled the strings kinda tight and attached onto the tape, then added another strip of Scor Tape over the strings, then a piece of scrap paper to hold in place (and to keep from sticking to the car).

• Next, I added some mini dimensionals (foam hexagons) to pop the car up.  This is needed so there won't be that hump where the strings are bunched up.


• Lastly, I added my car and done!  Easy peasy! 


PRODUCTS I USED:

30% OFF!

30% OFF!

30% OFF!


Thanks so much for looking!  I hope this fun li'l card inspires you in some way to use your favorite CottageCutz dies!  

Reminder - We're having a Design Team Call!!  See this post for details!
View more design team creations on our YouTube channel here

~Kristine

Monday, March 27, 2023

He is Risen


Happy Monday friends!

Kris here with an Easter card featuring some brand new dies from the Easter 2023 Release!  This release has some really beautiful Spring and Easter flowers including lilies, tulips and daffodils, some nice crosses and a tomb, and also some cutesy bunnies & frogs and lovely birds and butterflies, things you can use for more than just Easter - and all the dies in this release are 30% OFF!  

My card is a 5.5" square top folding card. I used the He is Risen w/ Empty Tomb die, the Spring Tulips die, and the Grass Slimline dies for this card.  I created a quick-time video with music if you'd like to see how I made it.  ☺  I hope this inspires you to create some BEAUTIFUL with your favorite CottageCutz dies!  ~Kristine

If you can't view the video here, please click here.

PRODUCTS:


Thursday, October 06, 2022

Halloween Kitties

Hello Scrapping Cottage Friends

Super Excited to announce we have a brand new release just in time for all of those amazing Halloween cards everyone makes!! The collection has 22 fabulous dies that are going to make those scrapbook layouts and cards look SPOOKTACULAR!!!  The dies are currently on sale so make sure you get them while they last at this special introductory offer!!

Today, I am using the Spooky Kitties.  It has so many cute pieces.  These pieces could be used in a variety of different ways!  For this card I decided to make a slimline.

Designer Steps:

1.  Using the Spooky Kitties die cut out the following colors of card stock:  orange, purple, brown, light and dark gray, yellow and white.  Ink the various pieces with TH inks and then assemble with a fine tip, fast drying glue.  I used a black Glaze Sakura pen for the eyes

2.  Use an orange 3 1/2 x 8 1/2 card base, cut a piece of purple card stock using the largest of the Slimline Scallop Stitched Rectangle dies, Cut a piece of DP 2 3/4 x 7 3/4,  and finally cut a piece of black using the Window Slimline.  Ink the edges of the orange base in black ink
2.  Glue the purple scalloped rectangle to the orange base then glue down the DP.  Before adhereing the black window frame to the base cut two pieces of green grass using the Grass Slimline die and cut a light gray cloud  using the Clouds Slimline.  Glue the pieces to the back of the black windows as shown above and cut off the extra.  Ink the clouds with a black TH ink
3.  Glue the black windows to the card base do not glue the tops of the grass so you can tuck your cats down into the grass
4.  Arrange your kitties in each of the window glueing the pieces flat to the card base make sure you tuck the kitties feet into the grass.  Add the sentiment and your card is complete

CottageCutz Products


Please make sure to check out this amazing Halloween release right HERE!


We have more inspiration on our YouTube Channel check it out HERE

Thanks so much for stopping by!  And I will see you next Thursday.

Blessings and Take Care