
Hello Friends
It is Pam sharing with you today.
I am getting ready to send out my Valentines in a couple of weeks so I am finishing up a few more today. The one I am making today is more of a guy's card. So maybe to my hubby or brother! It is a little more masculine with the deeper reds, wood and truck. The dies I used are: The Flatbed Truck w/Accessories, Puppy with Valentine and Valentine Phrase and More (Hearts from both of them)

Design Steps:


4. Glue the checked DP to the white card base and then glue down the wood rectangle as shown above

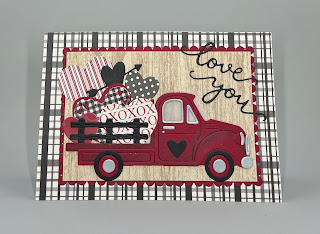

6. Glue down the truck and add arrange the hearts in the back of the truck. Glue the hearts down and then add the black fencing

7. Using the Valentine Phrase and More die cut out love you in black and glue to the front of the card as shown above. Your card is complete


Thanks so much for stopping by!
Blessings and Take Care


