Hi, Janja here!
Winter has not said its last word, but the sun is already showing its charm.
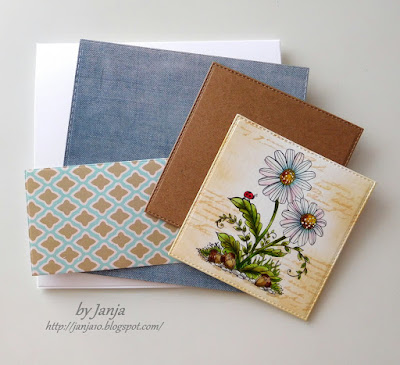
Today I share with you two cards with the spring flowers.

Supplies:
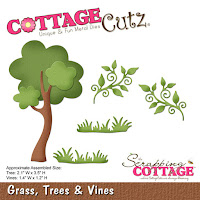
- CottageCutz set of stamps and dies: Daffodil Flower - March, Daisies Fower - April, Calendar Months, Pillow Box Plus (ladybugs), Fancy Pocket Plus (button), Stitched Square Set, Stitched Wide Square Frame Set, Stitched Wide Rectangle Frame Set
- white and kraft card base: 5.3 x 5.3" (13,5 x 13,5 cm), folded
- patterned paper: 4.9 x 4.9" (12,5 x 12,5 cm)
- white cardstock: 4.3 x 4.3" (11 x 11 cm)
- patterned paper: 4.8 x 2.2" (12,1 x 5,6 cm)
- white and colored cardstock
- watercolor paper
- Distress ink: Antique Linen, Mustard Seed, Scattered Straw, Wild Honey, Rusty Hinge, Tumbled Glass, Broken China, Twisted Citron, Mowed Lawn, Peeled Paint
- Memento ink: Desert Sand
- liquid pearls: buttercup
- string
Stamp flowers on watercolor paper and color them. Mine are colored with Distress inks.


When coloring is completed, shadow both backgrounds with Antique Linen Distress ink and stamp partly old letter writing.

Cut out the part of frame with a die. Color it with Distress inks.

Cut out March sign with calendar months die. Also, cut out a square frame from kraft cardstock, and another square of white cardstock.

Start by assembling the card. Add a white square on the card front. On the remainding card base add small buttercup dots.

Fix frame and tape, which is cut with scissors to the half.

When the card is completed, it seemed to me that something is missing. I added a button and a bow.

For another card I used a patterned paper.

Add a sentiment and cut out two ladybugs.


Winter has not said its last word, but the sun is already showing its charm.
Today I share with you two cards with the spring flowers.

Supplies:
- CottageCutz set of stamps and dies: Daffodil Flower - March, Daisies Fower - April, Calendar Months, Pillow Box Plus (ladybugs), Fancy Pocket Plus (button), Stitched Square Set, Stitched Wide Square Frame Set, Stitched Wide Rectangle Frame Set
- white and kraft card base: 5.3 x 5.3" (13,5 x 13,5 cm), folded
- patterned paper: 4.9 x 4.9" (12,5 x 12,5 cm)
- white cardstock: 4.3 x 4.3" (11 x 11 cm)
- patterned paper: 4.8 x 2.2" (12,1 x 5,6 cm)
- white and colored cardstock
- watercolor paper
- Distress ink: Antique Linen, Mustard Seed, Scattered Straw, Wild Honey, Rusty Hinge, Tumbled Glass, Broken China, Twisted Citron, Mowed Lawn, Peeled Paint
- Memento ink: Desert Sand
- liquid pearls: buttercup
- string
Stamp flowers on watercolor paper and color them. Mine are colored with Distress inks.


When coloring is completed, shadow both backgrounds with Antique Linen Distress ink and stamp partly old letter writing.

Cut out the part of frame with a die. Color it with Distress inks.

Cut out March sign with calendar months die. Also, cut out a square frame from kraft cardstock, and another square of white cardstock.

Start by assembling the card. Add a white square on the card front. On the remainding card base add small buttercup dots.

Fix frame and tape, which is cut with scissors to the half.

When the card is completed, it seemed to me that something is missing. I added a button and a bow.

For another card I used a patterned paper.


That's all for today. Thank you for coming over.