Showing posts with label Egg Painting Bunny. Show all posts

Sunday, March 11, 2018

Rainbow Easter Card

Hi!

It's Anja here. Spring is coming! I can smell it. Finally. I must say I was getting a bit tired of all the snow, waking up early to clean the snow of the car and roads full of snow. We still have some though, but I think the sun will take it away soon.

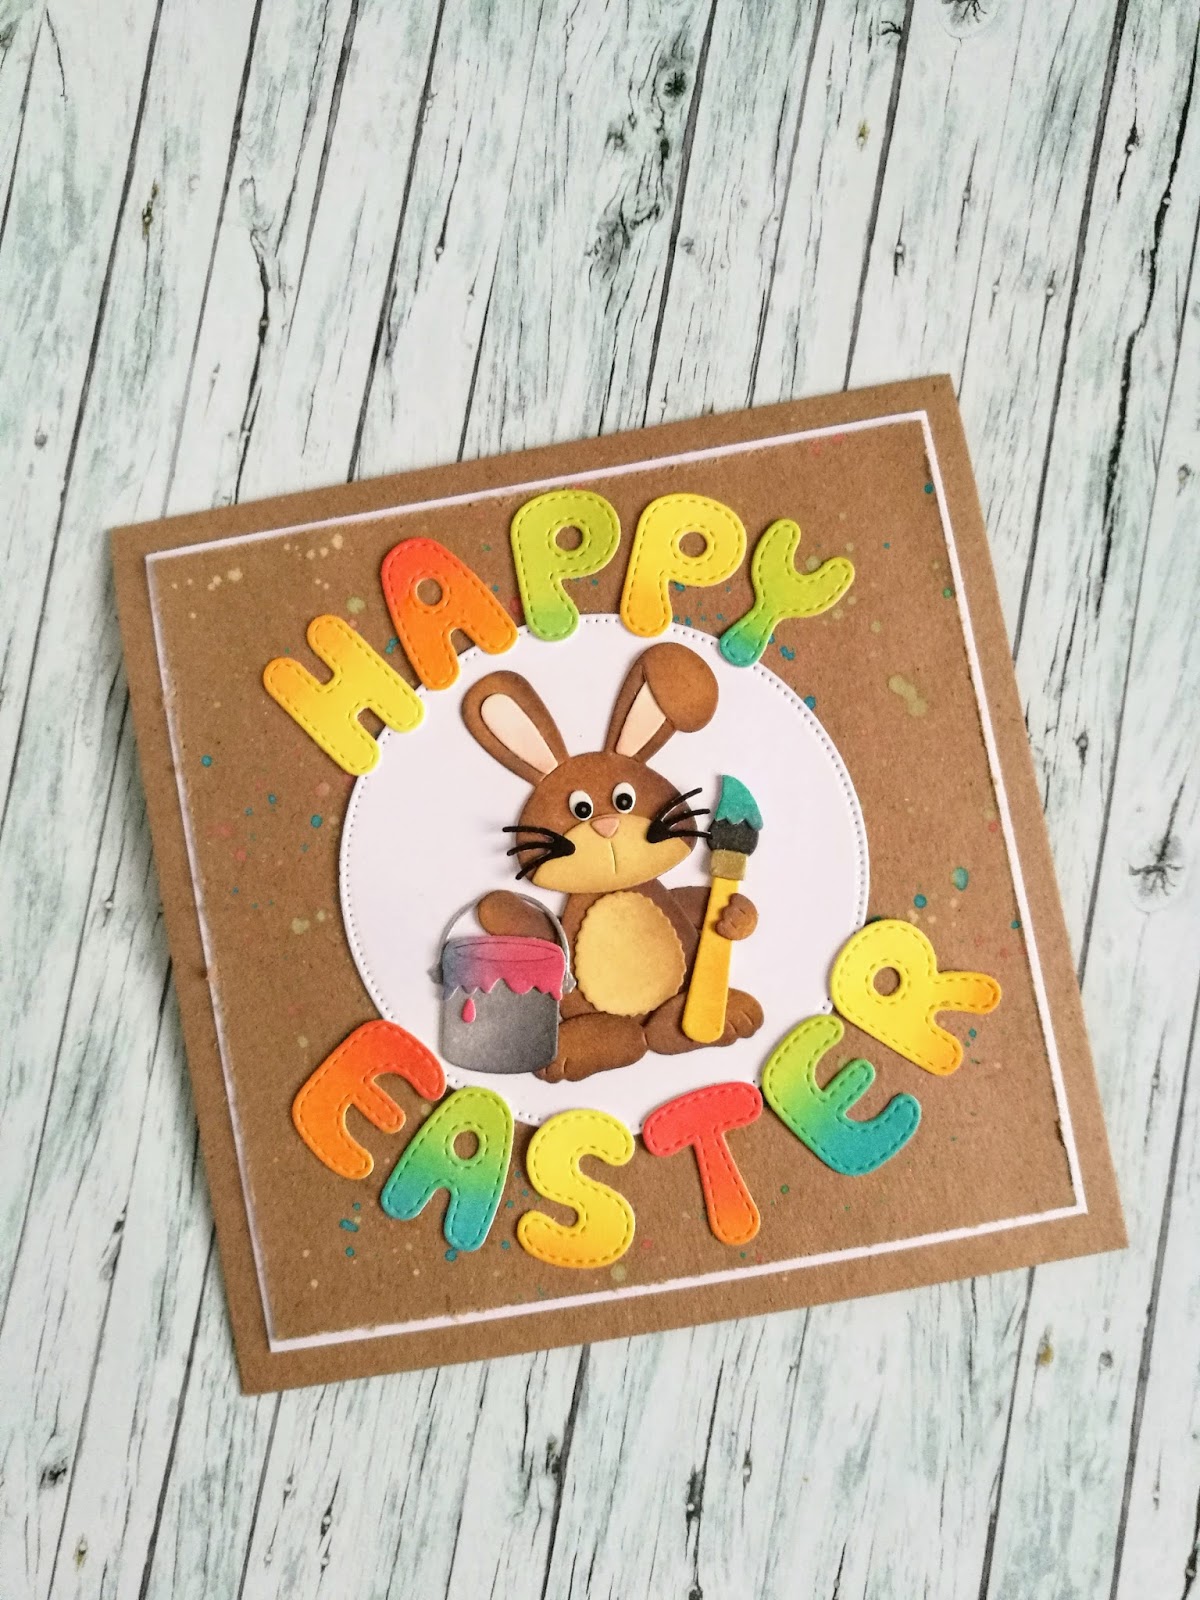
I still have some Easter dies to show you, so I decided to make another Easter card today. This time I used this cute bunny with the brush. He painted all the letters and eggs in rainbow colors.


For this card I used:
- Cottage Cutz dies (Egg Painting Bunny, Stitched Alphabet, Pierced Circle Set),
- Distress Oxides (Antique Linen, Black Soot, Twisted Citron, Gathered Twigs, Walnut Stain, Spiced Marmalade, Squeezed Lemonade, Peacock Feathers, Worn Lipstick, Abandoned Coral),
- craft card base (15x15 cm),
- craft paper for background (13 x13 cm),
- white card stock for die cuts and background (13,5x13,5 cm on the front, 13x13 cm inside),
- silver pigment ink,
- gold pigment ink,
- paper distresser,
- pink Zig marker,
- black brush pen,
- white pen,
- Wink of Stella glitter brush pen,
- paper glue.

First I colored the white paper with Distress Oxides. I tried to make a rainbow. I started with lighter tones and went to darker ones.


Then I cut out the letters. I used the leftover paper to cut out the eggs later.


Then I die cut and colored all the pieces for the bunny. I used combination of oxides and silver and gold  pigment ink pads to color it. I used Wink of Stella marker for the eggs, brush and can of paint.


When I had everything colored I made the background. I spritzed oxides, mixed with water on the craft background. I heat it with the heat gun.


I cut the other parts from white card stock.


Then I just glued everything together. I used the eggs to decorate the inside of the card.


At the end pf my post I want to remind you to stop by at the store and check out the new Rise&Shine Collection. I just got my new dies yesterday and I can't wait to make projects with it. The new dies are currently 25 % off.

I wish you all a lovely Sunday and see you again next week.
Anja Z.

Cottage Cutzs products I used:


Friday, March 09, 2018

Painting Eggs with Mr. Bunny

Hi, Jeanne here today.  The Easter bunny has been busy this week painting eggs!
For this card I started with a white A2 card base (8 1/2 x 5 1/2 scored at 4 1/4 to create a top fold card) then added a panel of plaid paper cut to 4 1/4 x 5 1/2 inches.  I wanted my eggs to be variegated rather than solid so I took out my Distress Oxide inks in colors to coordinate with the paper.
I had fun creating a large panel that I could use to cut the eggs, paintbrush tip and paint can paint.  I die cut Mr. Bunny and everything else from various colors of cardstock.
Before I assembled Mr. Bunny I took a sponge dauber and some Crumb Cake ink to give his edges just a bit of dimension. 
Next I used the largest of the Nested Wacky Stitched Rectangles dies to cut a panel for my scene and sentiment.  I used a stamping platform to stamp the sentiment in two different colors.
Finally, I arranged my eggs under the sentiment.  I really like how cutting the eggs from the blended panel gives variation to them.
This card goes together quickly but is a little messy - brings back memories of coloring real Easter Eggs with my kids!

Dies used:
http://www.scrappingcottage.com/cottagecutzeggpaintingbunny.aspx
http://www.scrappingcottage.com/cottagecutznestedwackystitchedrectangleset.aspx

Thanks for stopping by today - I hope you have a wonderful weekend!


Monday, February 12, 2018

Let's Color Eggs!

Hi, Lois here with another card for Easter.  As a kid, I'm sure we all loved to color Easter eggs.  I know I did.  Using one of the new Easter/spring dies from CottageCutz, I made a card reminiscent of that fun experience.  The CottageCutz die I used on my card is Egg Painting Bunny.


I wanted to make my egg-painting bunny the star of the show, so I made a relatively monochromatic background for him, using various purple papers.

To start my card, I die-cut the pieces from white cardstock.


Leaving the pieces on my sticky foam mat, I colored them using my favorite coloring medium -- my Copic markers -- using the packaging as a guide.   After I colored the pieces, I constructed the bunny and his paint can.


I then cut my cardstock and patterned paper:

Purple card base - 8 1/2" x 5 1/2"
Pale violet patterned paper - 4" x 5 1/4"
Die cut purple cardstock with largest Nested Stitched Scallop Rectangle Die
Die cut pale violet cardstock with largest Nested Stitched Scallop Rectangle Die, trimmed at the stitch lines


Constructing my card was simple.


I added some small foam pop dots to the back of the bunny and the eggs and adhered them to my card.


I then stamped the sentiment, and I was finished.


Be sure to check out the CottageCutz store because these Easter/spring dies (as well as some cute stitched dies) are currently 25% off.

CottageCutz dies used on my card are:

http://www.scrappingcottage.com/cottagecutzeggpaintingbunny.aspx


http://www.scrappingcottage.com/cottagecutznestedstitchedscalloprectangleset.aspx


Thursday, February 01, 2018

Painting Eggs!

Hello Scrapping Cottage Family!

It is Pam from Stamper At Heart Blog Spot.  Cottage Cutz has a brand new release of two collections of dies.  They are In Stitches and Spring Designs in all there are 33 new dies.  And for a limited time the new dies are 25% off!
Today, I am really excited to be sharing one of our brand new Easter dies!  It is called Egg Painting Bunny!  Isn't the cutest bunny you have ever seen!!

Designer Steps:

 1.  Gather your papers for the card and use a white A2 card base. Pink DP is 5 1/4 x 4, Jelly Bean DP 4 3/4 x 3 1/2, Orange sparkle paper 1 3/4 x 5 1/4 and the rectangle was the second largest Pierced Rectangle set.
2.  Glue the pink DP down first and then add the DP Jelly Bean paper
3.  Glue down the orange sparkle strip as shown and then the pierced rectangle on top of that
4.  Cut out all of the pieces using light grey card stock and the Egg Painting Bunny die.  Ink the edges with grey ink.  Ink the nose, eyes and whiskers with black marker.  Begin the assembly of the bunny
5.  Cut out the belly, face, eyes, inside of the ears, paint brush and eggs out of white and then color with copic: Y15, 17 - YG03, 13 - YR18, 68 - RV52, 55 and black
6.  Cut the bucket out of metallic silver and then assemble all of the pieces pop the bunny to the card as shown
7.  Color and shade the eggs using the same color of copic used to for the paint brush and paint.  Glue the eggs next to the bunny.  Stamp the sentiment and layer onto pink and attach to the card

Cottage Cutz Products 


Don't forget to stop by the store to take advantage of the 25% off sale!  The new collections are adorable and you can get an early start on your Easter Cards!
Blessings
Pam