Showing posts with label Double Stitched Circle set. Show all posts

Friday, November 09, 2018

Pumpkins Everywhere

Happy Friday everyone!  It's Jeanne today and I have a fall card that I entered into the October 25 Fusion challenge.  It is a combination theme/sketch challenge.  When I saw the challenge I knew that these dies would be perfect!
The challenge:
To start, I die cut the pumpkins, pile of leaves and the pie from the Pumpkin & Vines and Pumpkin Pie & Latte dies using various colors of card stock - Cherry Cobbler, Mossy Meadow, Pumpkin Pie, Crumb Cake and white.  I ended up die cutting more leaves than I needed but have saved those for another project.
I then used a sponge dauber to add depth to the edges and colors to the leaves.  I ended up changing my pie plate color to Lost Lagoon after I picked out my patterned paper.  I decided the blue gave it more of a pop.
I made an A2 card base from Crumb Cake and cut the circle from one of the patterned papers using the middle die from the Double Stitched Circle die set.  I used the coordinating paper and cut a rectangle 2 x 4 inches.
My pie became the oval in the sketch.
Finally I adhered everything together and added a few sequins.
This card came together very quickly thanks to the sketch.  I'll be making several of these as Thanksgiving cards.

The new Autumn 2018 dies are on sale for a limited time at the online store.  Be sure to drop by check them all out!

http://www.scrappingcottage.com/cottagecutzpumpkinpieandlatte.aspx
http://www.scrappingcottage.com/cottagecutzpumpkinsandvines.aspx
http://www.scrappingcottage.com/cottagecutzdouble-stitchedcirclesetbasics.aspx

 Thanks for stopping by - have a fun and creative weekend!


Friday, October 19, 2018

A "Hootie" Halloween

Happy Friday!  It's Jeanne today and before I get to my card, I'd like to tell you about Cottage Cutz' fantastic sale on their web site right now.  Select dies are on sale for up to 50% off.  It's for a limited time so check it out soon.  Now, my card for this Friday.  I'm in the Halloween mode so I just had to make a Halloween card.
For this one, I used the witch owl from the Spooky Night Owl set.  A super fun set that includes a witch and a pirate owl!
I first cut all my owl and branch pieces from white card stock.
I used Copic markers to color them.
Next, I cut the second and third largest circles from the Double Stitched circle set and the sentiment using the Halloween Trick or Treat die.  I cut two circles because I was unsure of what size I wanted to use for my moon.
To make the sentiment better fit my card I cut off the top and bottom pumpkins and foliage.  I thought about cutting out just the "trick or treat" but I liked the framed look.
I laid it out on a navy blue A2 card base.  I decided to use the smaller of the circles as I like the way the owl fit into it.
I added a few sequin stars to finish it off.  This is a fun and easy card to make and would also look terrific with the pirate owl as well!

Dies:
http://www.scrappingcottage.com/cottagecutzspookynightowl.aspx
http://www.scrappingcottage.com/cottagecutzhalloweentrickortreatelites.aspx
http://www.scrappingcottage.com/search.aspx?find=love+letters
http://www.scrappingcottage.com/cottagecutzdouble-stitchedcirclesetbasics.aspx


Thanks for stopping by today.  Have a fun and creative weekend!


Friday, May 18, 2018

Little Duck Baby Card

It's Jeanne posting a baby card today that uses dies from the new Mother's Day release!
I love ducks and I couldn't resist this little guy with his sweet face.  But since Mother's Day has passed I thought a baby card might be in order.
I started with an A2 card base and then cut the rectangles using the second and third smallest rectangles from the Double Stitched Rectangle set.  I picked a dot patterned paper since I thought it went well with the circles, but you could use any pattern.  Then I cut the circles using the third and fourth smallest dies from the Double Stitched Circle set in coordinating colors.
For the inside I used the largest of the Nested Double Stitched Rectangles.  I cut a full set of ducks from So Saffron card stock.
Using the Y26 Copic marker, I colored in the duck bills and one set of feet.   I wanted my outside ducks to be swimming, so they did not get feet.
I glued one duckling to the inside panel and the other one and his mama to the circles to form medallions.
I glued the rectangles to the outside front about an eighth inch from the sides and top/bottom.  Then I heat embossed the outside sentiment in white and stamped the inside sentiment in Coastal Cabana.
My last step was to glue it all together.  This card was simple to make but is adorable.  And it is flat which makes for easy mailing!  Ducks are gender neutral so this can easily be changed to a feminine card by changing the colors.

Dies used:
http://www.scrappingcottage.com/cottagecutzmamaduckandducklings.aspx

http://www.scrappingcottage.com/cottagecutzdouble-stitchedcirclesetbasics.aspx

http://www.scrappingcottage.com/cottagecutzdouble-stitchedrectanglesetbasics.aspx


Thanks for stopping by today.  Have a fun and creative weekend!

Friday, May 04, 2018

Floral Mother's Day

Hi Cottage Cutz fans!  It's Friday and Jeanne here with another Mother's Day card made from some of the beautiful new release that is available now.  And the new release is 25% off for a limited time!
You'll want to stock up for sure!
This card features the Happy Mother's Day Phrase and flowers from the Hat Box with Flowers dies.
I started with an A2 card in Blushing Bride, then added a 5 3/8 x 4 1/8 inch panel of Always Artichoke and a 5 1/4 x 4 inch panel of patterned paper.  I stacked and glued these together.
For the medallion I used the second largest Scalloped Circle in Blushing Bride and the third largest Double Stitched Circle in white.  I used a self adhesive sheet on the back of Always Artichoke cardstock and cut the sentiment.  I often use these sheets if the sentiment is particularly fine.  For this card I carefully cut away the heart from the sentiment.
Next I cut the flowers and foliage.  I ran the So Saffron twice so that I could have a few extra yellow flowers.
Using a sponge dauber and Blushing Bride ink I carefully tipped the edges and centers of all the flowers.
I assembled them on the medallion and glued that and the sentiment to the front of the card.
For my final step I added Wink of Stella and some glitter dots.  This card called for a little sparkle!

Dies used:
http://www.scrappingcottage.com/cottagecutzhatboxwflowers.aspx
http://www.scrappingcottage.com/cottagecutzhappymothersdayphrase.aspx
http://www.scrappingcottage.com/cottagecutzdouble-stitchedcirclesetbasics.aspx

http://www.scrappingcottage.com/cottagecutznestedscallopcircleset.aspx

 Thanks for stopping by today.  Have a creative weekend!


Friday, March 23, 2018

With "Mush" Love

Happy Friday!  It's Jeanne today with a card for spring.  I love the new stitched dies.  And I fell deeply in love with the Stitched Mushrooms and the snail from the Stitched Garden Friends set as soon as I saw them.
I started by choosing the patterned paper so I could get my colors - Smoky Slate, Pool Party and Calypso Coral.  I cut the side fold A2 card base from the grey, a Pool Party Panel 4 1/8 x 5 3/8 inches and a panel from the pattern 4 x 5 1/4 inches.  I glued the patterned paper to the blue panel but did not glue them to the card base yet.
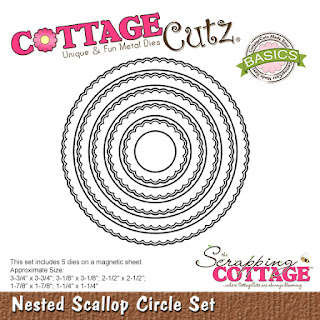
Next I die cut all the pieces from white, Smoky Slate, Pool Party and Calypso Coral. I used two mushrooms from Stitched Mushrooms, the snail from Stitched Garden Friends and the second largest circle from Nested Scalloped Circles. You may notice that a couple of pieces are missing from this photo.  That's because I sometimes "design-on-the-fly"; that is, I make decisions and change the design as I work.
I used a stamping platform to stamp my sentiment.  (I purchased a set of mushroom themed sentiments because a very good friend is a morel mushroom hunter - who knew such people existed?)  I placed everything in the platform, arranged my elements with sentiment on the circle, then carefully moved the elements and set a magnet in place.  I knew that the sentiment would now be in the correct place.
When the sentiment had been stamped I glued the mushrooms in place and added the snail with foam dots.  I then started to arrange it on the card with a piece of ribbon cut slightly longer than 5 1/2 inches.
However, I felt the main image didn't "pop" enough.  Here is my "design-on-the-fly"; I decided to add another element under the white scalloped circle.  I found the next size up scallop circle was too large but the second largest circle from the Double Stitched Circles worked perfectly!  Since my ribbon is coral, I made the circle blue.  I folded the ribbon behind my panel and glued it, then adhered the panel to the card front using foam tape to add dimension.
I glued the scalloped circle to the blue circle and adhered it with foam dots to the front of the card.  My second "design-on-the-fly" element is this cute button.  I was going to use a real button even though the color wasn't a perfect match, when I noticed that I had also cut a button (normally for the flower center) from the Stitched Garden Friends set when I cut my snail shell.  It worked perfectly!  Just the right color and size!

Dies used:
http://www.scrappingcottage.com/cottagecutzstitchedmushrooms.aspx
http://www.scrappingcottage.com/cottagecutzstitchedgardenfriends.aspx
http://www.scrappingcottage.com/cottagecutznestedscallopcircleset.aspx
http://www.scrappingcottage.com/cottagecutzdouble-stitchedcirclesetbasics.aspx
Thanks for stopping by today!  I hope you enjoyed my card.  Have a creative weekend!