Hello Scrapping Cottage friends! Thanks for taking the time to stop and visit today. It's Mary Marsh here bringing you the Saturday edition of the Blog. I can't believe that the first week of November is already a wrap. Time is marching on and getting closer and closer to the Christmas rush.
If you haven't started your cards yet, I have one to show you today that would be easy to mass produce. You could use any stamped background or even leave the background plain for a more simpler card.
So let's get started with some details on how I created my card.
White Card Base: 4 1/4" x 5 1/2"
Navy Blue Image Layer: 3 1/2"" x 5 1/2"
Silver side layers: 3/4" x 5 1/2"
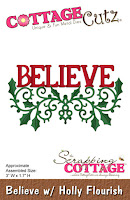
My card this week is using the Fancy Nativity Ornament and the Believe with Holly flourish dies. As soon as I saw both these dies I knew I had to have them. It demonstrates in such a beautiful way the real reason we celebrate Christmas.
I started by cutting the ornament and believe word in a silver glimmer paper. I use the Sizzix Precision Base plate to cut the ornament because my Big Shot is older and sometimes needs a little help. You could also use some freezer paper or the universal shim plate that is carried in the online store. Both these dies cut so nicely and release from the die easily.
Next, I stamped my starry background. I like this background stamp and the explosion of stars that surround the ornament. That's how I imagine the heavens reacted on the night Jesus was born. I stamped with Versamark ink and then used a white embossing powder.
Once the background was finished, I added my ornament and the believe word. I like the contrast with the dark blue background and the silver glimmer paper.
Here are some close up shots of the Nativity Ornament and the Believe word. I cut 2 silver pieces of cardstock 3/4" x 5 1/2" to add to each side of the image panel. I wanted some definition here and also added card interest. By cutting the strips the way I did, it saves on your cardstock.
My final step was to add this image panel to the white card base. I also used foam mounting tape to lift the image panel away from the card base. Just another way to add character to your creation.
Well, that's it for me for this post. So until next week.......inky hugs.


