Showing posts with label CottageCutz double-stitched Square Set. Show all posts

Thursday, May 09, 2019

Birthday Wishes!

Good Morning Crafty Friends!

It is Pam creating with you today on the blog!

I have a ton of birthdays in the summer months so I am getting started.  The Fairytale Birthday die has a number of cute items that are perfect for all different kinds of birthday cards.  The Magical Fairytale dies are still on sale at a big 25% off! Check it out here!
Design Steps:

 1.  Using the Fairytale Birthday die cut out 3 cupcakes using light green, blue, pink and light yellow. Also cut out 3 white squares using the Double Stitched Square die the 4th from the largest
 2.  Assemble the cupcakes and apply Glossy Accents to the icing then add clear glitter
 3.  After the icing is dry add yellow stickles to the flames
 4.  Pop up the cupcakes to the squares
 5.  Use an A2 white card base, a slightly smaller piece of light blue, and  a slightly smaller piece of DP.  Glue the blue to the white card base then glue down the DP.  Cut a strip of light blue card stock 5 1/4 x 3/4 glue it to the center of the card
6.  Use Versa Mark and white embossing powder to create the sentiment.  Pop up the squares to the card front and sentiment as shown


CottageCutz Products

Thanks so much for stopping by!  I really appreciate it and love your comments!
Blessings
Pam

Thursday, August 23, 2018

New Christmas Die - Peace on Earth

Good Morning Everyone!

It is Pam sharing with you today from Stamper at Heart Blog Spot.

It is so hard to believe but Christmas is just around the corner!  And CottageCutz is all ready for it!! This is Christmas part 1 of a 2 part release!  And it is just amazing!  Last week when it was my turn to post I shared a die that was perfect for fast multiple cards and this week I have one more to share that works just as beautifully.   The best thing about all these wonderful dies is that right now they are 25% off but just for a limited time! Don't miss out on this fantastic sale!


Design steps:

 1.  Use the Peace on Earth die cut out 3 of the sentiment on vanilla card stock and glue together
 2.  Use the Double Stitch Square die and cut out the second from the largest in vanilla and the next down in size in gold DP
 3.  Use an A2 vanilla card base and a slightly smaller piece of gold DP
 4.  Glue the DP to the front of the vanilla card base
 5.  Use foam tape and glue the two cut squares together
 6.  Glue the Peace on Earth to the gold DP
7.  Cut out vanilla snowflakes using the Snowflake Set die.  I used the 2 smaller snowflakes for the card front.  Glue the square panel to the front of the card add the snowflakes and rhinestones
I did one other variations for you just below.  The only thing I did differently is add Glossy Accents to the sentiment

CottageCutz Products


Thanks so much for stopping by!! And remember the sale on the new release Christmas dies is for a limited time only! So please don't miss out!
Blessings

Pam


Thursday, June 28, 2018

Happy Days!

Good Morning Friends!

It is Pam creating with you on the blog today!

Today, I will be working with the new Build A Sign die!  It has so many options for making a cute retro looking sign.


Design Steps:

 1.  Using the Build a Sign die cut out the pieces of the signs in white card stock
 2.  Use your markers to color all of the pieces of the signs
3.  Using the Double Stitch Square die and cut out 2 in white cards stock. Assemble the signs on the 2 squares
4.  Use an A2 white card base and cut out a slightly smaller piece of yellow card stock and glue to the front of the card base.  Cut out a piece of DP slightly smaller then the yellow card stock and then glue it to the yellow card stock
5.  Glue the squares to the front of the card and add clear sequins.  Stamp the signs with Happy Days and your card is complete.

Cottage Cutz Products


Thanks for stopping by and checking out the new and fabulous dies!
Blessings
Pam


Thursday, June 21, 2018

Route 66!

Hello Cottage Cutz Fans!

It is Pam sharing with you today on the blog!

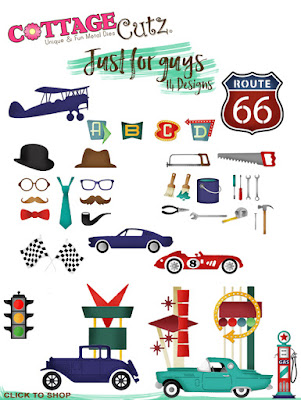
We have a number of sales going on in the store today!  Including the new release which is Just for Guys!!! It has 14 wonderful dies for the awesome men in our lives! Can you believe they are on sale for 25% off!  So please check out the online sales!


The other sale we have going on is our ANNIVERSARY SALE WITH UP TO 50% off most of the dies in the store!

Now onto the project for today!  I used some fun designer paper and our new Route 66 Road Sign die!
Designer Steps:
 1.  Cut all of the pieces out of white card stock using the Route 66 Road Sign die
 2.  Color the pieces using your markers
 3.  Cut a white Double Stitched Rectangle and pop the Route 66 sign on top of it.  Cut to 1/4 x 5 1/4 inch red strips
4. Use an A2 white card base cut a slightly smaller piece of red card stock and then a piece of DP 5 1/4 x 4.  Glue all of the piece to the front of the white card base

 5.  Add the red strips and the Route 66 panel


6.  Color the additional road signs with your markers. Stamp the arrow with Roadtrip
Cottage Cutz Products


Thanks so much for stopping by and the sales end soon so don't miss out on these fabulous discounts!
Blessings
Pam

Thursday, April 12, 2018

Mother's Day is Coming!

Good Morning Scrapping Cottage Friends!

It is Pam creating with you today!

Thanks for taking time to stop by today!  We have a brand new release of Llama & Botanical dies available in the online store.  And the dies are currently on sale for a limited time at 25% off the retail price.

The new dies have a couple of super cute Llama images as well as cactus and other succulents.  And don't miss the sweet hummingbird and garden bird too!  This new release is so versatile!  They can be used for all kinds of cards and other projects!

I am using the new Dogwood Branch!
Design Steps:
 1.  Using the Dogwood Branch die cut out all of the pieces in white
 2.  Using the Double Stitched Square die cut out the third largest in white.  Then keep the die intact with the paper.  Place a cloud stencil over the top and sponge on the blue ink
 3.  Pull the square away from the die and it will give you a nice clean edge
 4.  Use your Copic Markers to color the branch and leaves
 5.  Use your Copics to color all of the flower pieces also
 6.  I used a shaping tool to give the flowers a little bend
 7.  Glue the flower layers together
 8.  Glue the branch to the cloud covered square as shown
 9.  Arrange the flowers as shown
 10.  Use an A2 white card base a slightly smaller piece of DP and then a piece of blue cardstock cut to 3 3/4 x 5.  Run it through an embossing folder for some texture
11.  Use craft foam on the back of the cloudy square then glue to the card front.  Stamp your sentiment and layer onto DP glue to the front of the card.  Add the bow and your card is complete!
Cottage Cutz Products used:


As always thanks so much for stopping by and don't forget to take a look at the new release dies. They are just so sweet!  And they are dies that can be used over and over again for so many different projects and occasions!
Blessings
Pam