Showing posts with label Cottage Cutz Happy Expression. Show all posts

Thursday, May 28, 2020

A Little Birdie Told Me!


Hello Scrapping Cottage Friends!

It is Pam creating with you on the blog today.

Just for your information this is the last day for the Memorial Day sale!!  You can save up to 70% off on most of the dies and the new Gardening release is 25% off.  You don't want to miss this money saving sale!

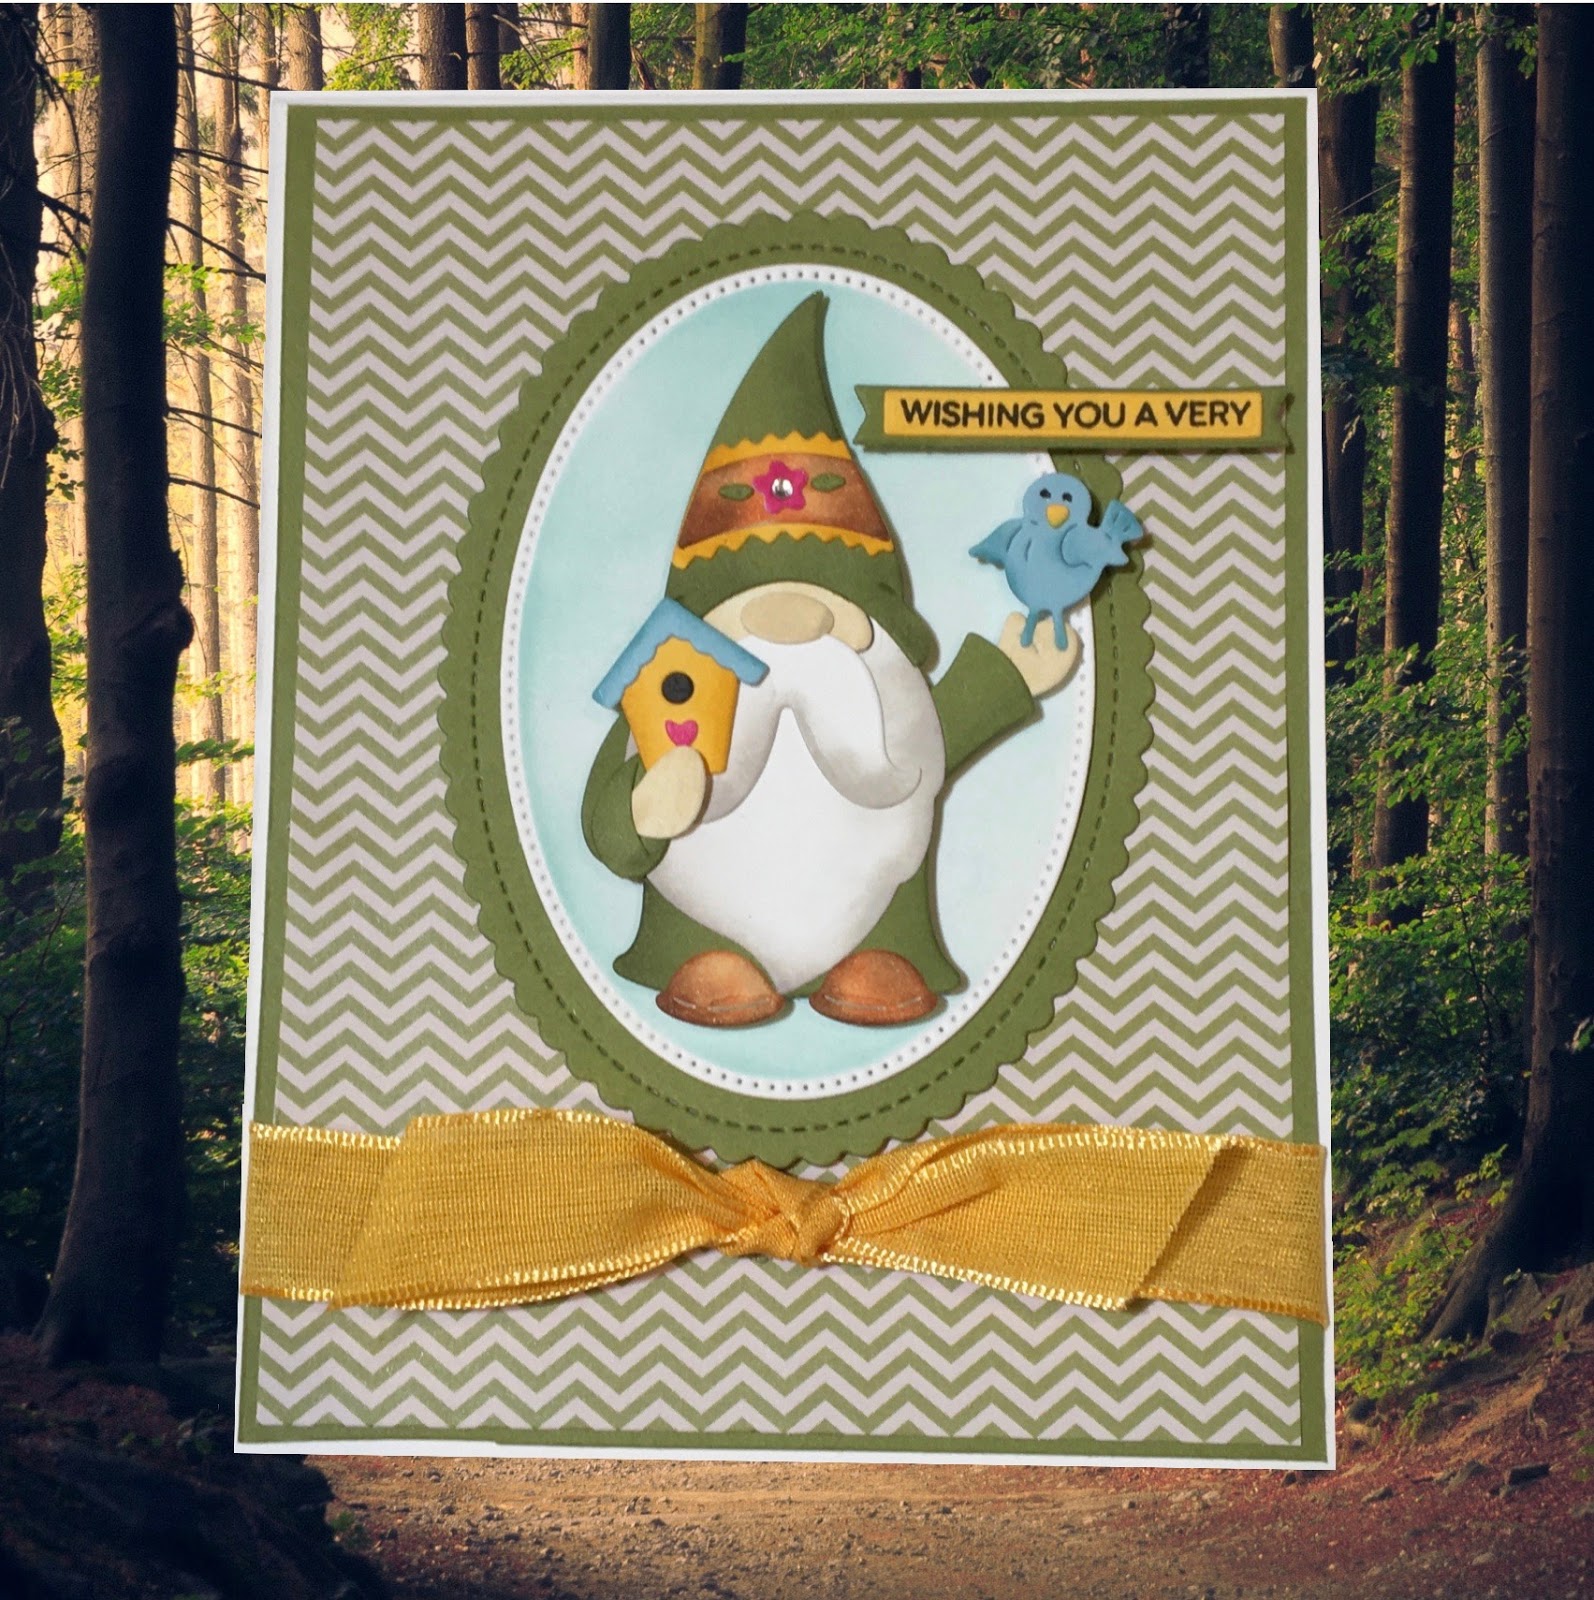
Today I am using the Tomte.  He has many different looks and little tools you can use with him.  I think is is just adorable!

Background Photo by Lukasz Szmigiel on Unsplash

Design Steps:


1.  Cut all of the pieces using the Flower Power Tomte die.  I used yellow, green, blue and white card stock
2.  Using a variety of inks shade the pieces and then assemble using a fine tip glue
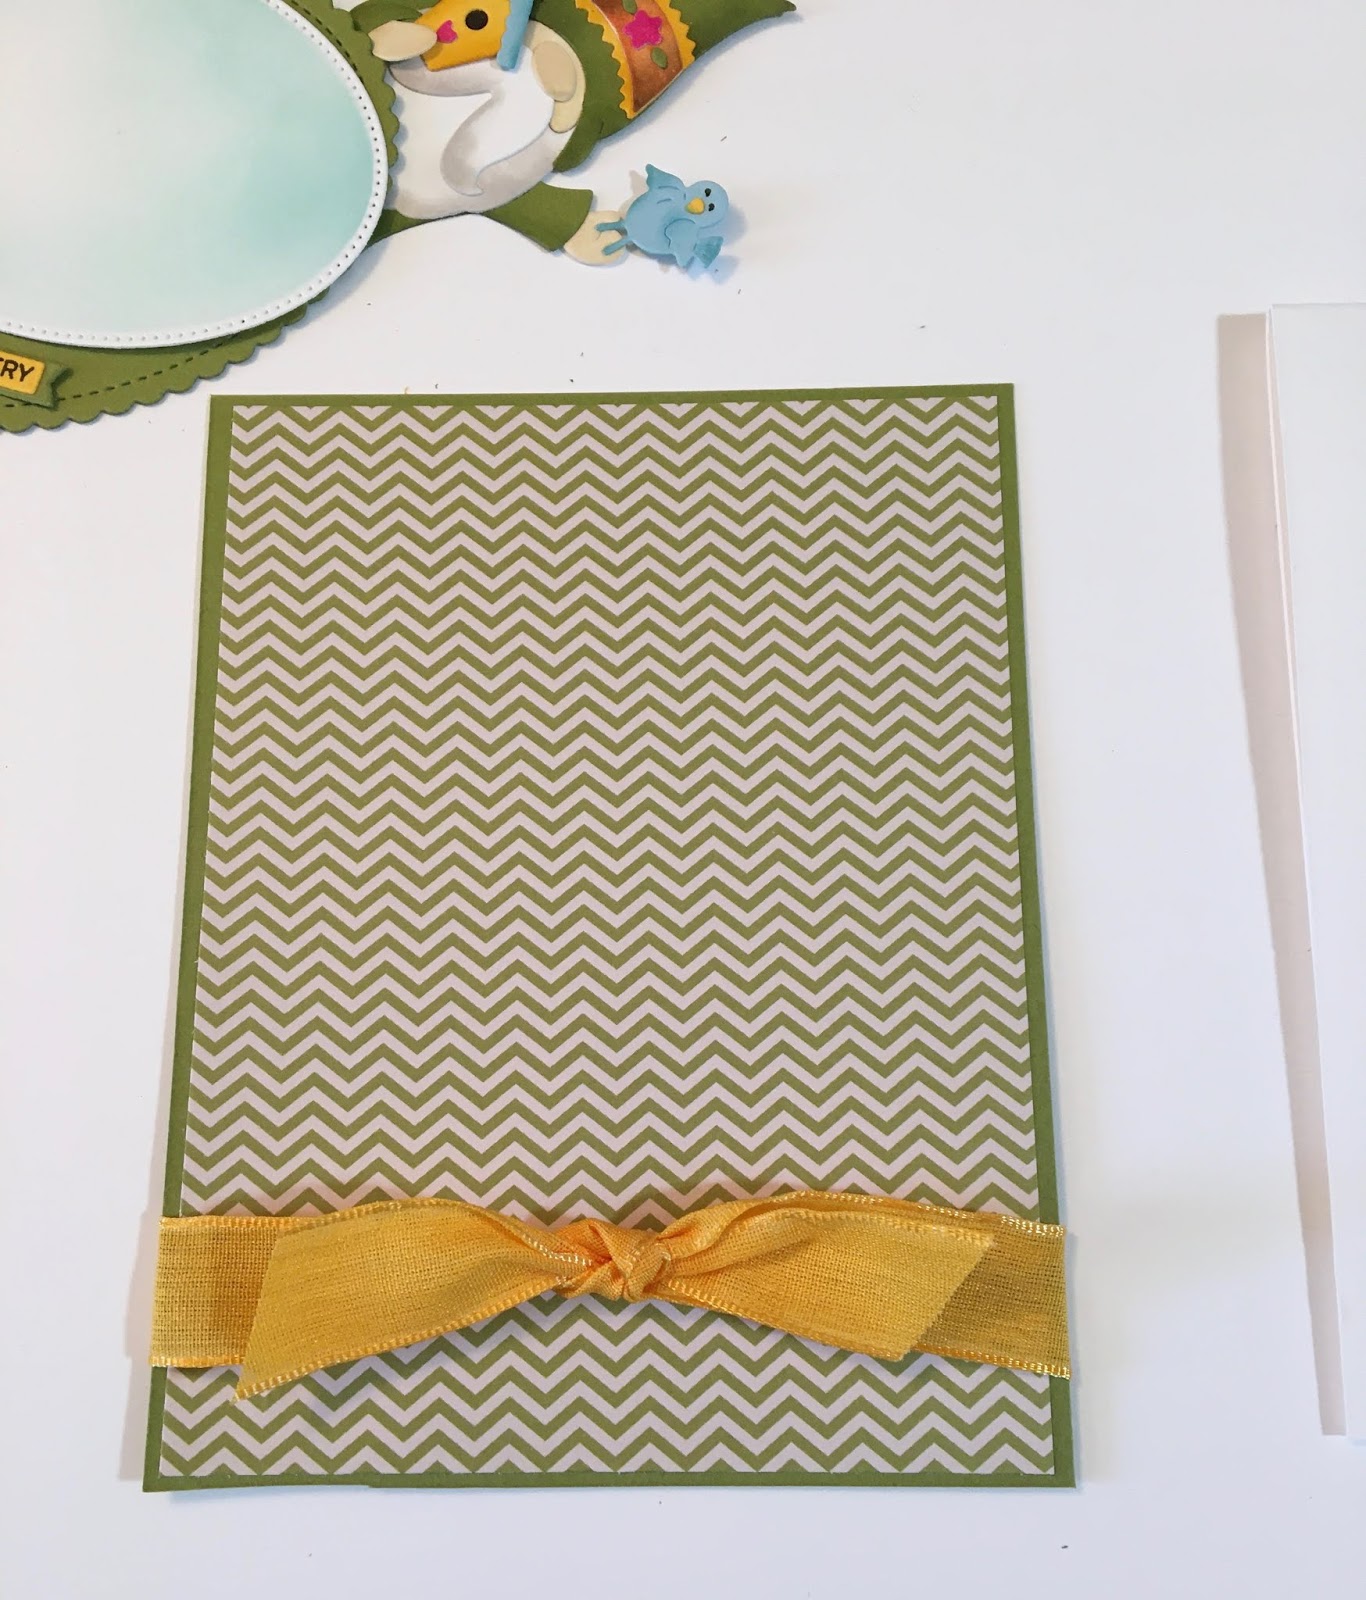
3.  Use an A2 white card base cut a piece of green 4 x 5 1/4 and DP 3 3/4 x 5.  Use the 4th from the largest Pierced Oval die to cut out a white oval.  Use the 2nd from the largest Stitched Scallop Oval die to cut out a green oval
4.  With the pieced oval die in place shade in the opening with a light blue.  Also stamp your sentiment on yellow and layer onto green
5.  Glue the DP to the green card stock then add the ribbon tying a knot in the center.  I use a glue dot to keep the knot in place
6.  Glue the ribbon panel to the front of the A2 white card base.  Add the green oval and then the shaded blue oval
7.  Place pop dots to the back of the little Tomte and add him to the oval on the front
8.  For the inside I used the Happy expressions die to cut out a yellow and green happy. Glued them together slightly off center then placed inside card.  Add the Birthday sentiment and the strip of DP to the bottom with the little flowers.  To finish I added some rhinestones to the front and inside

CottageCutz Products


I appreciate you stopping by today!  It was so much fun creating this card. I hope you are able to take sometime for yourself today!  And don't forget the awesome sale!

Blessings and see you next time!
Pam

Thursday, March 08, 2018

Spring Wreath

Hello Scrapping Cottage Friends!

It is Pam sharing with you today from Stamper at Heart Blog.  I just wanted to remind you that we are having a hugh sale!!  The two new collections In Stitches and Spring Designs are 25% off! And there are other wonderful sales going on too! So don't miss out!!

Today, I am making an Easter card with the new Fresh Spring Floral die. This die is so awesome that it can be used for just about any occasion!
Design Steps:
 1.  Start with an A2 white card base and a piece of white card stock 4 x 5 1/4.  Emboss that white piece with a stripe.  Using the Fresh Spring Floral die cut out all of the pieces using different color card stock: light yellow, dark yellow, purple, light green and dark green.  Cut out Happy in light yellow using the Expressions Happy die
 2. Arrange the wreath on the embossed white card stock using both the light and dark greenery
 3.  Add the layered yellow flowers
4.  Add the tiny purple flowers and dot the centers with white.  Add the sentiment and ribbon

Cottage Cutz Products


As always thanks for stopping by and please don't forget the fabulous sale we have going on right now!!! Take some time out of your busy schedule and be creative! It is so good for the soul!
Blessings
Pam


Tuesday, August 29, 2017

Rub-A-Dub-Dub Birthday!

Hello all! I hope the week is treating you well so far. It's back to school time and I'm sure many of you sent your students off to start a new year like I did yesterday. Time flies alarmingly fast!

For your viewing pleasure today, I'm taking a little break from the wedding theme to bring you a birthday card for a little one in your life. It features the Bathtub Time die that that was part of the baby release this spring. This die has ten individual elements you can use to create a large variety of scenes. It's a great die to play around with and easy to construct. There are enough pieces to decorate both the front and the inside of a card like I did on this one.

I also used the Stitched Oval Set to create the frame on the front and the mat inside the card. The Happy and Birthday Expression dies were used for the sentiment inside.

To learn how this card came together, please click on the YouTube thumbnail below. If you are a fan of embossing or want to some additional ideas on combining embossing techniques, I think you'll enjoy this one.


Thanks for spending a few minutes with me today. I'll be back tomorrow with another video.

- Janet
  SugarShine Designs

Dies Used For This Project: