Showing posts with label Cottage Cutz Cross-Stitched Circle Set. Show all posts

Thursday, February 20, 2020

Easter Friends

Hello Scrapping Cottage Friends,

It is Pam on the blog today!
Just a reminder that our new spring release is 25% off for a limited time and I don't want you to miss out.  Today,  I am using the Spring Buddies die and it is just so sweet!

Designer Steps:
 1.  Using the Spring Buddies die cut the pieces using yellow, orange, pink, green and gray card stock
 2.  Shade the pieces using varies colors of inks and then assemble the pieces
 3.  Use a white A2 card base, cut a piece of blue 4 x 5 1/4 then run it through an embossing folder.  Cut a piece of pink DP 3 3/4 x 5.  Use the Cross Stitch Circle dies to cut out the circles as shown
 4.  Glue the embossed blue card stock to the front of the card then add the pink DP

 5.  Insert the bunny and the chicks
 6.  Using the Hello Spring Bloom die cut out the flowers and leaves in green, light orange, pink and yellow
7.  Arrange and glue the flowers and leaves in the upper right hand corner of the card as shown.  Add the sentiment and your card is complete


CottageCutz Products


Thanks so much for stopping by today!  We really enjoy hearing from you so don't forget to leave us a comment and also check out the new release!
Blessings
Pam


Thursday, February 13, 2020

Hello Spring

Good Morning Friends!

Hi Everyone!

I am so excited about our NEW RELEASE!!!  This release features Spring dies and right now they are 25% off for a limited time.  There are 27 different dies and they are just perfect for Easter and Spring cards.  There is everything from ducks to daffodils and more.  Check them out HERE!

Today, I am featuring the Daffodil Duck die!!

Design Steps
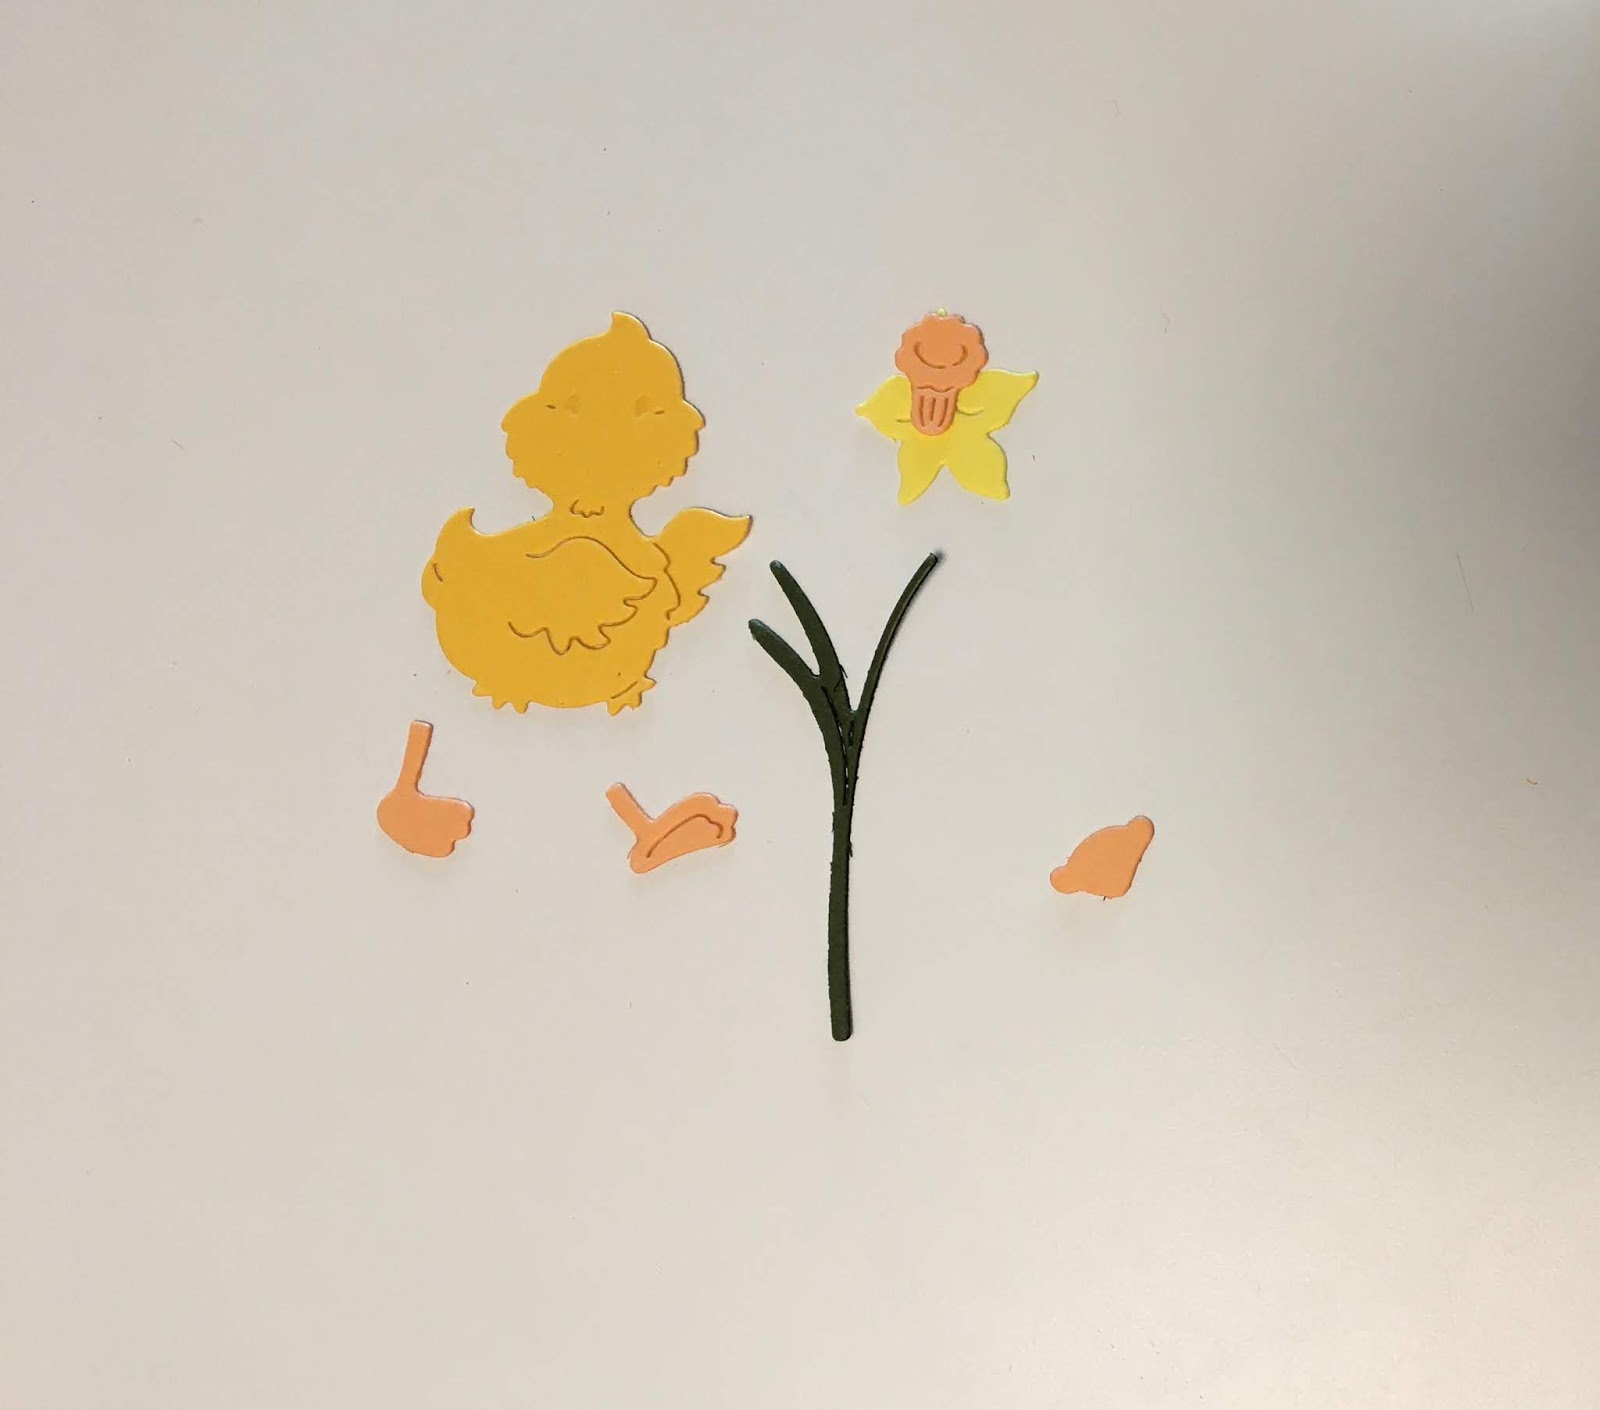
 1.  Cut all of the pieces out of yellow, orange and green card stock using Daffodil Duck
 2.  Shade the pieces I used my Copic markers to shade.  After shading assemble using a fine tip glue. Blacken the eyes with a fine tip marker and add white to the eyes using a gel pen
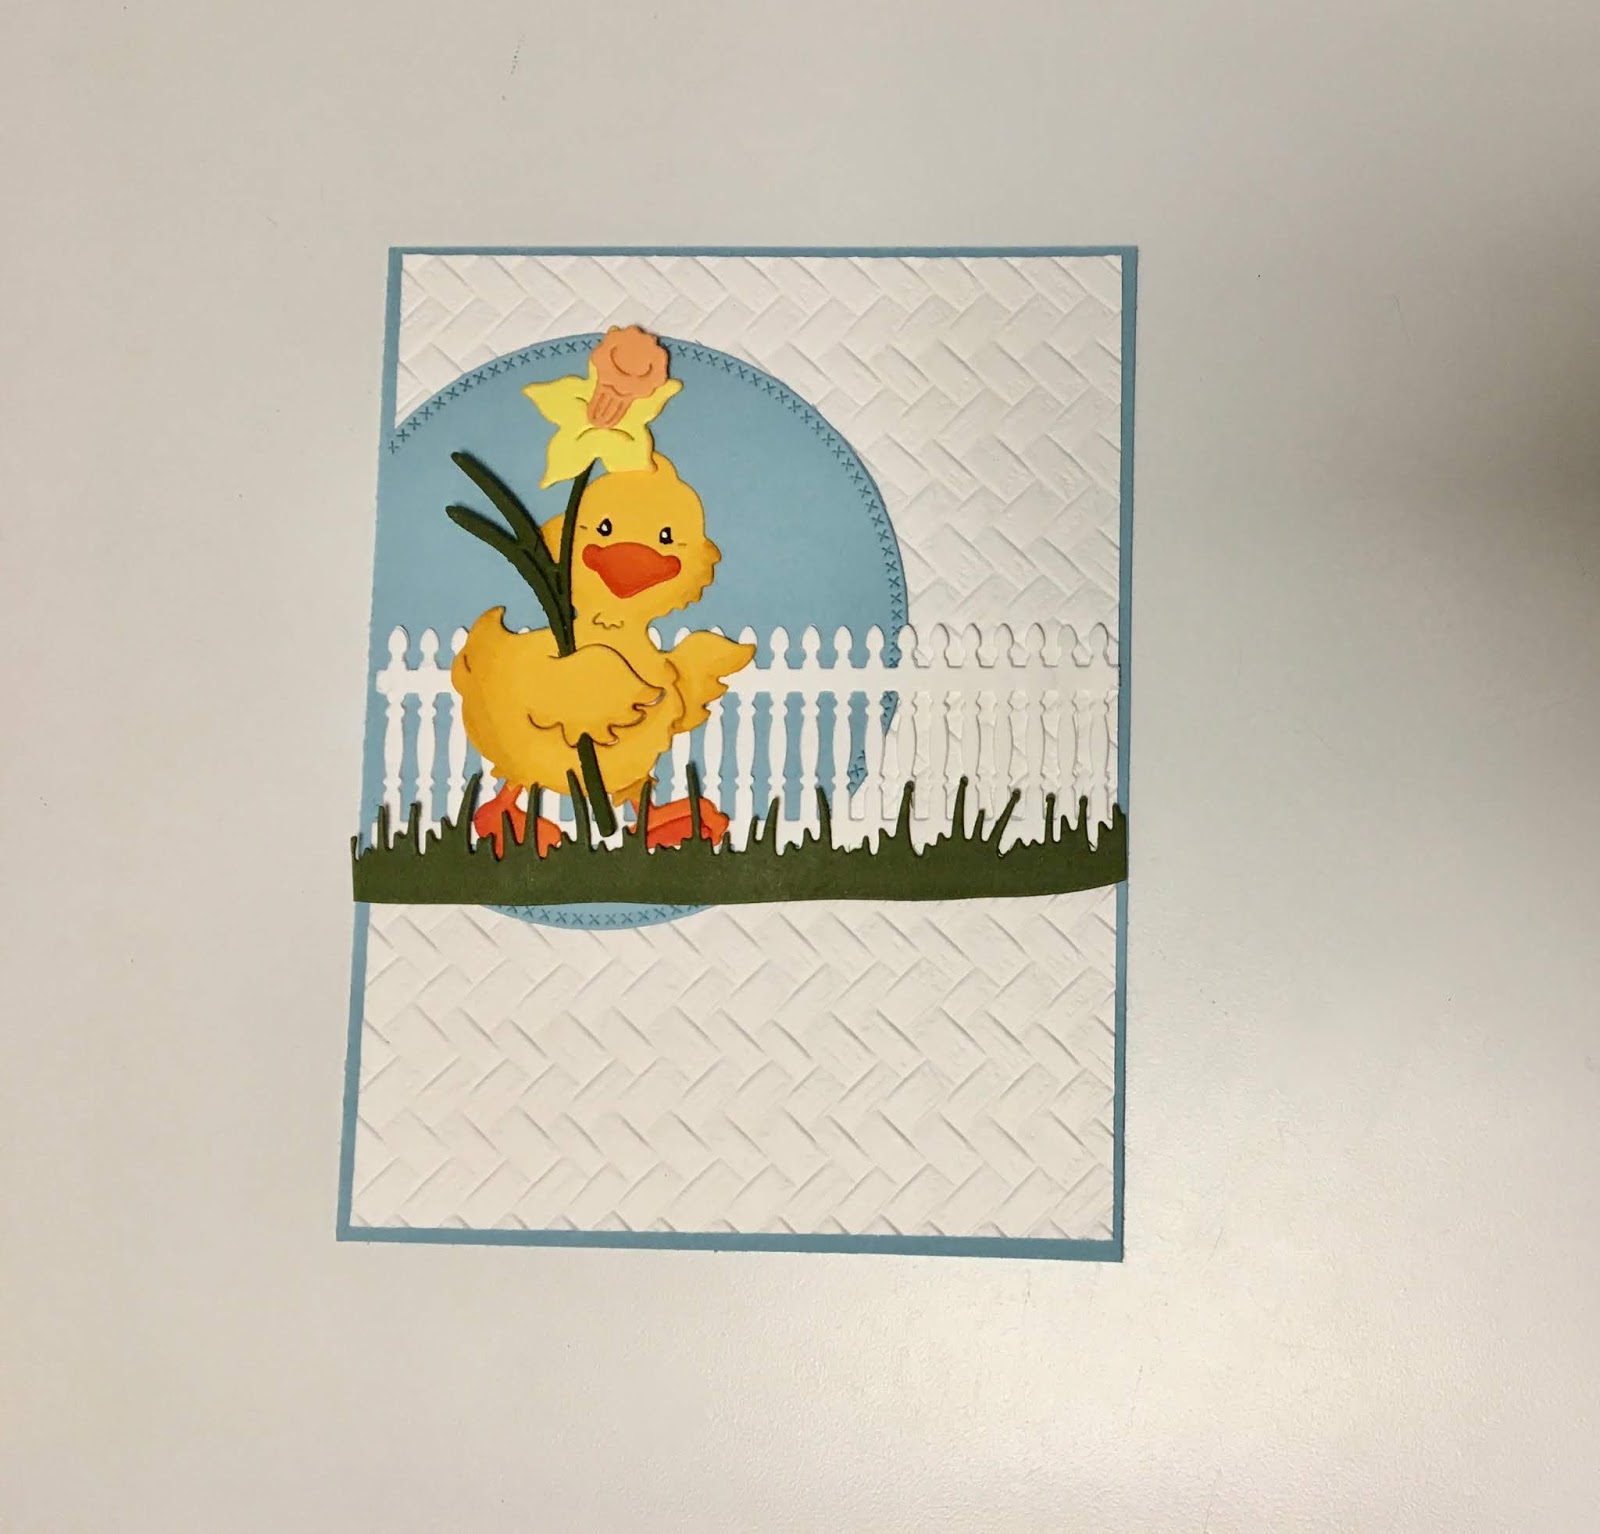
 3.  Use a white A2 card base, 4 x 5 1/4 piece of blue card stock, 3 3/4 x 5 piece of white card stock run through an basket weave embossing folder.  Glue the blue and white embossed card stock together
 4.  Use the Spring Grass die and cut it out of deep green card stock.  Use the 
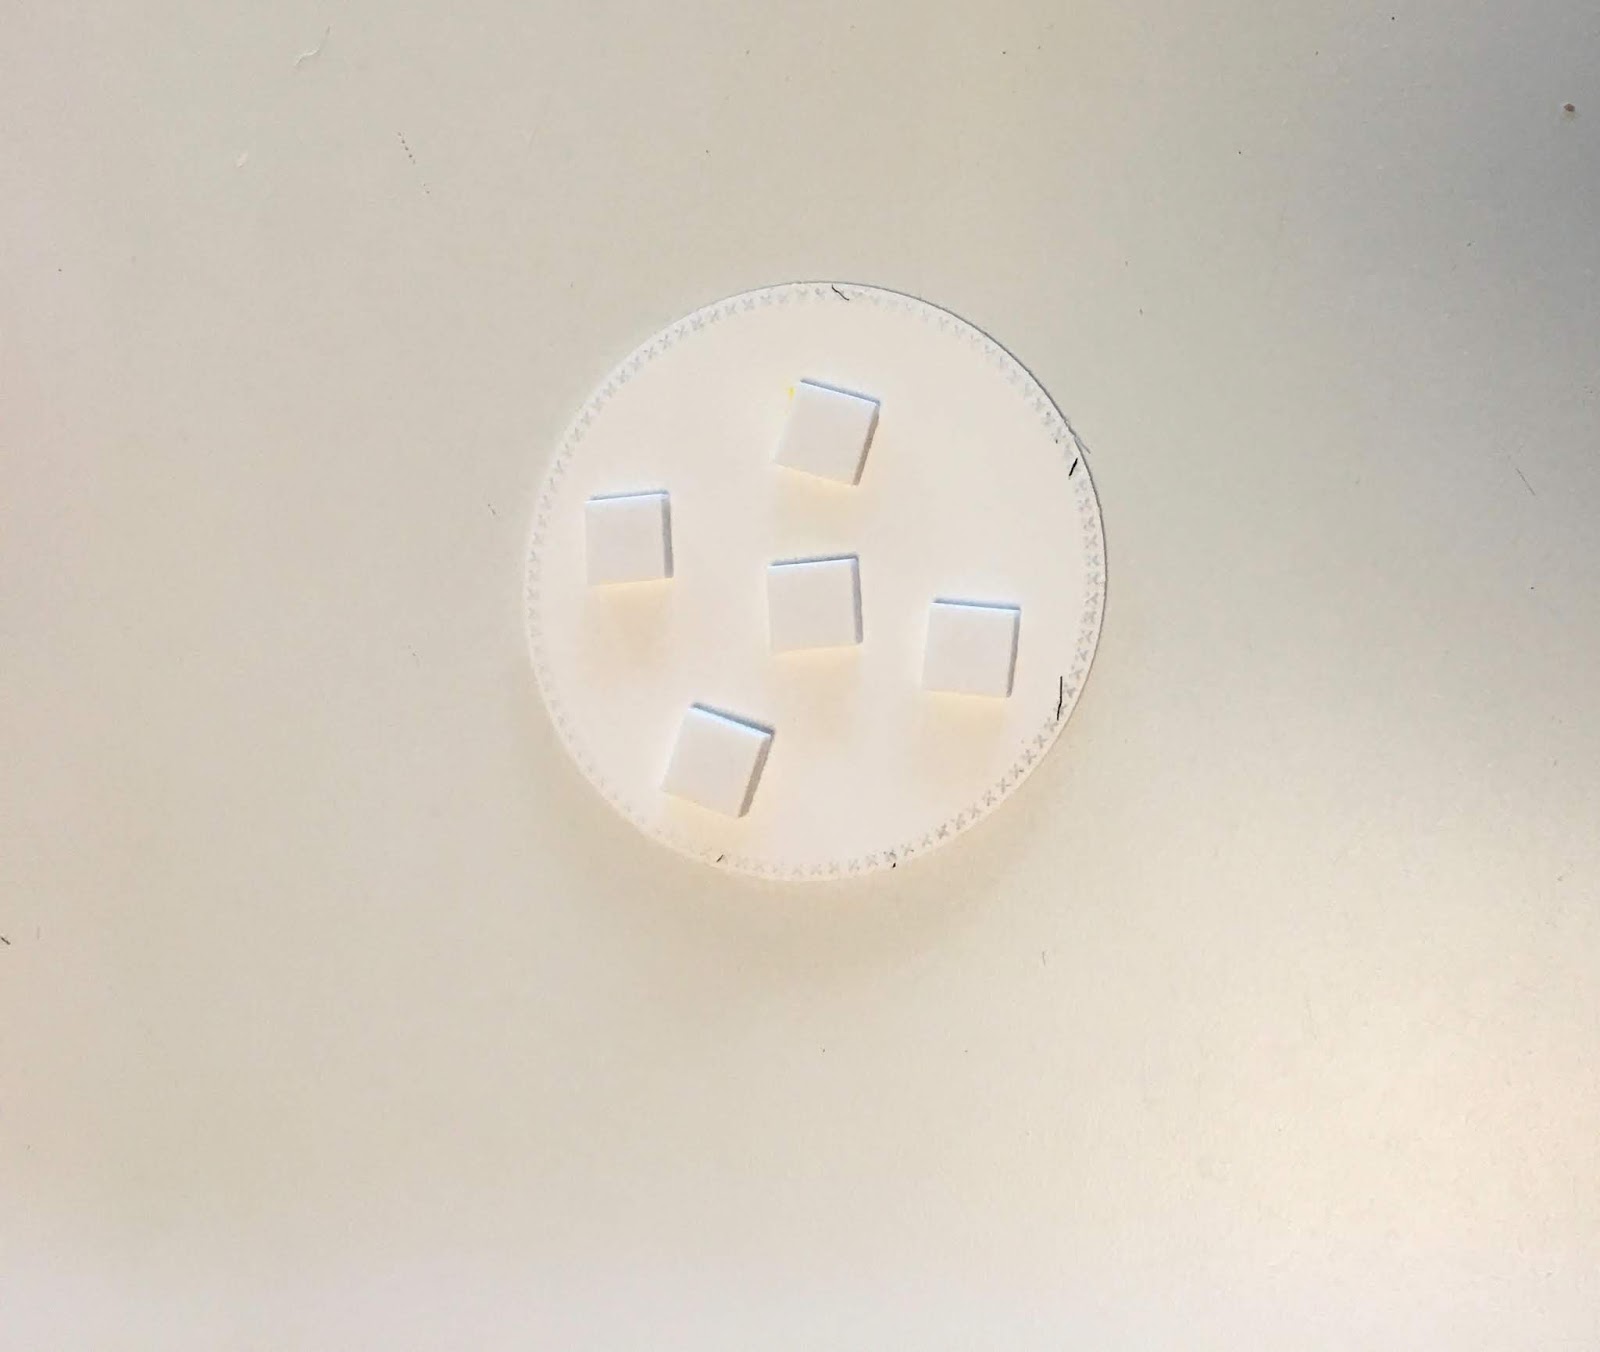
Victorian Fence die and cut it out of white card stock.  Last cut a blue card stock circle using the second from the last Cross Stitched Circle die.
 5.   Cut a small piece of the circle off as shown below and glue to the card
 6.  Next glue down the white fence and the grass on top of the blue circle
7.  Add the duck tucking the feet into the grass as shown.  Cut out three hello sentiments using the Hello Spring Bloom die.  Glue them together for a little dimension and then glue to the bottom right of the card.  Add the entire panel to the A2 white card base
CottageCutz Products


We are so excited that you stopped by today!  Your visit means so much to us!
Blessings
Pam

Thursday, February 06, 2020

Easter Basket!

Hi Everyone!

I am so excited about our NEW RELEASE!!!  This release features Spring dies and right now they are 25% off for a limited time.  There are 27 different dies and they are just perfect for Easter and Spring cards.  This Spring release has everything from bunnies to baskets and more.  Check them out HERE!

Today, I am featuring the Basket of Eggs die!!


Design Steps:
 1.  Cut out your pieces with a variety of DP and card stock using the Basket of Eggs die
 2.  Use an A2 white card base, 5 1/4 x 4 pink card stock, 5 x 3 3/4 jelly bean DP, 1 1/2 x 3 3/4 green DP cut with a dove tail, 3 x 2 pink DP and 1/2 x 5 1/4 light green strip.  Also cut a white circle using the second from the largest Cross-Stitched Circle die
 3.  Glue the Jelly Bean DP to the pink card stock then add the green dove tail DP and finally the pink DP rectangle
 4.  Last glue the light green strip to the top of all the layers and glue to the white card base
 5.  Use the white Cross Stitched circle as a base assemble and glue the Easter basket to the circle
6.  Add dimension dots to the back of the circle and add to card front.  Last add your sentiment and your card is finished


CottageCutz Products


Thanks so much for stopping by!  The new Spring Dies are a must in your collections so be sure to check them out especially while the sale is on!!
Blessing
Pam

Thursday, December 26, 2019

Foxy Friends

Hello Everyone!

I hope you all had a wonderful Christmas with your family and friends.  I can't believe that 2020 is just around the corner.  I don't know where time goes.  It seems like the older I get the faster time goes.
While there is a few days before we have more celebrations  I am making a few winter cards.  The cards I am making can be used for a variety of things such as thank you, birthday or just a hello.  I often leave the insides blank so that I can add the sentiment as I need the cards.
Design Steps:


 1.  Use the Arctic Baby Foxes die and cut all of the pieces out of white
 2.  Color all the pieces with your markers and assemble the baby foxes
 3. Using the second from the Largest Crossed Stitched die cut out a DP and then cut out a white circle using the same die.  To cut the white circle down I used the Largest Pierced Rectangle die and placed it across the circle and cut to get the pierced snow.  Glue the two pieces together and add the foxes
 4.  Cut a piece of white card stock 4 x 5 1/4 and add the ribbon
5.  Cut a piece of DP 3 7/8 x 4 1/2 and on top glue a white embossed piece 3 3/4 x 4 1/4.  Glue this piece to the white card stock with the ribbon.  Then add the DP circle with the foxes and the sentiment

CottageCutz Products


Just wanted to wish you a Happy New Year full of God's wonderful blessings!!
Pam