Showing posts with label Coffee & Cocoa Warm Wishes. Show all posts

Sunday, October 17, 2021

Snowman With Country Shed Christmas Card

Happy Sunday Scrapping Cottage friends!  Melinda here, and today I am sharing a fun Christmas card. It features the super cute, Snowman With Country Shed die. It is one of the new dies in this month's new release. Now is the perfect time to pick them up! They are 30% off and they are SUPER FUN! They will help you get your Christmas projects done with some fun and pizazz!

Here is a look at my project. I created this cute card filled with frosty country charm!
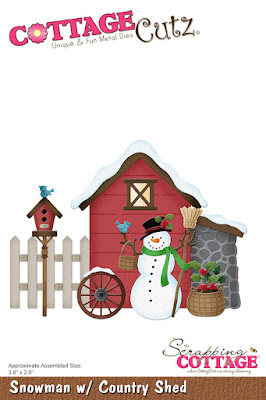
The card is an A4 horizontal top folding card. The base is from some gray cardstock. I cut a mat from some cute pink snowflake digital paper I created. I then used the cute Snowman With Country Shed Die. I cut all the pieces in white and then used a combination of markers and colored pencils to color my pieces.
For the country shed, I colored it with a base of my red marker.

I then added some details to give the "wood" some additional dimension with my colored pencil. I proceeded to color all of the other pieces in the same way.


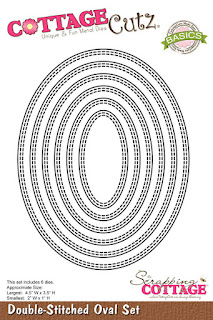
I then used the largest Double-Stitched Oval die from the Nesting die set. I cut it in half length wise.

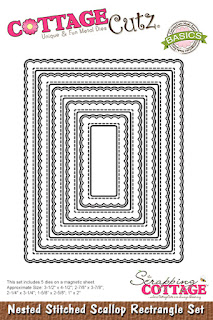
I layered the dies on the bottom of my mat. The mat is the largest Stitched Scallop Rectangle from that nesting die set. I added a mat of some pink snowflake digital paper I created. I trimmed the ovals down to match the width of the pink mat paper. They made some perfect snow mounds for my background.

Here is the base of the card. As I mentioned above, it is a top folding horizontal A2 base. I then cut another mat of my patterned paper and mounted onto the base. From there I assembled the rest of the pieces onto the scalloped stitched base. Once everything was in place, I mounted that mat onto my card base. I finished it off by adding some white paint and stickles glitter glue.

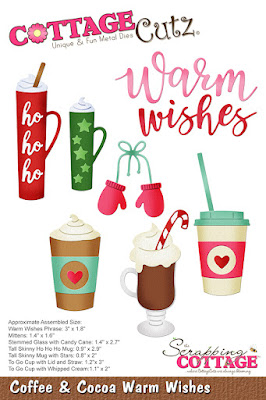
Here is a look at the finished card. For the Warm Wishes sentiment, I used them from the Coffee & Cocoa Warm Wishes Die Set. I think this card turned out super cute! I know the perfect person to get this card! 

The Dies I used to create this project:


Well that about covers it for today! Be sure to head over to the Cottage Cutz You Tube Channel where some of the designers will be posting videos! You can also catch us on Facebook and Instagram!

Make sure to come back by each day for some more great crafty inspiration from the super talented team. Until the next time, have a wonderfully crafty day!

Friday, February 14, 2020

Latte Love

Happy Valentine's Day!  It's Jeanne today and I have a Valentine for you.  Actually, I sent this one to my youngest daughter - a gal who loves her lattes! (I also enclosed a Starbucks gift card.)
This card uses the same color palette as last week's card and some of the same elements.
I cut my pieces from various colors of cardstock using the new Juggling Spring Bunny and Spring Lamb & Chick dies, and the older Coffee & Cocoa Warm Wishes die.  I assembled all the pieces.
You may recognize this striped panel from last week - it's the panel I cut from the middle of my base panel!  I used the Nested Stitched Scallop Rectangles (middle size) to cut a white panel.
I stamped my sentiment on it using black ink.  I cut a panel 4.25 x 5.5 inches from white and embossed it with large dots.  The white was too plain for me and I felt this gave the card some visual interest.  The large dots contrast nicely with the smaller stripes.
I assembled it all on an A2 side fold card base.

Dies:
http://www.scrappingcottage.com/cottagecutzjugglingspringbunny.aspx
http://www.scrappingcottage.com/cottagecutzspringlambandchick.aspx
http://www.scrappingcottage.com/cottagecutzcoffeeandcocoawarmwishes.aspx
http://www.scrappingcottage.com/cottagecutzstitchedrectanglesetbasics.aspx

http://www.scrappingcottage.com/cottagecutznestedstitchedscalloprectangleset.aspx
Thanks for stopping by today!  Be sure to visit the online store where the new Spring dies are on sale for a limited time!

I hope you have a wonderful Valentine's Day and a wonderful weekend!

Sunday, June 23, 2019

DT Samples w/Magic Garden Dies (Day 5)

Hello Scrapping Cottage friends! Thanks for taking the time to stop and visit today. We are sampling DT cards for the next week from our brand new Magic Garden release.

There are 14 new dies in the Magic Garden release. And for a limited time the individual dies are on sale at 25% off.  If you love fairies, fairy gardens, gnomes and flowers, you will love these dies.

We want to give you some creative ideas for using the dies. So let's get started with the cards for today.

Sample 1:  Our first sample today is from Anja Zurga. She used the Stone Fairy Door, Mushroom Fairy Garden and Mushroom Garden and created a beautiful framed art piece. She started with distress oxide inks and then built the cutest fairy garden scene with these dies.  This would make a wonderful gift for a special friend or if you make handmade Christmas gifts this is a great idea.

Sample 2:  The next sample is from Janja Albreht. She used the Gnome on Tree Stump and Tree with Tire Swing to create a fabulous card of encouragement. Such a wonderful way to let someone know you care. The stenciled a ray of light around the gnomes lantern adds a unique touch.  Don't you love the caring, tender look on the little gnome's face?
Sample 3: The next and last sample for today is one that I (Mary Marsh) created. using the Wishing Well and Fairy Garden Flowers dies. When I saw the wishing well die, I thought of a bridal shower card and also a get well card. Today I went with the get well card idea.  I used some cloud designer paper for the background. Stamped the get well sentiment and the Wishes phrase is from the Coffee & Cocoa Warm Wishes die. This is a sweet way to send get well wishes to someone that is under the weather or battling a major illness. It lets them know you care.
 
Well, that's our samples for today. I hope we have given you several ideas on fresh ways to use the new dies. We still have 3 more days of group samples so stop by again tomorrow. You can also check us out on FaceBook and Instagram

dies used to create today's projects:
http://www.scrappingcottage.com/cottagecutzgnomeontreestump.aspx

http://www.scrappingcottage.com/cottagecutzmushroomfairygarden.aspx

http://www.scrappingcottage.com/cottagecutzmushroomgarden.aspx

http://www.scrappingcottage.com/cottagecutzstonefairydoor.aspx

http://www.scrappingcottage.com/cottagecutztreewithtireswing.aspx

http://www.scrappingcottage.com/cottagecutzfairygardenflowers.aspx

http://www.scrappingcottage.com/cottagecutzwishingwell.aspx


Saturday, June 15, 2019

A Fairy Happy Day

Hello Scrapping Cottage friends! Thanks for taking the time to stop and visit with us today. It's Mary Marsh here bringing you the Saturday edition of the Blog. 

We have released the new Magical Garden dies. There are 14 new designs and they are currently on sale at 25% off.

If you love fairies, fairy gardens, gnomes and flowers, you will love these dies. We will have several group posts to jump start your creativity starting next Wednesday, June 19th through Saturday June 22nd. The DT has created some really cute cards showcasing these new dies so make sure you check back each day. 

 Today, I am featuring the new Mushroom Fairy Garden die. Let's get started with some details on how I created it.

Step 1: I cut the fairy and the mushroom garden first, using the colors on the packaging. I wanted those colors done first because I was going to sponge the background and I wanted colors that would complement each other.
For the background, I used tumbled glass, broken china, spun sugar and picked raspberry distress inks. When I was satisfied with the color intensity, I misted it lightly with water to get a more muted type look. Perfect for my fairy and her mushroom garden.
I wanted a frame around the scene so I used the largest of the Pierced Wide Rectangle Frame die and cut in white cardstock.

Step 2: I am ready to start card assembly. I attached the garden scene with multi-matte adhesive. I wanted the fairy to lifted slightly from the background so I attached her with dimensional adhesive.
I stamped the sentiment using a grape ink and my MISTI. I did need to ink & stamp twice this time. The MISTI is invaluable for that reason alone.
I die cut the "wish" word in a light purple cardstock. I used the coffee & cocoa warm wishes die. The word was the perfect size for this card and I simply trimmed off the "es". I cut it 3x to give it a bit more dimension.
To complete my card, I attached the image panel to the light purple (highland heather) cardstock. Scattered a few sequins and this card is finished. I hope I have given you some inspiration on a way to use this new die set. See you next Wednesday for the DT group posts.

dies I used to create card:

Wednesday, December 19, 2018

Warm Wishes Layout

Hello! This is Sukie with my guest designer post.  Today I'm sharing a single page 12x12 layout.  I used several Cottage Cutz dies on this page.
The patterned paper was the inspiration for the die cut cuts on my layout page.  I cut all of the drinks from the Cottage Cutz Coffee & Cocoa Warm Wishes and Sweet Christmas die sets.  Everything was inked on the edges for added dimension.  The mug from the Sweet Christmas set was layered on top of a circle cut from the Pierced Circle set.
I created a pocket and tucked in an ephemera die cut card.  A couple of tags cut from the Cottage Cutz Nested Stitched Scallop Rectangle set were stamped with sentiments from the My Creative Time "Do the Cocoa Motion" stamp set.  A small bow in Christmas Mint Trendy Twine was adhered to the mug.
The title and drinks were layered on a piece of paper to act as a shelf. I added a second layer of paper underneath for a pop of color.
Some Stickles were used to accent the holly berries and the candy cane for a sparkly finish.  The Stickles coordinate perfectly with the strip of red glitter paper on the base of my layout page.
To fill up some of the space at the top of my page, I layered the title at an angle above the 4x4 photo mat.
The journaling pocket was layered with the mug and the sentiment tags were tucked insides.  A few adhesive gems were sprinkled amongst the drinks.
Here are the dies used on my layout page available in the shop: