Showing posts with label Clouds Slimline. Show all posts

Friday, February 23, 2024

Magical Unicorn Dreams Shaker

Hello friends,

Kris here to share some Friday inspiration with you.  I've created a fun Unicorn Shaker card that is perfect for a young girl.  The inside says "Birthday Wishes"


DESIGN STEPS:

I die cut the Flying Unicorn and the Rainbow with Clouds from white cardstock and colored with Copics.


Next, I cut (2) pieces of white cardstock at 4-1/4" x 5-1/2".  From one of those, I die cut the largest Double Stitched Rectangle die from the middle, creating a frame for our card front. 


From the Double Stitched Rectangle that was cut out, I die cut one of the Clouds Slimline dies.


On the other A2 piece of cardstock,  I ink blended Distress Oxide inks over the whole background, then repeated it onto the frame.    


I used Scor Tape to adhere a piece of acetate to the backside of frame, and also to the backside of the clouds border for the front.  Before removing the tape backings, I inset the clouds and glued the rainbow so the ends are tucked under the clouds. 


Once I got my clouds adhered on the front, I flipped it over to the back and added 1/8" foam strips around the opening, then added my shaker elements.  I then placed my ink blended layer (back of shaker) upside-down onto the foam strips.


I die cut "Magical" from the Magical Unicorn Dreams die from lavender c.s. and adhered to bottom of clouds, then I popped up the unicorn with foam strips.  

I cut a white A2 top folding card base and attached my shaker to the front and done!  


Head over to Cottage Cutz and do a little shopping today!

Get Social With Cottage Cutz


Thank you so much for joining me today! 
 I hope you are inspired to get crafty with your favorite CottageCutz dies!  

~Kristine

Thursday, August 03, 2023

God's Promise

Hello Friends

This is going to a friend to brighten her day.  I chose a lot of vivid colors to bring some cheer!

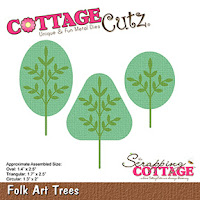
I am using the Folk Art RainbowFolk Art Trees and Folk Art Houses.   This die is from our Folk Art release!  There are 19 wonderfully detailed dies in this collection.  Each die can be used together or separately. These are fantastic versatile dies.


Design Steps:

1.  Start by using the Folk Art RainbowFolk Art Trees and Folk Art Houses dies.   Cut the following colors of card stock:  red, yellow,  mint, light blue, dark blue, purple, orange, and brown
2.  Prepare the card base: A2 white base, 4 1/8 x 5 3/8 blue, 2 1/4 x 5 3/8 green cut with the Hills Slimline die, white cut with the Clouds Slimline
3.  On the blue layer arrange the clouds and hill (do not put glue on the very top edge so you can tuck in the rainbow) as shown above
4.  Tuck the rainbow down into the grass as shown and glue
5.  Add the trees to the left of the rainbow and the small layer of grass at the bottom as shown above
6.  Add the ribbon and sentiment to the clouds.  Then tuck in the small house to the right of the trees.  Your card is complete 


We have more inspiration on our YouTube Channel check it out HERE

Thanks so much for stopping by!  And I will see you next Thursday.

Blessings and Take Care


Monday, May 08, 2023

Car and Balloons

Hi and welcome to a new week of crafty inspiration!! 

Kris here to share with you a cute and simple card featuring the car from the Spring Bunny Car, the balloons from the Spring Party Car, (both from our latest Spring Release!) and I added some previously released dies such as a dog from the Christmas Puppies, and the Slimline Clouds and Slimline Grass to help create my scene.  ☺


I started with this week's Color Challenge at SCS (CC946)
Cherry Cobbler
Pacific Point
Old Olive
Bermuda Bay
+ the dessert option= masculine


also used last week's Ways to Use It Challenge (WT946):
Feature a cloud/s - I stenciled them AND used a cloud border die!


Design Steps:

• I cut my card base 5-1/2" x 8-1/2" and scored at 4-1/4" for a top folding A2 card.

• I cut a scrap piece of white cardstock to 5-1/4" wide and shorter than 4" which is what I would have cut it to if it wasn't a scrap.  I then sponged clouds on it using Salty Ocean Distress Oxide ink.

• I cut a piece of Old Olive c.s. at 5-1/4" wide & die cut the top with the Grass Slimline die, then I stamped a sentiment in bottom right corner.

• I cut a piece of white at 5-1/4" wide and die cut the bottom with the Clouds Slimline die. 

• I cut a piece of road patterned paper (from La-La Land Crafts) at 5-1/4" wide.

 • I then die cut my car from Pacific Point, Bermuda Bay and white cardstock and used Copics to color the white pieces.  I cut the dog from white and the balloons from each of the challenge colors.  

• I then layered them onto my card front as shown below:


• I added some baker's twine in the Bermuda Bay color behind each balloon, then loosely tied them together (I removed this tie later).


• I then added a pop dot behind each balloon and attached it where I wanted them on my card front.

• I then added a strip of Scor Tape where I wanted to tack down the strings (behind the car) and removed the tie.


• I pulled the strings kinda tight and attached onto the tape, then added another strip of Scor Tape over the strings, then a piece of scrap paper to hold in place (and to keep from sticking to the car).

• Next, I added some mini dimensionals (foam hexagons) to pop the car up.  This is needed so there won't be that hump where the strings are bunched up.


• Lastly, I added my car and done!  Easy peasy! 


PRODUCTS I USED:

30% OFF!

30% OFF!

30% OFF!


Thanks so much for looking!  I hope this fun li'l card inspires you in some way to use your favorite CottageCutz dies!  

Reminder - We're having a Design Team Call!!  See this post for details!
View more design team creations on our YouTube channel here

~Kristine