Showing posts with label Birthday Card. Show all posts

Tuesday, August 29, 2017

Rub-A-Dub-Dub Birthday!

Hello all! I hope the week is treating you well so far. It's back to school time and I'm sure many of you sent your students off to start a new year like I did yesterday. Time flies alarmingly fast!

For your viewing pleasure today, I'm taking a little break from the wedding theme to bring you a birthday card for a little one in your life. It features the Bathtub Time die that that was part of the baby release this spring. This die has ten individual elements you can use to create a large variety of scenes. It's a great die to play around with and easy to construct. There are enough pieces to decorate both the front and the inside of a card like I did on this one.

I also used the Stitched Oval Set to create the frame on the front and the mat inside the card. The Happy and Birthday Expression dies were used for the sentiment inside.

To learn how this card came together, please click on the YouTube thumbnail below. If you are a fan of embossing or want to some additional ideas on combining embossing techniques, I think you'll enjoy this one.


Thanks for spending a few minutes with me today. I'll be back tomorrow with another video.

- Janet
  SugarShine Designs

Dies Used For This Project:


Thursday, March 31, 2016

Birthday Celebration!

Hello everyone,

It's Donna here sharing with you a birthday card which is another shaker card!  Here is my card:


Closer look at the presents and shaker


How I made this card........

The size of my card is an A2(4 1/4 X 5 1/2), the solid layer is the same size and the design layer is 4 x 5.  Who has used the Stitched Wide Frames?  They are wonderful to make shaker cards.  The circle stitched frame on my card is from the Stitched Wide Circle Frame Set.  There are three sizes in the set.  I used the largest circle.   To make the shaker I cut a circle from a clear plastic sheet and fused the edges leaving an opening to put my sequins in.  Once I filled it, I fused the small opening I left open.  I then used my tape runner to tape the circle and the pouch I made.  Then I taped it to the card.  So simple, no message glue to deal with!

I used the Present die to cut the two presents.  After cutting the two presents, I shaded the edges with ink and cut small boxes for the back of the presents so you could not see through the back.  Also, you can see the hearts that run down the center of the box.

I finished the card off with a sentiment.  That was easy peasy!  Why don't you give it a try and make this card with the Present die!

Please come back soon to see some more creations from the design team!


Monday, October 20, 2014

CottageCutz Birthday Party Bear


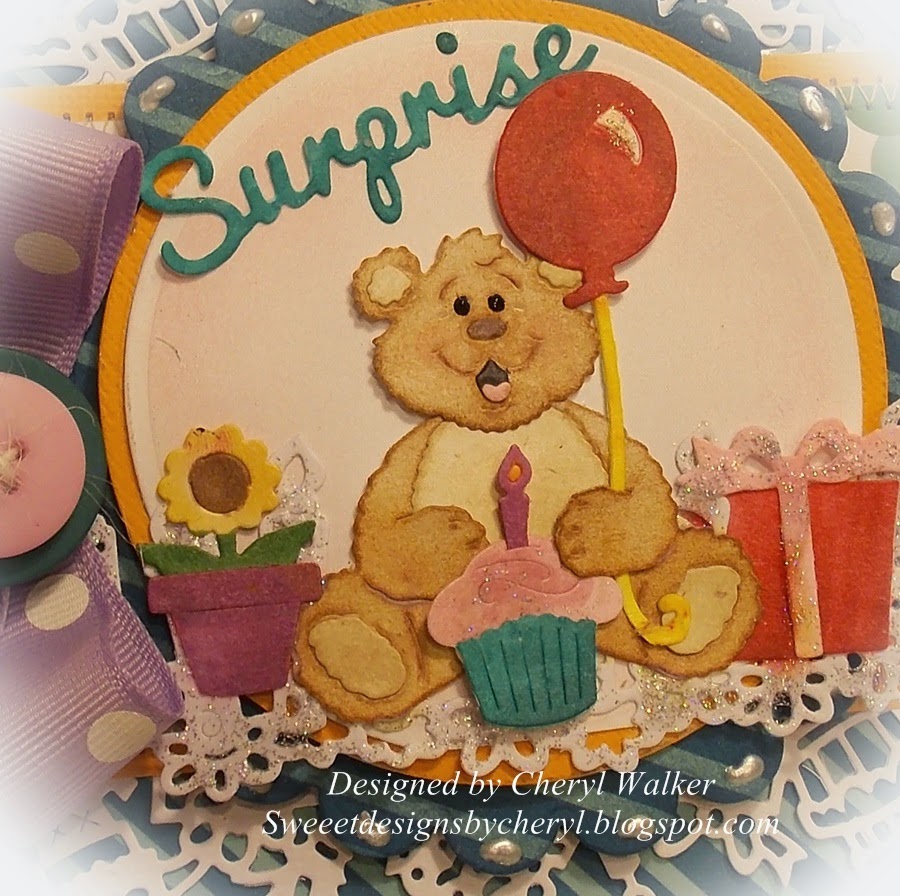
Hello everyone, Cheryl here to share with you today a Birthday Surprise card I made for the Scrapping Cottage using the Darling "Birthday CottageCutz" Dies. LOVE this release, as all the dies are absolutely darling and perfect for cards,mini albums, and scrapbook pages.

On my card here, I used the Darling CottageCutz Birthday Party Bear , and colored him and everything else with copics. I did add some liquid glitter glue to the cupcake, present, and balloon. I also used the CottageCutz Birthday Candle Border, and glittered it up too. Its behind the bear and his gift,cupcake,and flower pot.

Next I used some Birthday Design Paper, and then layered the border across the center of my card with the CottageCutz Birthday Border. The CottageCutz Surprise was cut in white, and then colored with copics to match the dp. 

Here are the CottageCutz Dies I used:
All photo's below are linked to the Scrapping Cottage for easy finding! Just click on each photo


Thank you for stopping by and have a lovely day!
Hugs to all,
Cheryl