Showing posts with label Birch Trees & Deer. Show all posts

Friday, September 16, 2016

~Tree Tops Glisten~


Hello Scrapping Cottage friends! Thanks for taking the time to stop and visit today. It's Mary Marsh here bringing you the Friday edition of the Blog.

Even though the temperatures are still soaring like summer is never going to end, we all know that our summer season is fading away rapidly. Next week marks the official start of Autumn. And, before you know it Christmas will be knocking on our doors.

So it's not too early to start working on your Christmas cards. That way when December rolls around there will be time for all the other festive holiday traditions. So with that in mind today I am bringing you a Christmas card using one of the new CottageCutz Christmas 2016 dies.

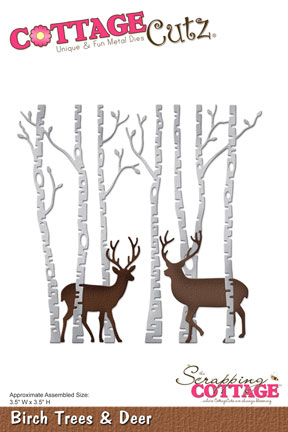
This one is the Birch Trees & Deer dies. The die cuts the trees in 4 different pieces. I think that makes it much easier for placement and attaching to your cardstock. And, I love the antlers on the deer. They cut so smoothly.

Without further delay, let's get started on some details of how I made this card.

White Card Base:  4 1/4" x 5 1/2"
Light Gray Layer: 4" x 5 1/8"
Image Layer: 3 7/8" x 5"

I started my card by creating the background. It was done by using both a brayer and a large sponge dauber. My ink colors are a medium blue-green and a teal.

Tips on using Brayer: I always use dye based inks because it dries quickly and when you mix the inks they will stay true to color. I use a soft rubber brayer from Speedball.
My cardstock is a smooth white cardstock. Because it's so smooth you won't get a lot of spots in your work like you would by using a textured cardstock.

When you ink up your brayer, roll in one direction. If you roll it back and forth you won't ink the entire brayer.
When I start the actual brayering, I have the brayer right next to my cardstock and roll upwards and then come back and catch the edge of the paper. And then go back and forth, back and forth.

I used the lightest shade of ink and went about 1/3 of the way down my cardstock. I repeated this several times until I got the shade and look I wanted.

Then I inked up my dauber and started sponging the darker shade of ink. I kept applying color until I had the shade I wanted. I didn't cover the entire background because I knew I was going to add a snowbank to this card.
Once this part of my background was complete, I pulled out a snowflake stencil to create some background snow. I secured the stencil with some painters tape. Works like a charm for me.
I used 3-D molding paste and smoothed it over the stencil with a spatula. Once I have the paste in place  I remove the tape and carefully lift off the stencil. I set it aside for about an hour to dry.
While this was drying I cut the snowbank from white cardstock and stamped my sentiment in the teal ink. Then I added some glue and chunky glitter. Just wanted a little sparkle on the card.
 
I cut the trees in a light gray cardstock and my deer in a medium brown cardstock. I also added chunky glitter to the treetops to make them glisten and sparkle just like my sentiment says.
Now with all the elements complete, I am ready for the card assembly. I attached the trees with Ranger multi-medium matte and I used glue dots for the deer. The image panel is layered over the light gray cardstock. And, to this layer I cut some white fun foam to lift it off the base panel. It just creates more dimension on your card. You could also use mounting tape.
 
Here are some close up shots of the trees and the deer. You can also see the little bit of chunky glitter I added to the treetops for the glistening effect.  
Well my friends, that's my post for this week. I hope my card has given you some ideas of ways to use this new die set.
Just a reminder that our 6th challenge is going on with a Holiday theme this time around. Get info here.
Until next time.......inky hugs!!!
http://www.scrappingcottage.com/cottagecutzbirchtreesanddeer.aspx


Tuesday, August 16, 2016

Deer on a glade

Hi, Janja here!

Calm early morning silence. On a small glade, surrounded by birch trees and snow-capped spruces, deer briefly stop on a morning walk.
These and similar scenes can be created on cards, with the new CottageCutz Christmas dies.


For the card we need:
- white scalloped card base: 5.3 x 5.3" (13,5 x 13,5 cm), folded
- brown cardstock: 4.7 x 4.7" (12 x 12 cm)
- patterned paper: 4.5 x 4.5" (11,5 x 11,5 cm)
- white and brown cardstock
- Distress ink: Iced Spruce, Tumbled Glass, Scattered Straw, Vintage Photo, Shabby Shutters, Moved Lawn, Peeled Paint

Cut out birch trees and deer with the die birch trees & deer.


Shadow blue paper and cut out several spruce trees with snowy tree die. Do not discard white cardstock from which we cut the snow. It will be used as a stencil for shading. 


Paste a snow in spruces. Place stencil from white cardstock on the snow-covered spruces and shadow them. 


Apply glitter with a clear glitter marker.


Under the light, I caught a gleam glitter.


When putting a card together, gradually shadow the background with Distress inks, to create depth.


With a green marker emphasize the edge between the snow and the green part of spruces. At the lower and upper part of the background apply white paint with a finger.


I hope you've enjoyed this card. Thanks for stopping by.

I would like to remind you on our CottageCutz challenge #5 - birthday card. Join us.


Saturday, August 13, 2016

SNOWY CHRISTMAS WITH ANITA KEJRIWAL

Hello to all !!!

I'm Anita here and I am super excited today as I bring for you my first Christmas card with CottageCutz dies. A wonderful collection of Christmas dies have been recently released and many more are on the way.
These are such beautiful dies with Christmas theme that one can create wonderful cards and other projects with them.
You can find them here
Here is my card for today featuring some of the latest dies.


Follow the pictures below for making this card step-by step.


Distress a 4 inches x 6 inches white card stock with Broken China and Chipped Sapphire


 Stamp images from Snow flakes stamp with Versamark Embossing pad


Cut out wavy layers from white card stock. Apply white embossing powder over stamped image and heat set.


Add the layers at the bottom using 3d foam tape.


Add the die cuts as shown and apply glue over the edges. Sprinkle Distress glitter and let it dry.


Add some sequins and add a die cut with Christmas sentiment on the top left.


Adhere this on a dark blue card stock and cyt leaving 1/4 inch all around. Adhere this on a card base 7.5 inches by 5.5 inches.


The finished card.

Challenge #5 is going on at the blog. The theme is Birthday. So do share your entry.

I hope you will be inspired to see these projects and use CottageCutz dies to create wonderful cards.


Dies used in this card.

Used the deer from this die.