Hi friends!
Kris here sharing another BABY card with you.
I used the color challenge at SplitcoastStampers this week #CC996
which is Polished Pink, Lemon Lolly, and Parakeet Party
Dessert option is: Embossing folder

I used the CottageCutz dies called Baby Girl Clothes and I computer-generated this sentiment based one I saw on Pinterest.
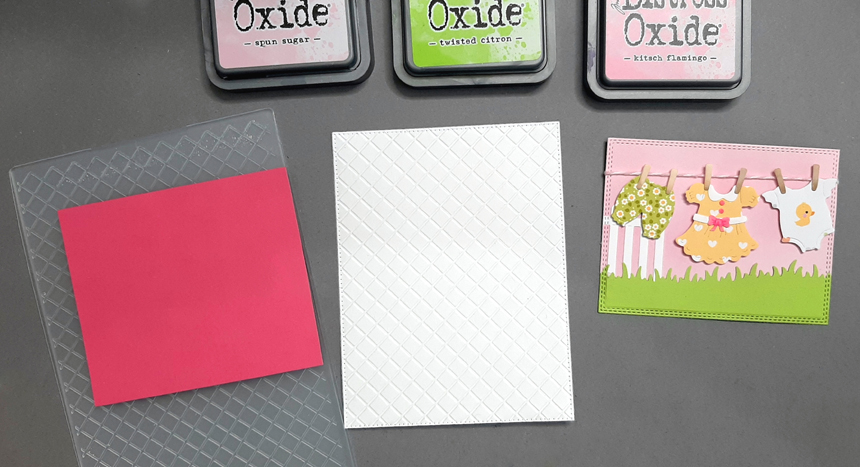
For my base, I cut a top folding A2 card. I then cut a layer and used a GinaK lattice embossing (the dessert option part of the challenge).
For my main image, I added Kitsch Flamingo D.O. ink. I then die cut some grass from the Parakeet Party cardstock and attached it to the pink layer. I added a leftover piece of fence behind the grass. Then I die cut the whole thing with the largest of the Double Stitched Rectangles die
I backed that layer with the Polished Pink cardstock, cut at 4-1/4" wide and just a li'l taller than my focal panel so it gives a bit of a border on top and bottom.
I ran a piece of cotton candy baker's twine around the panel and added pop dots on back to hold twine and also elevate the whole panel so you won't see indents where the twine is on back. The clothespins are part of the Baby Girl Clothes die. I pieced the clothes with the Doodlebug Designs Baby Girl papers.
That's a wrap!! ☺♥ Thanks so much for looking today!
♡ ♡ ♡
Ink Something Crafty!
~Kristine