Showing posts with label Autumn CottageCutz. Show all posts

Wednesday, October 19, 2016

AUTUMN THEME CARD WITH ANITA KEJRIWAL

HELLO,

How is everyone doing ?? Are you all busy with preparations for Christmas or still basking in the beauty of Autumn ??
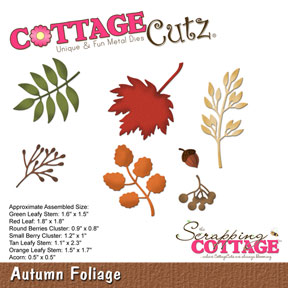
I am really enjoying myself doing both and believe me !!! It is so much fun creating these cards. CottageCutz has released some awesome Autumn theme dies that you can check here.
Today , I have a card for you where I have used a very innovative way to use negative of die cuts as stencils.
Here is my card .


To create this card, Cut a card A2 size that is 5.5 inches by 4.24 inches in white card stock.
Using the CottageCutz Feathers die, cut out the diecuts and use the negative of the die cuts as stencil to create a background. I have used the Distress inks Rusty Hinge, Spiced Marmalade, Peeled paint and Gathered Twigs.

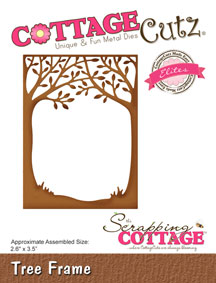
Cut out a window frame from the CottageCutz Stitched Square die and distress with Espresso Distress ink. 


Cut out the feathers from the CottageCutz feathers die and colour them using the above colours. Tie together using a twine.
Stamp a Thank You sentiment and layer all the square dies together.


Products used from CottageCutz dies.


`

The CottageCutz challenge 7 is Fall Theme. Do share your entries with us. See you soon with more CottageCutz goodness. 


Saturday, September 24, 2016

Thank You Card in Pastel Shade

Hello dear friends !!!!

It's Anita here with new craft inspirations. As the days are progressing, the festive fever is catching up. Cardmaking is in full swing. Fall has made its entry and its time for Thanksgiving and fall cards.
Today, I have given a new colour to Fall .. light pastel blue.
It has a touch of Christmas with all that glitter and the yellow flowers give a hint of Autumn.
CottageCutz has released awesome Christmas and Autumn themed dies that you are going to love. Do have a look at them here.

My card for today.


Step by Step Instructions

Cut out a card panel 4 inches by 6 inches and using the circle die from CottageCutz Nested Ornaments-Ball cut a medium circle. Cut out two more circle frames using the same die and the CottageCutz Stitched Circle die.


Distress the card panel with Evergreen Bough Distress ink and score at 1/8 th inch interval on the scoreboard. .Distress the frame also. Apply some glitter on it.


At the back of the card panel, around the circle, put foam tape as shown. .
Turn back on the right side. Add a square piece of glitter paper to cover the back,

Add sequins inside. Cover with same sized acrylic circle and adhere the frame on top.


Cut out leaves and acorn from the CottageCutz Cornucopia die and colour them with distress inks.
Cut flowers from CottageCutz 3d  flower# 2 and colour them in pastel yellow. Shape between fingers and arrange with twine  and leaves. Add a sentiment at the bottom.


Here is the complete car


Do share your entries  in the current challenge# 6-holiday. Thanks for being with me.

Die used are here.


Saturday, September 17, 2016

AUTUMN THEMED THANK YOU CARD.

Hello everyone... Anita here.

The colour of the day is turning in a new shade of warm orange.. the leaves are drying, changing colour and there is a warmth in the air with the nature basking in new shades of FALL.

CottageCutz has recently released some new fall themed dies and they are so beautiful. You must try them to create beautiful fall projects.

I have a quick simple card for you today keeping in mind that cardmaking is in full swing during this season and one needs a large number of cards. So here is a sample which can be made in 15-20 minutes and they look good.

So here it is.


To make this card, make a card base 5.5inches by 4.25inches with light yellow card stock.
Emboss a white piece of card stock measuring 4inches by 5.25 inches in a brick texture embossing folder. Adhere on the card front.
Distress the design with Pumice stone and Peeled Paint distress ink.
Cut out  2 shapes from the CottageCutz Tree frame die and few from  CottageCutz Autumn Foliage die
Paste the two frame dies together to get a thick die cut. 
Colour with Brushed Corduroy and Peeled Paint distress ink.
Add on a black matte layer.
Colour all the leaves with Distress inks-Rusty Hinge and Mowed Lawn.
Adhere the leaves and frame on the card front as shown.
Add a thank you sentiment.

CottageCutz dies used.


Challenge#6 with Holiday theme is live on the CottageCutz blog.Do share your entries.
Check out all the amazing new releases at the store.


Saturday, February 25, 2012

CottageCutz Treat Bag


If you are need a cute treat bag to make, I've got one to share with you. When I saw the CottageCutz / Peachy Keen Shower Peepers die from The Scrapping Cottage, I knew what I wanted to make. I always think that shading my die cuts with distress ink adds so much more life to them - but on this little chick, I was having a hard time getting too much ink, so I added it a little different. I used my water pen, and picked up a little Scattered Straw ink for her body, and just a touch of Worn Lipstick for her cheeks. This gave me much more control, and a very light touch of ink. The face is so cute - it's a Peachy Keen stamp that comes with the set (actually you get three different faces so your little peeper can have different expressions).

If you want to make the gift bag, here's how:


The acrylic bubble that I used on the front of the bag is a Flower-Soft Display Globe, but you could also just use a flat piece of acrylic, and cut your opening to any size and shape that you would like.


Cut another strip of paper, 1" x 12" and attach to the sides for a handle. Use dimensional tape to attach your die cut.

Scrapping Cottage Dies: Shower Peepers
Patterned Papers, Buttons: American Crafts Garden Cafe
Acrylic Dome: Flower Soft Display Globe
Distress Ink: Scattered Straw, Worn Lipstick
Water Pen: Close to My Heart

Thursday, November 05, 2009

Autumn Splendor


This week I have been really paying
great attention to all of the changing
colors and to the wonderful signs of fall.

I was inspired to create a fall border for
some pictures I took of my children playing
in a pile of colorful leaves on our front lawn!


CottageCutz
Raking the Leaves