Friday, April 05, 2024

Baby Sleeping on Moon

Hello CottageCutz friends!

Kris here to share a sweet baby card with you today featuring Baby Sleeping on Moon die.


  This card came together very quickly with some cute papers and dies ☺  

I die cut the white circle for the focal image using the Double Stitched Circle set.  I then sponged some clouds using Spun Sugar Distress Oxide ink and spattered some RV81 Copic ink using a small paintbrush.  

 
I die cut a peach mat using the largest of the Nested Stitched Doily Set

I die cut the Baby Sleeping on Moon and the Expressions Baby dies from white cardstock and colored with Copic markers.  

My card base is a landscape A2 card.  I cut some layers from the Bundle of Joy papers (Doodlebug Designs) and layered onto card front.  I then popped up the main focal circle onto card front with foam tape. 


Sweet li'l baby card 


Thanks for looking!!  I hope you're inspired to get crafty with your favorite CottageCutz dies!

~Kristine


Head over to Cottage Cutz and do a little shopping today!

Get Social With Cottage Cutz

Tuesday, April 02, 2024

Spring Time

Hello Friends,

It is Pam sharing with you today.

I thought I would make a few spring cards for my family who have had a rough winter back in Ohio and New York.  I must say I love Arizona winters!  No snow to shovel and no winter coats for me!  I guess our extremely hot summers are our winters.  We stay inside during the summer and play during our winter!!

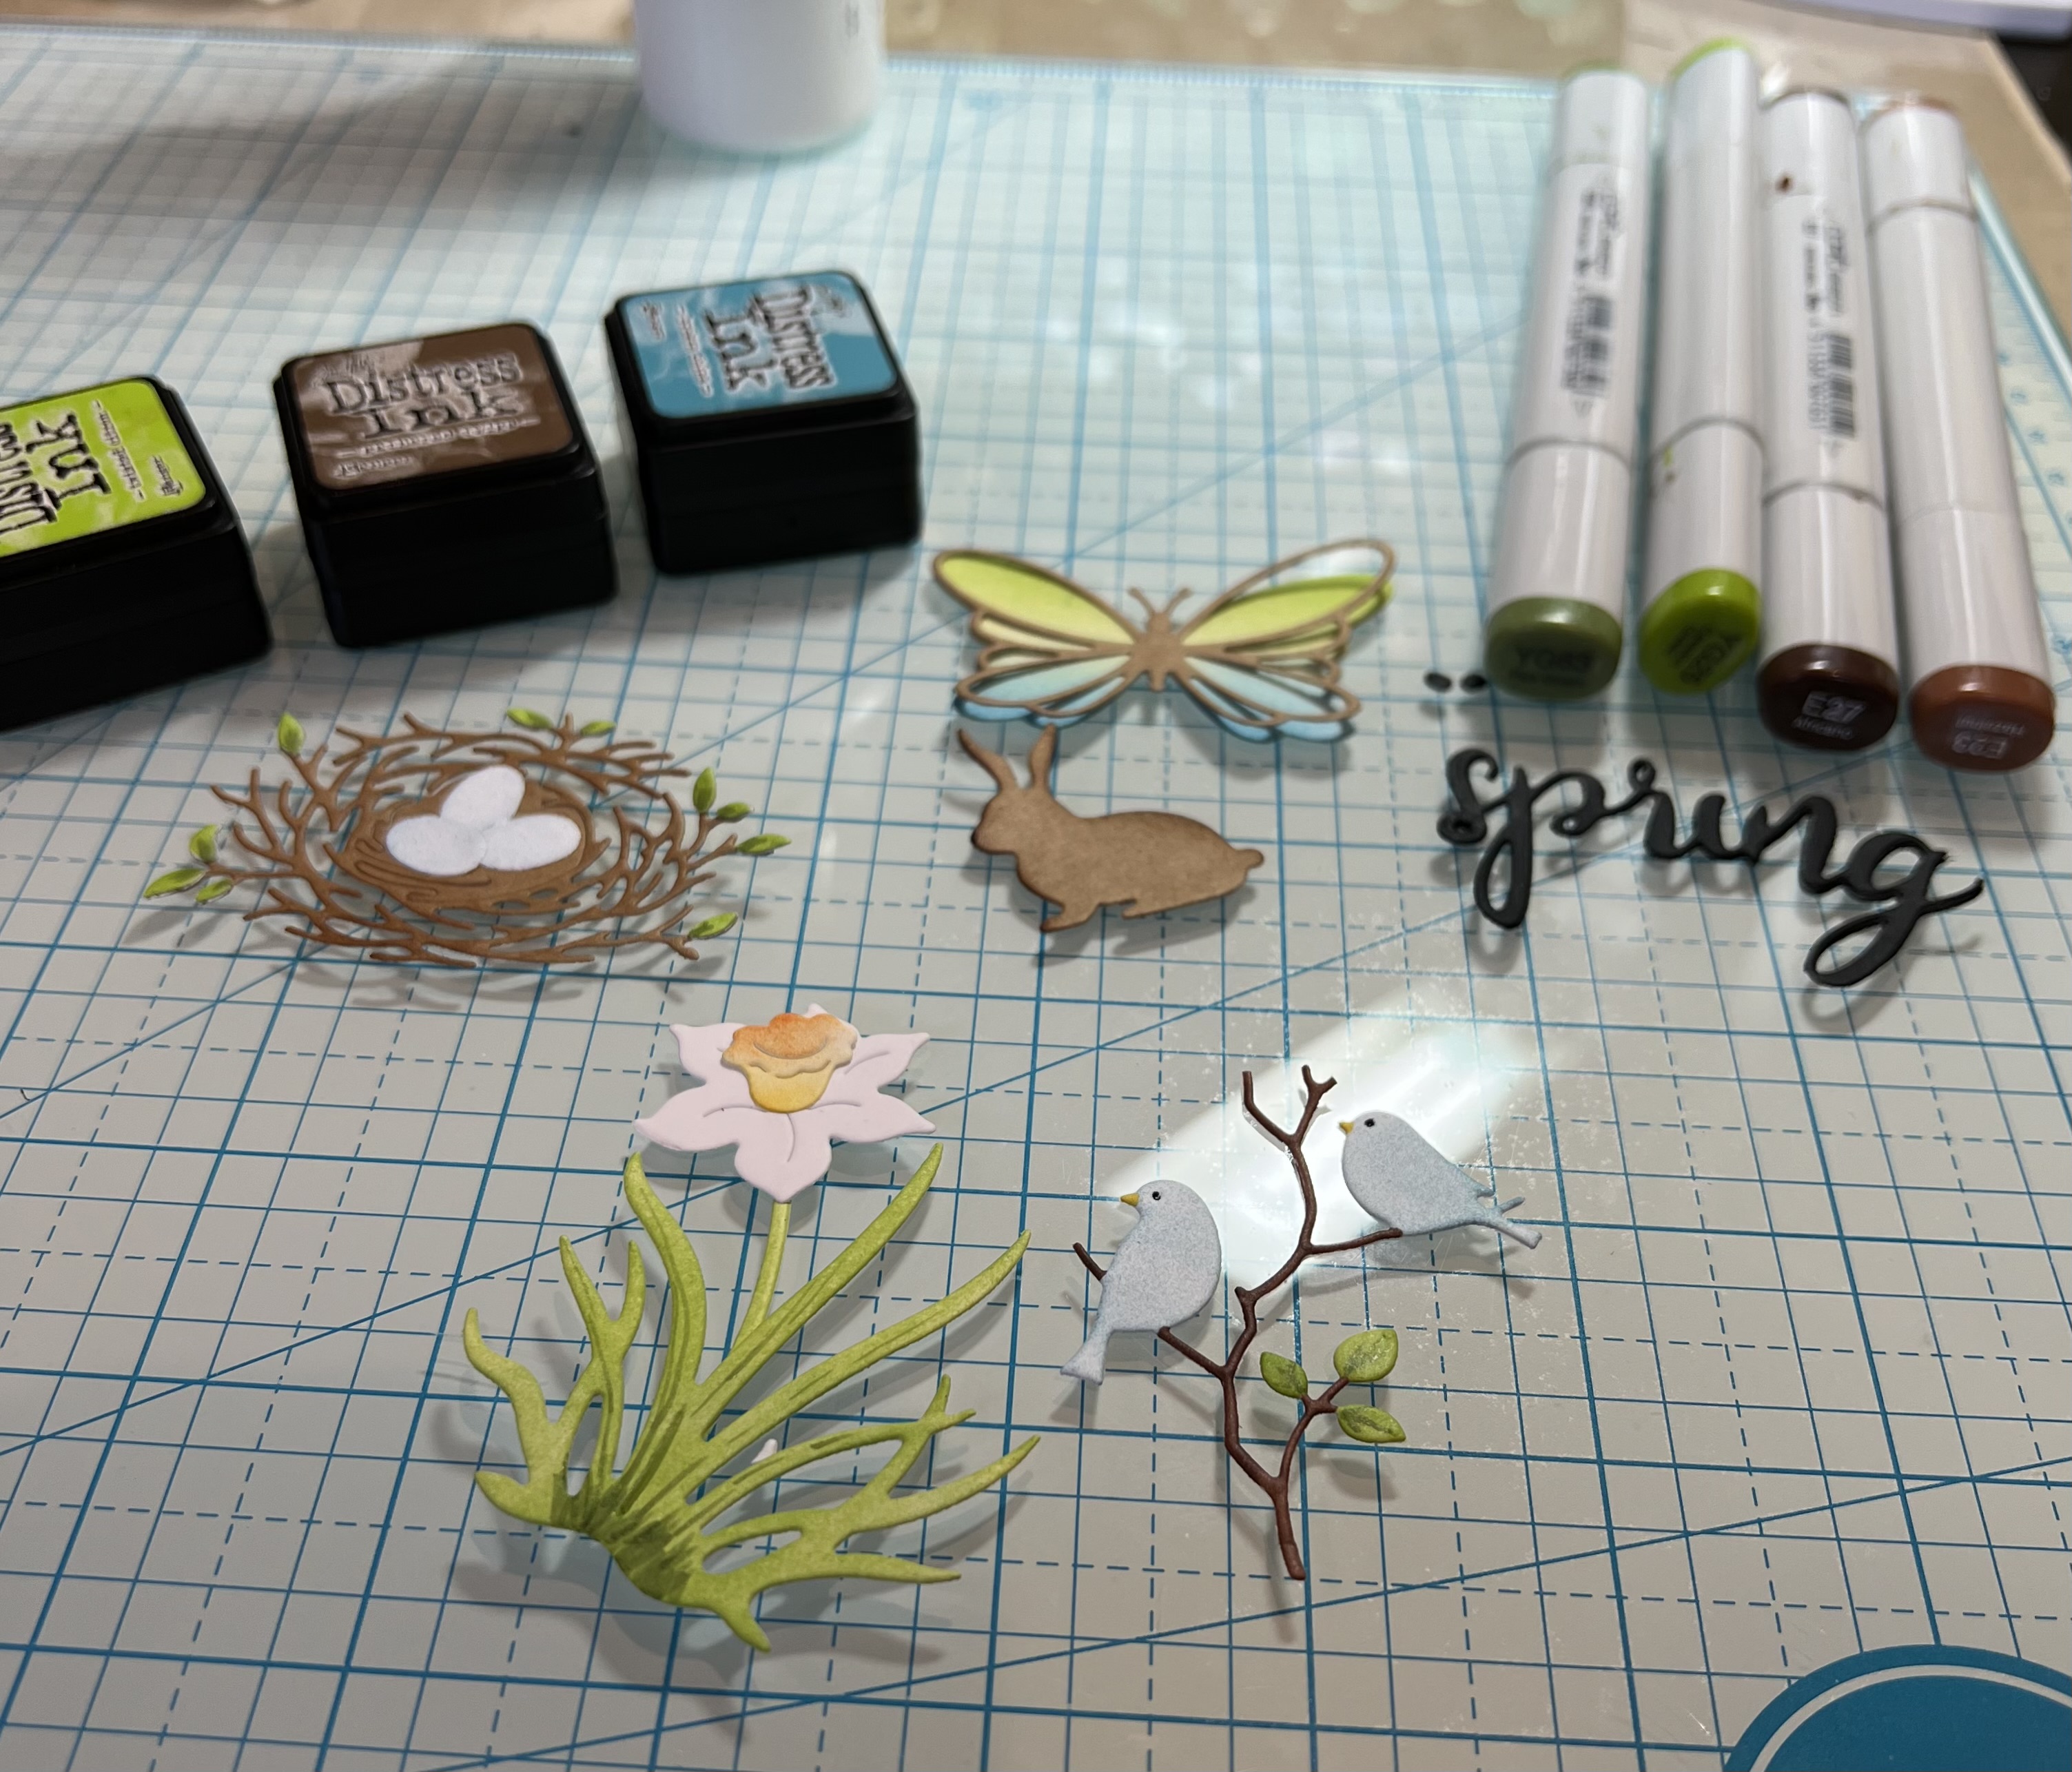
This card was inspired by a beautiful card by Wanda Guess.  The design and dies are a little different but I really love how it turned out.  I used a larger card to accomodate the dies I chose.  It is a 5 x 7 card.  The dies I am featuring are Nest with EggsSpring BunniesSpring Daffodils & Eggs,  Hello Spring BloomGarden Butterflies and Bees and Bird Trio.

                                                                                                                      Background Photo Freepiks 

Design Steps:
1.  White base card is 5 x 7 when folded, kraft card stock 4 7/8 x 6 7/8 and white card stock 4 3/4 x 6 3/4
2.  Using the Pierced Square Set the 6th, 7th and 8th from the largest square cut out the squares in white.  Using the Pierced Rectangle Set the 4th and 5th from the largest rectangle cut out the retangles in white
3.  Use a blending brushe and blue ink to cover the top half of the rectangles and squares as shown above
4.  Take the white piece of card stock measuring 4 3/4 x 6 3/4 and lay out the retangles and squares as shown above.  When you have them as you like place dimension tape on the back of the retangles and squares then pop them to the white panel

5.  Using the Nest with Eggs die cut out the nest in kraft and the eggs in white.  Using the Spring Bunnies cut out the sitting bunny in Kraft.  Using the Bird Trio cut it out in white.  Using the Spring Daffodils & Eggs die cut it out in white.  Using the Hello Spring Bloom cut the word spring out twice in black and glue together.  Using the Garden Butterflies and Bees cut the butterfly out in kraft and white
6.  Use Copics and inks to color the dies and then glue together as shown above
7.  Glue the dies to the retangles and squares as shown above.  Splatter the card with white and blue ink. Add a little stamp sentiment that says time.  Glue the panel to the 4 7/8 x 6 7/8 kraft card stock and then onto the card base.  Your card is complete


We have more inspiration on our YouTube Channel check it out HERE

Thanks so much for stopping by!  And I will see you next Thursday.

Blessings and Take Care


Head over to Cottage Cutz and do a little shopping today!

Get Social With Cottage Cutz

Sunday, March 31, 2024

Blessings Card

Hey crafty friends,
So glad you stopped in today! Happy Easter! Today I am sharing a card I created with an Easter or even just a thoughtful blessings card. Here is what I created.
My card is a top folding A4 card.

As usual, I started by cutting all of my pieces out in white. I used my markers to color my various pieces.


I layered the two white cross pieces together. I wanted to keep the crosses white but wanted to add a little extra pizzaz to it. So I decided to brush a little sparkle on it.

I then proceeded to build my flowers and leaves around it. I also built the cute little bird after I colored all of the various pieces. I went ahead and mounted all that to a double stitched oval with a piece of patterned paper. I put that onto the next largest white double stitched oval mat. I used a piece of green plaid paper 

Here's another view of the finished card to show you the depth of the pretty flowers and the little bird.


Dies Used For This Project


Double Stitched Oval Set

Well, that about covers it for today. Be sure to come back. You will want to keep up with all our crafty adventures!  Don't forget to check out our YouTube Channel! Links are below.
Until the next time, have a wonderfully crafty day!
Melinda


Head over to Cottage Cutz and do a little shopping today!

Get Social With Cottage Cutz