Thursday, July 21, 2022

So Berry Sweet Gnome Card

Happy ThursDIE Cottage Cutz Friends!
Melinda here with you on on this Terrific Thursday! I hope you are enjoying your week thus far and if you are state side...hopefully you are beating the heat! Staying in and crafting is always a great refreshing way to relax in these dog days of summer! Today I am sharing a very simple but sweet card I created featuring dies from the new Strawberries and Bees release

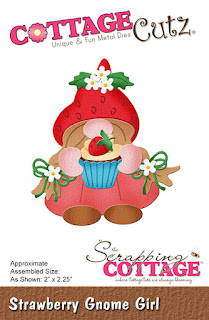
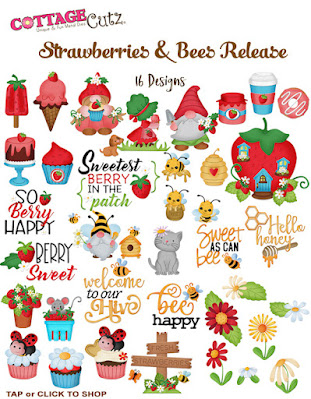
The focal point of this simply sweet card is the adorable little Strawberry Gnome Girl Die. She is part of the new Strawberries and Bees release. I also used the Berry Phrases Die from the same release. My finished card size is a standard top folding A4 size. The base is white cardstock and then I added a piece of red cardstock. To that, I added a mat of some patterned strawberry paper. I designed the paper and printed it out. I purposely made the strawberries on the paper tiny so they wouldn't be disproportionate to the rest of the composition.

Here's a closeup of that sweet little Strawberry Gnome Girl.

She was very easy to assemble. I just cut all her pieces out in white and then colored them in. That really is my favorite thing to do. Coloring your die pieces is very relaxing. She comes together very easily and is so sweet.

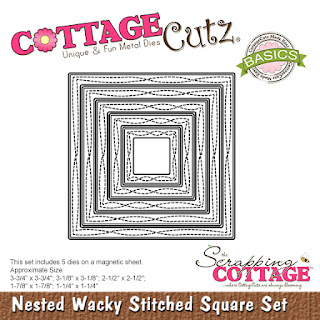
Here's another view of her closeup. Once I assembled her, I added some foam tape to give her a little lift off the mats. I used a pink and red cardstock mat and put those on top of Wacky Stitched mat. I added just a tiny touch of stickles to the centers of her hairbows and the centers of the little flowers on her berry hat.

Here's a closeup of the sweet title and two berries. I did the same with the title pieces. I cut them all out in white and then colored them in. 


Dies I Used


Be sure to check it out and all the amazing creations from the design team!


Also, don't forget to head over to the CottageCutz YouTube channel and check out all of the amazing projects on there. Our video team is doing a wonderful job of filling the channel with all sorts of creative content! You don't want to miss it!


Well that about covers it for today! Until the next time, have a wonderfully craft-die day!
Melinda Beltran

Wednesday, July 20, 2022

So Berry Happy


Hey Krafty Friends, Jen from Katahdin Krafts, back with another  CottageCutz YouTube  video on the CottageCutz Channel.  This week, I am sharing my "So Berry Happy" strawberry house card.  


I used several dies from the latest "Strawberries & Bees" release, along with the "Flower Pot House" die for my card this week.  I looked at that flower pot and saw a strawberry planter waiting to be created! 


Please head over to the channel and watch my video to learn how I created this fun project, also enter for a chance to win the "Strawberry Girl" die!  

The winner of the "Flowers" die from my last video is Lori U'ren, you can find all the details on the YouTube Channel!


Tuesday, July 19, 2022

Berry Sweet

Hello Scrapping Cottage Friends, 

It is Pam sharing with you today!

We have a new release and it is just plain adorable.  It is called Strawberries and Bees perfect for those fun summertime cards. There are 16 designs in this new collection and you can get the individual dies for 30% off right now! This sale will not last so shop today to get the incredible savings.

Here is my card for today using three new release dies Strawberry Treats 1Strawberry Treats 2, and  Berry Phrases.


Design Steps:
1.  Use a white slimline for the card base measuring 3 1/2 x 8 1/2, cut a piece of white card stock 3 1/2 x 8 1/2 with the Circle Window Slimline die and your final piece is a checked blue DP at 3 1/4 x 8 1/4
2.  Glue the blue checked DP to the white card base and then glue down the Circle Window piece.  Using the Berry Phrase die cut out the Berry in red and the Sweet in black.  Glue to the center circle
3.  Using the Strawberry Treats 1 die cut out the pieces in pink, brown, red, white and green.  Assemble with a fine tip glue
4.  Using the Strawberry Treats 2 die cut out the pieces in pink, brown, red and green.  Assemble with a fine tip glue
5.  Glue the cake in the left circle and the icecream in the right circle 

6.  Using the same dies cut out a few extra strawberries and add then to the card as shown.  To complete the card add some silver sequins

CottageCutz Products

Here is the new release so please check it out in our store today!!

We have more inspiration on our YouTube Channel check it out HERE
Thanks so much for stopping by!  And I will see you next Thursday.

Blessings and Take Care


Monday, July 18, 2022

Hello Honey

Hello and Happy Monday CottageCutz friends! 

I'm Kris ~ one of the Guest Designers here, and I've got a sweet & simple card I made for my daughter.  She's clear across the states (I'm in OR and she's in PA - attending grad school) so she's definitely one of my frequent card recipients, and the dies in this Strawberries & Bees Release were perfect for dropping a sweet hello!  

I've used the Bee Phrases and Flowers dies.  And I'll apologize now that I kinda forgot to take pictures along the way, but it's super simple that I think written details will suffice ☺


How I made it:

1.  I cut a piece of thick white cardstock 11" x 4-1/4" and scored it at 5-1/2" to make a top folding card.

2.  I cut a piece of black/white striped paper from my stash at 5-1/4" x 4" and adhered to card base.

3.  I cut a piece of yellow (Daffodil Delight) cardstock at 5" x 4" and adhered to the black/white striped piece so that the stripes appear at top and bottom.

4.  I cut a piece of kraft (Crumb Cake) cardstock at 4-3/4" x 3-3/4".  I mixed a bit of white acrylic paint with water and with a paint brush, I spattered white ink all over and set it aside to dry.

Here's a closer up shot of that.


5.  While the paint was drying, I die-cut and assembled my pieces from the Bee Phrases and Flowers out of white and yellow cardstock.  I then colored the 'Hello', bottom pieces of the bees & wings, the honey spoon, the top layers of the honeycomb, and the flower with Copic markers and assembled them.  

6.  For the dripping honey, I added some liquid pearls in a golden color to the yellow die-cut and let it dry.

6.  Next I adhered my white-spattered cardstock onto the middle of my card front.

7.  I then attached my die-cuts, gluing everything down, except the flower blossoms and bees in which I popped up with foam dots.

8.  I noticed I smudged my white paint spatter just above my honey spoon and it looked bad, so I added a golden bee charm there and another in bottom right corner just to make it look cohesive. 

That's all!  This was fairly quick and simple to put together.  I hope something I've done today inspires you to create with this ADORABLE release!  ☺

PRODUCTS I USED:


Here's the whole awesome release!


    Hope you have a CRAFT-astic week!!
~Kristine

Saturday, July 16, 2022

Two Birthday Wishes Cards

Hello CottageCutz friends! Thanks for taking the time to stop and visit with us today. It's Mary Marsh here bringing you the Saturday edition of the Blog.

It's new release time!!! We have new dies in the online store. It's our Strawberries and Bees release with 16 new designs. You can pick up the individual dies are 30% off.

The new dies are perfect for all your cardmaking needs. They would work for so many occasions as our design team have been showing.

Today for your viewing pleasure I created 2 birthday cards. That seems to be the most needed card of the ones I send. So, I can never have enough of these. I have a big extended family plus the friends I send birthday greetings to. 

I am featuring the new Strawberry Treats and the Flowers die. I used the same CAS layout for both cards. Just changed up the designer papers to get a different look. A big plus is this design would be easy to re-create if you had to make multiples.  Let's get started on some details of how I created my card. 

Design Steps: 

I picked the colors for the first card and then chose my designer paper & card base. 
 
Light purple card base: 4 1/4" x 5 1/2"
White border strip: 1/4" x 5 1/2"
Designer Paper: 3 1/4" x 5 1/2"

Attached to the card base with double sided tape.
Next, I cut the cake image and the sweetest phrase in colors that complemented the base and designer. Instead of the strawberry that is part of the cake design I decided to add flowers. I didn't think a red strawberry would look good with the shades of purple I was using. 
I decided to place the images on a circle. I had this one in my supplies already cut from the Wacky Stitched Circle die. It's the 2nd largest one - approximately 3 1/8".  I attached the circle with double sided tape and the images with dimensional adhesive.  
To finish off this first card, I attached the sweetest phrase, stamped an additional greeting on a banner and added a few light purple gems. 

Now for my second card. This one is using the same layout and color scheme. My designer paper is a  different pattern but the same light purple shade. It's called fresh freesia. And I used the Stitched Circle die on this card. 

The flowers are cut in shades of purple. The Sending phrase is from an older Black Friday release. release - Sending Hugs. It looks like it's no longer in stock, but you could use the Sweet phrase that I used in my first card.  
I attached these images with a combo of double-sided tape, glue and dimensional adhesive. I also used a different sentiment on this card and scattered grape enamel dots to complete it. 
Well that's it for me for this post. See you next Saturday. 

Dies I used to create card: