Monday, December 20, 2021

Easy Ornament Scene


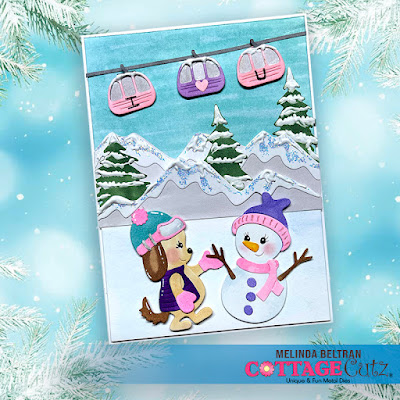
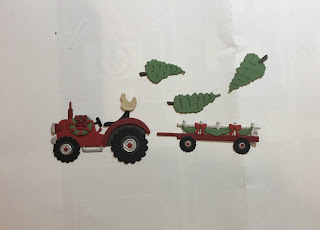
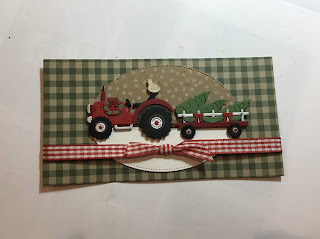
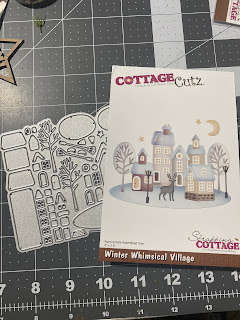
Hi everyone I am here sharing a fun home Decor Christmas ornament the kids made this weekend. My daughter had a party and I bought these mason jar looking ornaments. We came up with this fun scene using the latest Winter Whimsical Winter die just one of so many cute new cuts. 
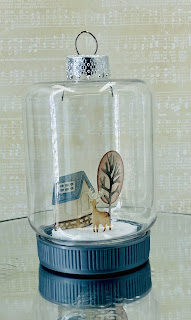
Now look at the possibilities you can make using this set with ornaments. They all fit inside the ornament which is plastic by the way. 

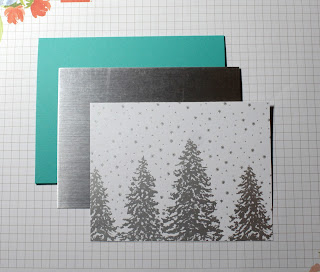
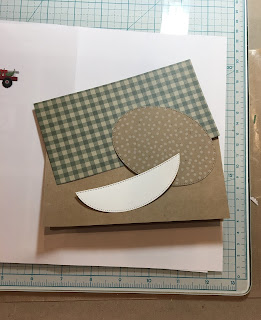
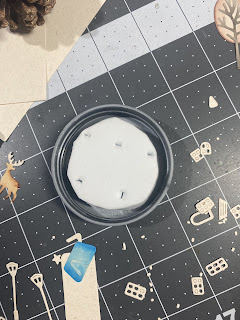
To get the pieces to stand I put some foam and adhered it to the lid and cut slits for my pieces
To stand in. Super easy and so much fun. 

I sure hope everyone gives it a shot and Happy Holidays everyone from our family to yours!!

 
Super easy to make and fun. Don’t forget to check out our YouTube Channel that is full of fun new projects. 
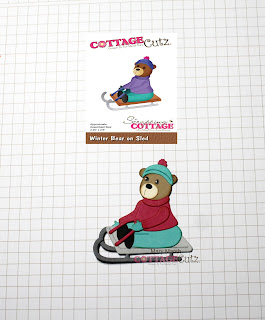
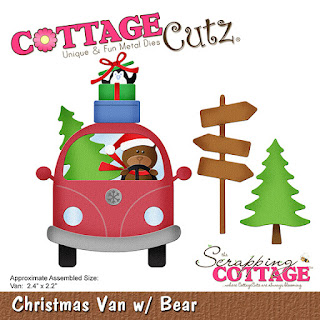
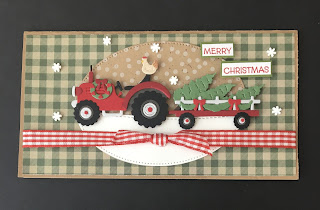
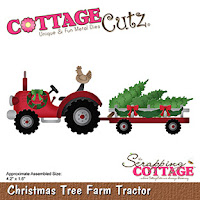
Die I used to create project:


Sunday, December 19, 2021

I Heart U Winter Ski Trip Card

Happy Sunday Scrapping Cottage friends! 
Melinda here with a cute wintery themed project share. Here's a look at my card.
My card features dies from the new Winter Release Bundle. I created this top folding A4 card with the Winter Dog and Snowman,  and the Winter Ski Trip die.


I cut all of my pieces out on plain white cardstock. I then used my chalks and markers to color them in.


Here is a closer look at the cute ski lift gondolas. I colored them with my markers and added the I {Heart} U. I also added a little bit of white puffy pain to the top to give them the appearance of snow on the top.

Here's a closer look at the trees and mountains. I staggered and layered the mountains. I then put in some of the trees and staggered them among the mountains as well. I used a combination of puffy pain and stickles to give them a little touch.

All of my dies and the entire scene were layered onto a white cardstock base. I used a combination of my markers and chalks to color the sky and the snow base.

Here's a closer look at the sweet little Winter Dog and Snowman. They are adorable! 

The Dies I used to create these projects:


In case you didn't hear, The CottageCutz YouTube channel is up and running. We are featuring videos every Wednesday. Drop by and subscribe so you don't miss one and give us a thumbs up on our videos.


In case you missed it, head over and check out the entire winter release collection. Super adorable dies!
WINTER RELEASE!!!!


Until the next time, have a wonderfully crafty day!
Melinda Beltran

Saturday, December 18, 2021

Winter Bear on Sled (New die)

Hello CottageCutz friends! Thanks for taking the time to stop and visit with us today. It's Mary Marsh here bringing you the Saturday edition of the Blog.

IT'S NEW RELEASE TIME! The Winter Release with 15 new designs is in the online store. They are perfect for creating cards for all your winter celebrations. You can pick them up on a limited time 30% off sale.

I am using the new Winter Bear on Sled die to create a birthday card for my brother. His birthday is mid-January, and I like to make him winter themed cards that are on the whimsical side. So, let's get started with some details on jhow I created my card. 

Design Steps:
I started this week by selecting my designer paper. I wanted something with background trees and falling snow for a more masculine look. I found the perfect one in my Christmas papers. Since it has neutral colors, I knew it would work with most colors for the bear. 

Bermuda bay card base: 5 5 /8" x 4 1/4"
Brushed silver layering panel: 5 1/2" x 4 1/8"
Designer paper layer: 5 3/8" x 4"


Next, I cut the bear on the sled in a variety of bright colors. I wanted it to stay masculine and I achieved that with the blue and red shades I chose.
I cut a hilly slope for the sled ride using the Hills Slimline die. I stamped my sentiment on the slope in ink that coordinates with the bears snow pants. I just bought the stamp set that has the months of the year. 
Now that my elements are prepared, I am ready to start card assembly. I attached the designer paper to the silver layer with double sided tape and then to the card base. I decided to add some chunky glitter for added interest. 
For the bear image I used dimensional adhesive to lift him slightly off the background. It adds a bit more depth to your card. 
To finish off my card I scattered a few enamel dots in the lipstick shade of the bear's shirt. And, that's it for me for this post. I hope I have given you an idea for a way to use this new Bear on Sled die. He is just too cute. See you next Saturday! 
Reminder: Our YouTube channel is active again. Check out the latest video and we are having a giveaway for subscribing, liking the video and giving it a thumbs up. Click here. 
 

Dies I used to create card:


Friday, December 17, 2021

Santa’s Lost his sleigh


Good morning Cottagecutz fans. I trust you have had a great week. Hopefully you’ve broken up for Christmas now and are watching Christmas movies, eating mice pies and maybe a glass of eggnog

It’s Wendy bringing you the blog today and I’ve made this shaker card and Santa had lost his sleigh. 

Here’s how I made it.


I took the largest rectangle and cut in out in blue and white. I took the white card and used the ‘Hills Slimline’ to make some snowy hills.

Next I took the largest ‘Nested Scalloped and cut out in blue card. I then attached some snowy acetate to the back of the card. 


Next I cut out all the elements that I wanted on my vCard. unfortunately I had to chop off Santa’s feet so he fitted in the car lol!


I then assembled the card and added a cute little sentiment and Sonne little snow shapes.


So to finish I added some chunky glitter and attached the card with the acetate with with 3D foam pads and we are done

I really hope you like the card today. I wish you a wonderful weekend with plenty of crafting time and I will see you on Tuesday for another exciting blog post
Hugs
Wendy 

Dies i have used:


Please don’t forget to check out our YouTube channel to check out out latest project


Thursday, December 16, 2021

Christmas Tree Tractor

Hello Scrapping Cottage Friends

I have a few more Christmas cards to finish up so I thought I would try a farm themed mini slimline.  The adorable tractor is perfect for this theme and style of card.  The die I am using is called Christmas Tree Farm Tractor.


 Design Steps:

1.  Use the Christmas Tree Farm Tractor die and cut out the pieces using: green, red, dark red, silver black, brown, and tan.  Glue the pieces together using a fine tip clear drying glue
2.  For the mini slimline base use kraft card stock cut 6 1/2 x 6 folded in half measuring 3 1/4 x 6.  Piece of checked green DP 3 1/8 x 5 7/8.  Cut a Pierced Oval using the 3rd from the largest oval out of snow dotted kraft card stock, and a piece of white cut out with the same oval then cut in half with the Hills Slimline 
3.  Glue the kraft oval to the center of the green checked DP and then glue down the half white oval
4.  Pop up the tractor and then add the red checked ribbon.  Glue the checked piece to the kraft card base
5.  Stamp the sentiment and layer onto green card stock.  Pop the sentiment as shown above.  Add the tiny snowflakes and your card is complete

CottageCutz Products


Thanks so much for stopping by!  I hope you are well on the way to finishing your Christmas Cards!  

And just to remind you we have a wonderful YouTube Channel for more inspiration.  Check it out HERE

Blessings

Pam


Wednesday, December 15, 2021


Hello there friends! 
It's Theary here on the blog today. I wanted to stop in and share a video that I created on The CottageCutz Youtube channel.


This card was created featuring some of the new products from our most recent release. I used the house from the Winter House 1 die, and some trees from the Campin Out Trees die. 

You can check out the video here.

Congratulations to the winner of our recent giveaway, Birgit Norton! Please contact us at mrmarsh917@msn.com to claim your prize.

Until next time,
I hope you have a wonderful day!


Supplies Used: